VIEW BY CATEGORY:
Hi, we're Hunter and Sarah, a husband-and-wife, luxury wedding photography team. We’re also educators, helping other photographers build profitable and sustainable photography businesses.
MEET US
LOOKING FOR SOMETHING?
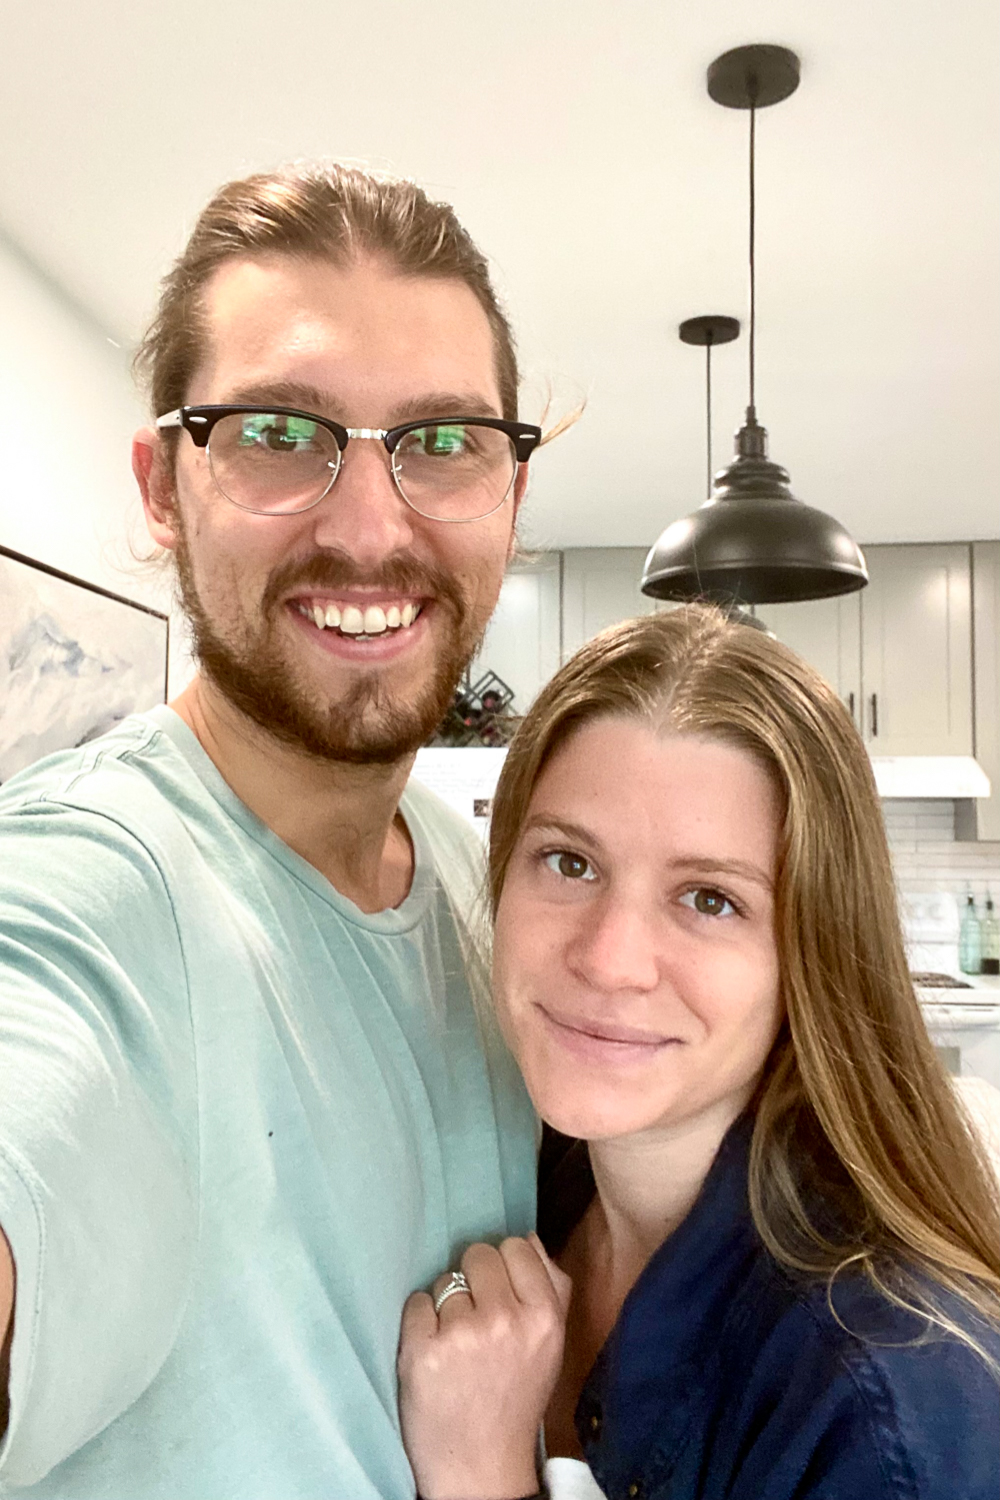
How We Renovated Our Outdated Kitchen … While We Weren’t Even Home
August 27, 2021
Happy Saturday friends! In case being full-time wedding photographers during the most wedding-packed year in history wasn’t keeping us busy enough, earlier this year Sarah and I decided to undergo what is hopefully our final renovation project in our house!
If you’ve been following along since last year, you know that we spent the first 4 months in 2020 transforming our damp, dark, unfinished basement into a bright and modern two bedroom AirBnB.

Then, just before the holidays, we totally gutted our 1960s bathroom, and created a bright, modern, new bathroom.
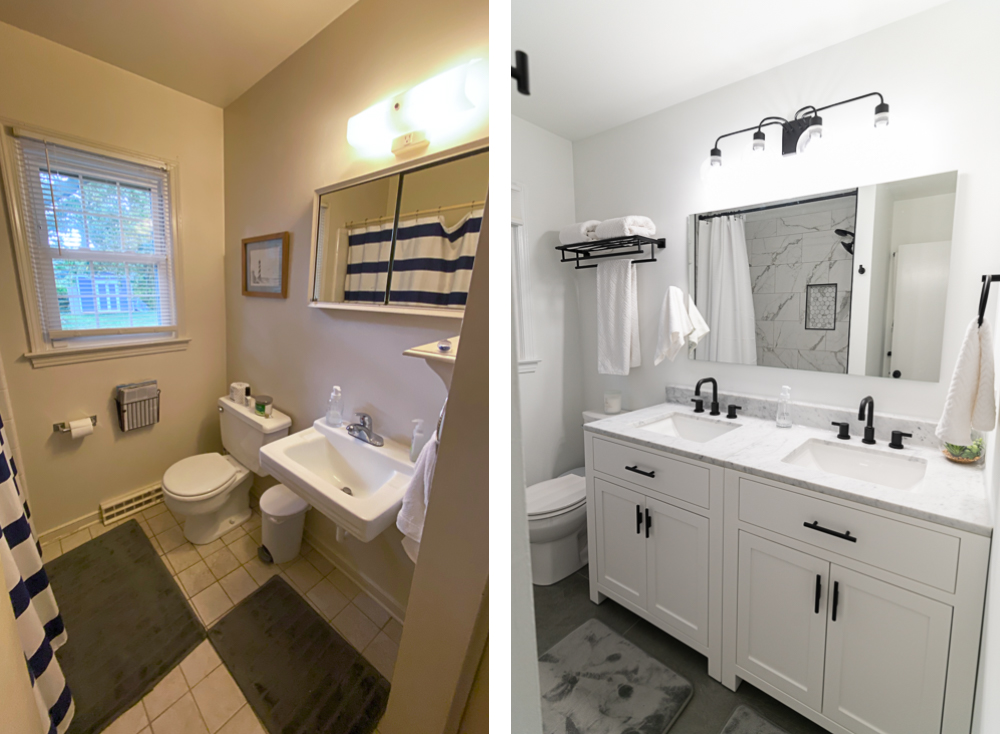
When we finished the bathroom project, we swore we were going to take a year before we did any other renovating… But clearly that’s not what happened ????
Barely four months after finishing the bathroom, for better or worse, we dove head-first into tearing our kitchen apart, and rebuilding it literally from the ground up.

Well, we’re excited to say that that project is finished! We’ve already started to get questions from friends and our couples alike about how much a certain thing costs or who we used for a specific part of the project. So, without further ado, here’s how we renovated our outdated kitchen into a modern masterpiece — and mostly when we weren’t even home!
PHASE I: Planning & Opening it Up
Step 0: Planning | $0.00 | 12 Hours
As always, the first step with any reno was planning. We began dreaming of a brand new kitchen pretty much the minute we finished the bathroom in December of 2020. However, at the time, we assumed we wouldn’t have the money or the time to begin the project until the following winter, maybe November 2021.
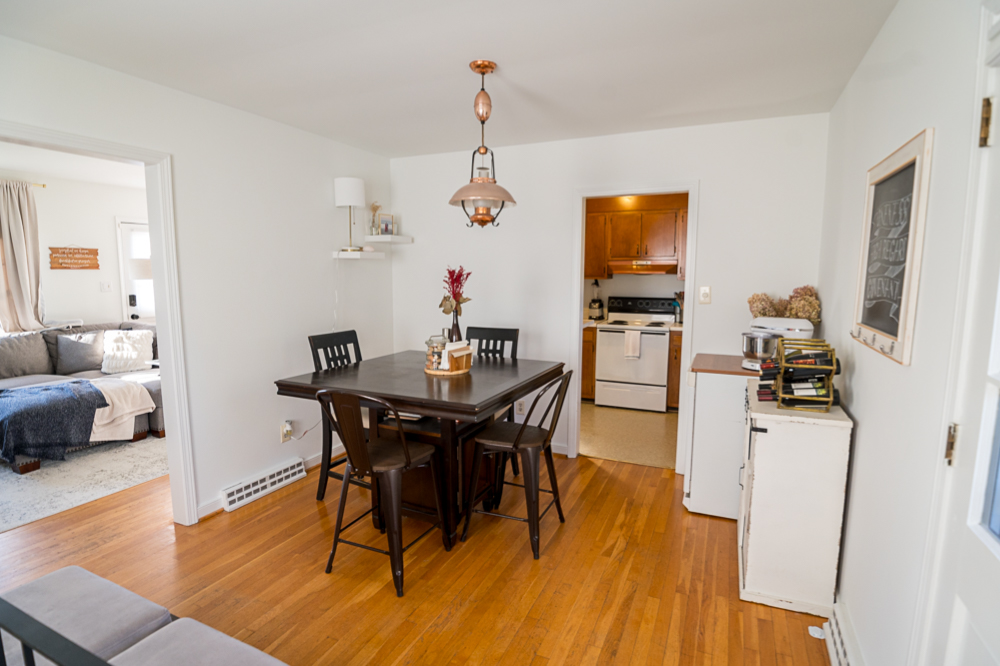
But when our AirBnB continued to stay completely booked through the winter, we got a hefty tax return, and a couple rounds of COVID-relief stimulus, we suddenly had much more cash-on-hand than we were expecting. And when our entire calendar of April weddings postponed sometime in mid-February, we started to play with the idea of starting sooner.
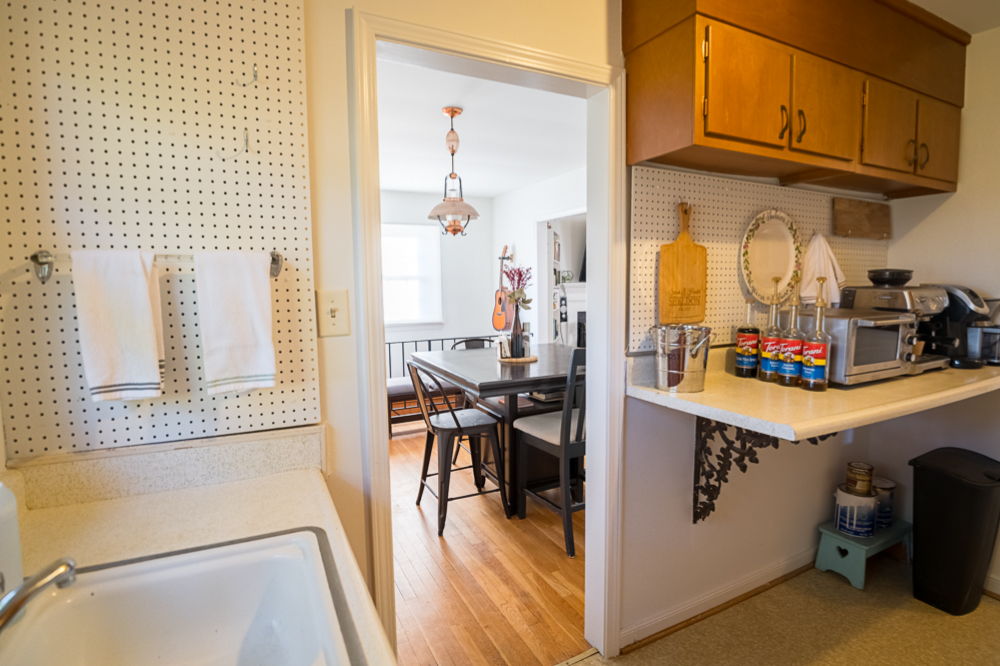
So, we got right to work planning the layout. We knew we were going to keep the largely monochromatic theme we had in the bathroom and that we wanted to open up the wall dividing our kitchen and dining room. But beyond that we had no idea.
We used our online floor-planning software (here, it’s free!) to get a basic idea. Then, assuming we’d be using IKEA for all of the cabinets and appliances, Sarah spent hours planning the entire kitchen in their online kitchen designer.
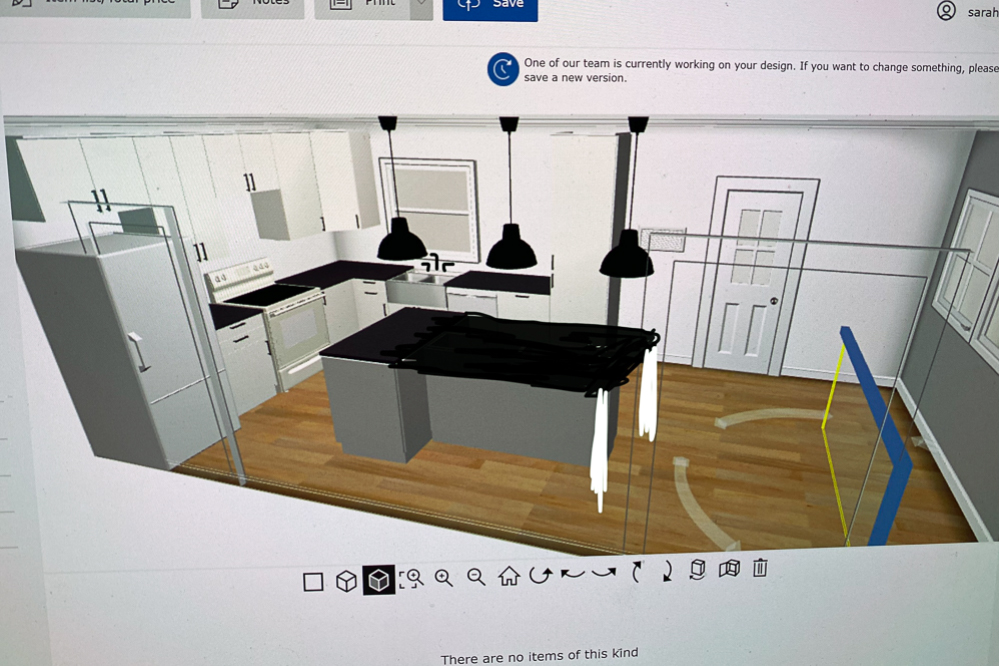
After the rough design sketch was in place, in late-March of 2021, we began meeting with local vendors and getting quotes for various aspects of the project. Like we talked about at the end of our bathroom reno blog, we had learned our lesson about trying to do too much ourselves.
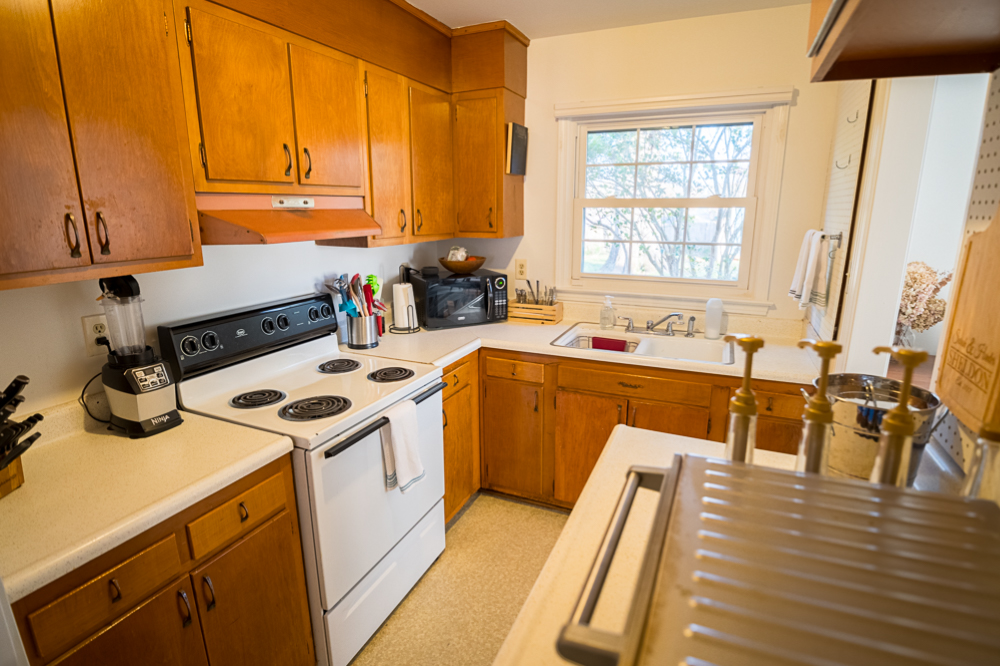
After all, we’re decent DIY-ers, but much better at being professional wedding photographers, general contractors on the side, and leaving the vast majority of the skilled work to the people who do it best. We had started with the figure of $25,000 in our head for a modest but thorough overhaul of the kitchen, and it was looking like that was going to be doable.
Step 1: Demo Part 1 (The Center Wall) | $1,000 | 8 Hours
We knew from the bathroom how disruptive it was to be living in a constant construction zone (or at least we thought we did — the kitchen was a whole other level). But when we realized that we were going to be in DC for 4 or 5 days straight in late-March (shooting a series of sunrise cherry blossom engagement sessions), we realized that that was the perfect opportunity to have our handy man come in and do most of the demo work!
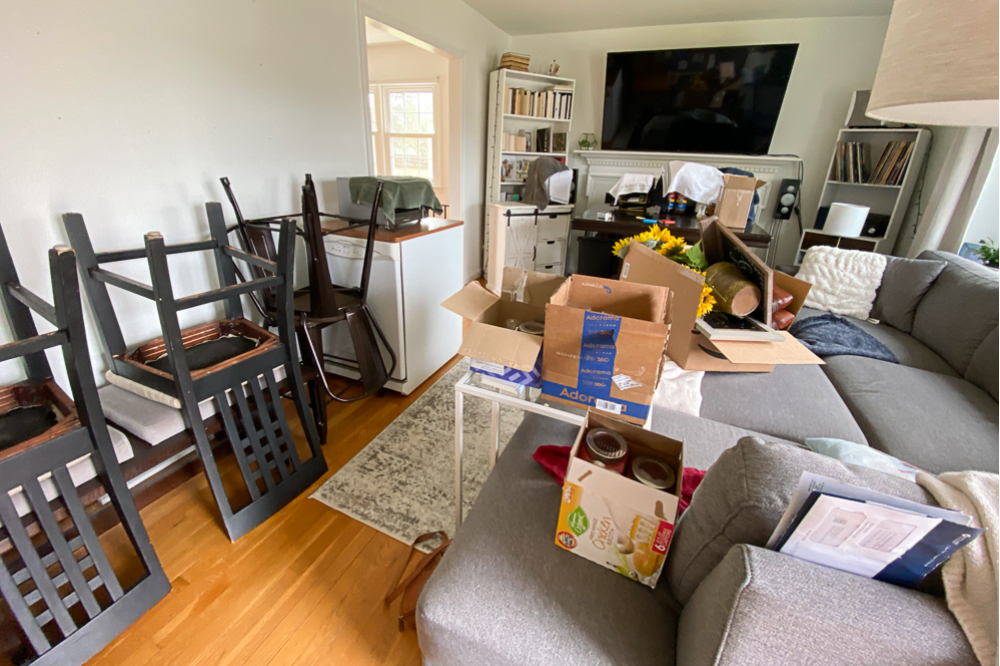
So we spent a few hours prepping the spaces, and said goodbye to our tiny galley kitchen and separate dining room, knowing that they were about to become a thing of the past. When we returned from DC a few days later, it felt like a whole new space already!

Our handyman, Tim, took most of the time we were in DC to demo the wall, and repair the drywall that needed some serious patching as a result. We had just officially started a few days prior, but when we returned from DC on April 1st, we were just a quick coat of paint away from some major progress!
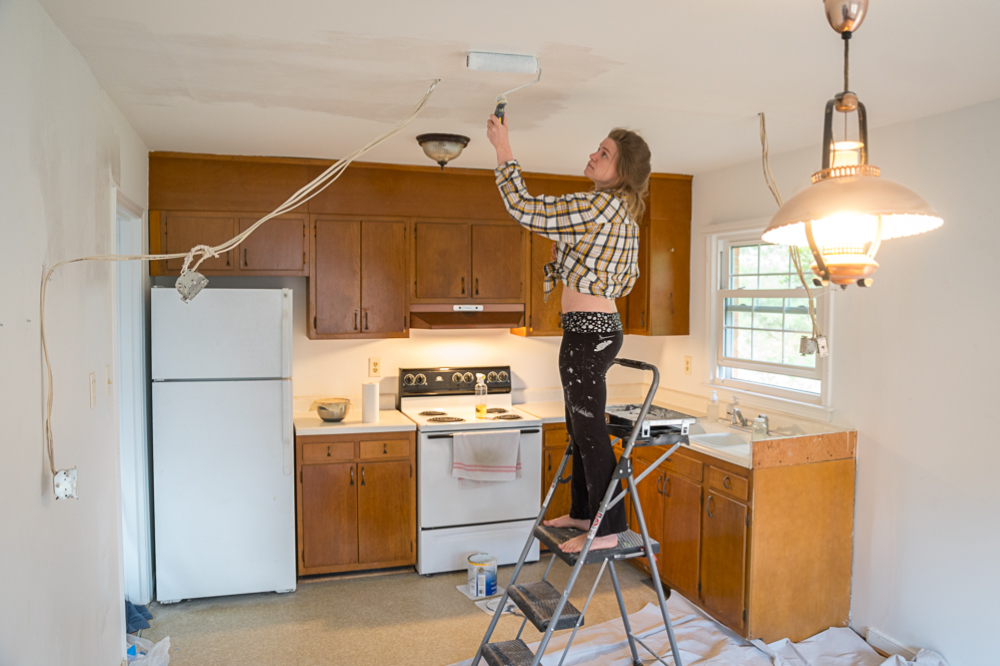
Although we were FAR from done, at this point, we put our kitchen back in order, and found ourselves in a sort of “steady-state”. It was nowhere near where we wanted it to be, but it was at least usable and didn’t feel too much like a work-in-progress.
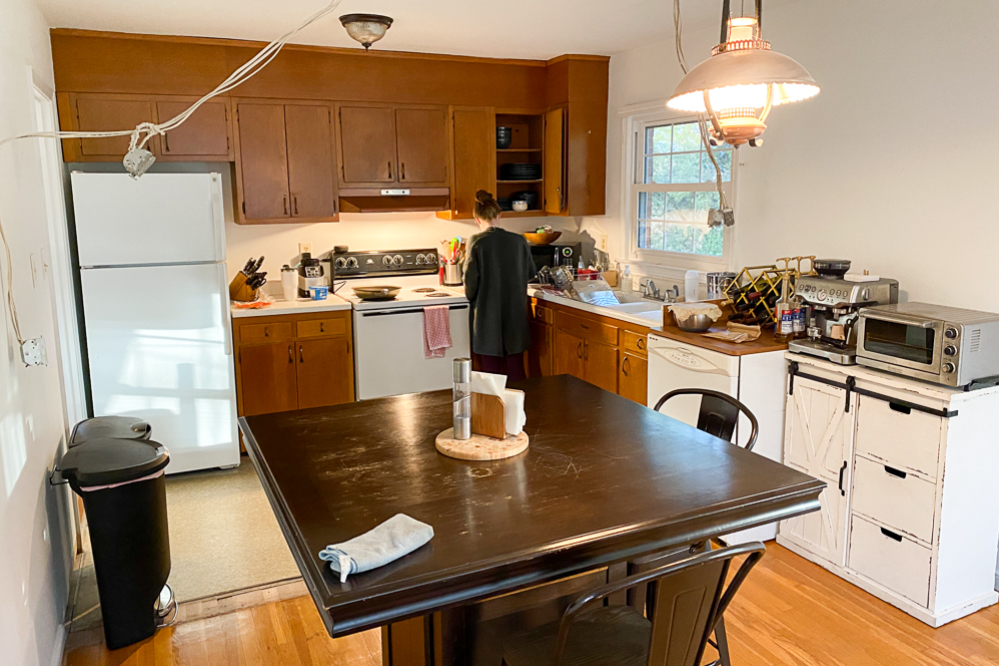
Step 2: Electrical Part 1 (No House Fires Please) | $431 | 4 Hours
One issue that we hadn’t thought about before demo was the light switch and electrical outlets that were inside that center wall. Because our house was wired more than 60 years ago (and apparently by someone who was very distracted), the circuits were a total mess. It seemed like flipping any of the unlabeled circuit breakers in our breaker panel would turn off the lights in one room, and a handful (but not all) of the outlets in a totally different room.
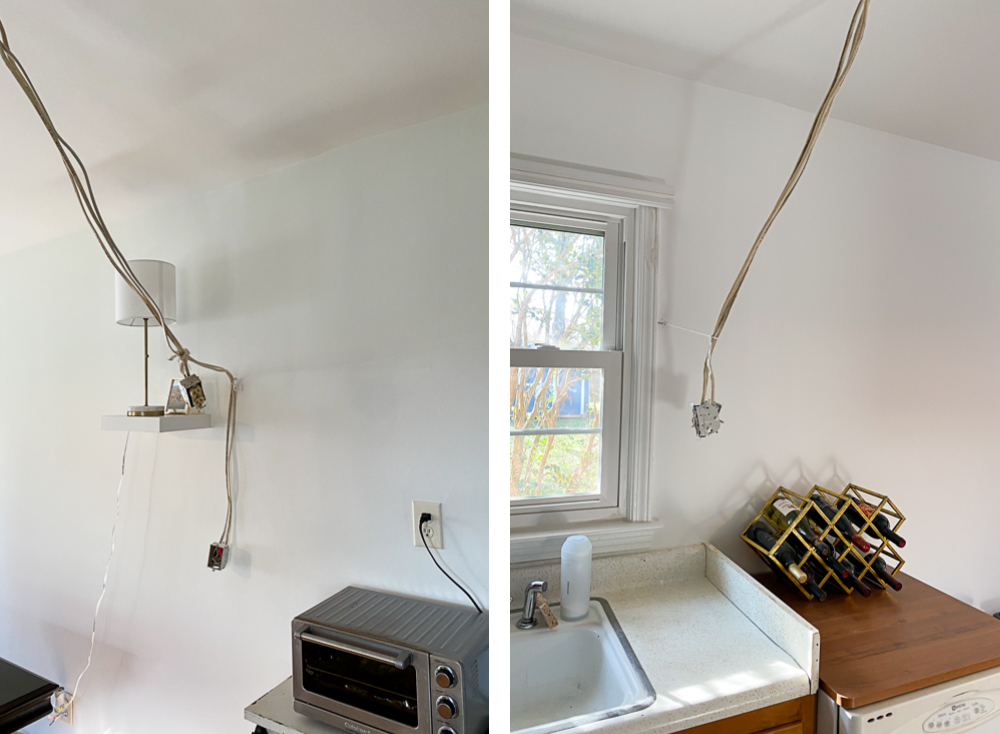
So at this point in the project, all we wanted was to not have live electrical wires hanging from the ceiling anymore ???? We again very gratefully took the generous offer from my parents of using one of their on-staff electricians when they had breaks in their schedule, which saved us quite a bit of money. It took two guys a full day to get the wiring situation sorted out, and they also laid the groundwork for some future electrical outlets too.
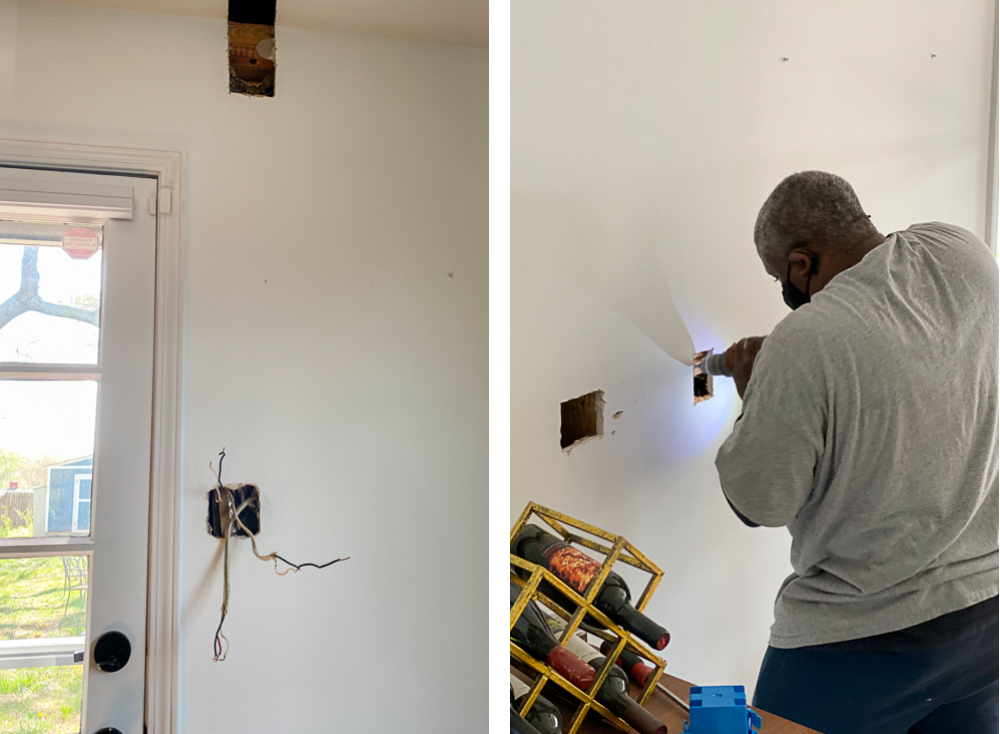
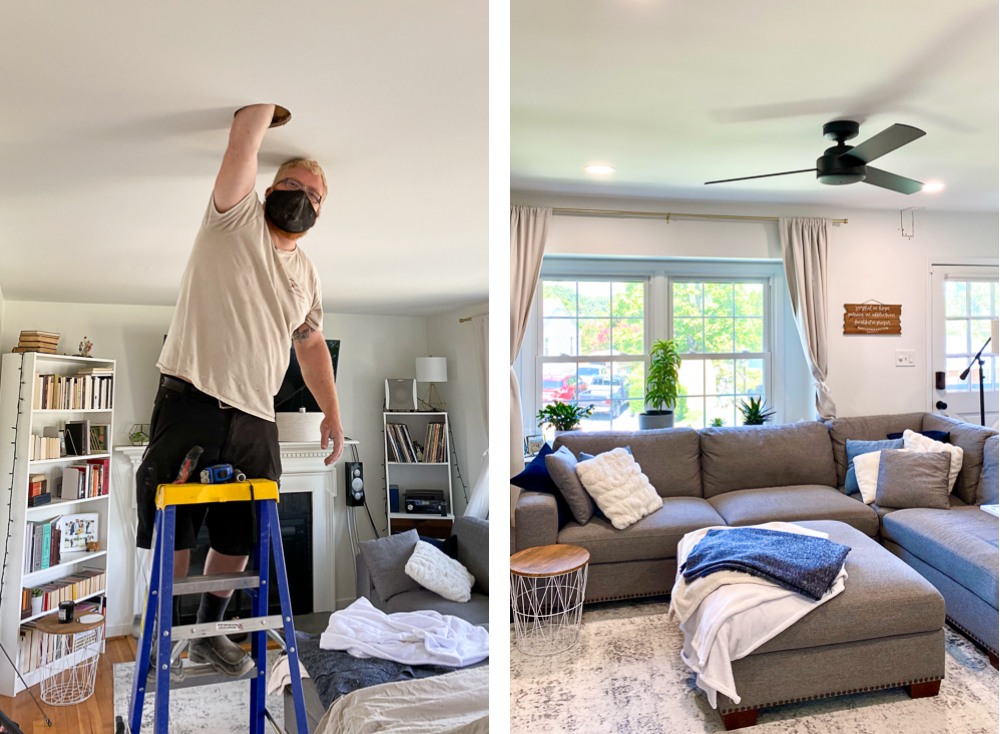
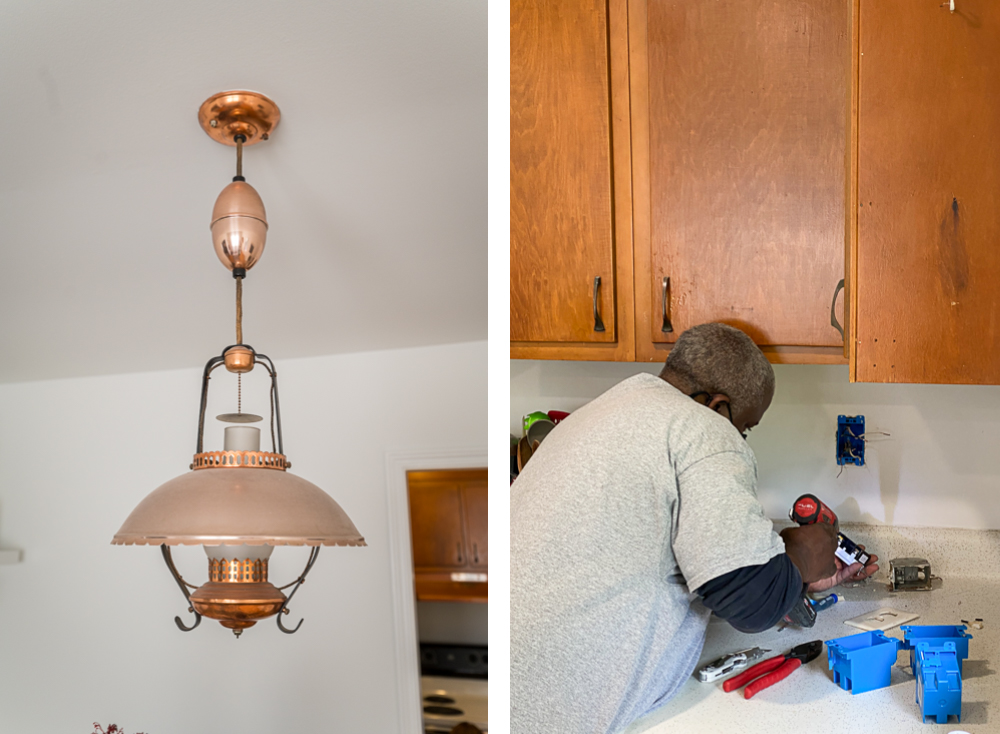
But while they were in, we had them replace the single light fixture in the ceiling and the oil-lamp-style light in our dining room with a handful of sleek recessed LED lights! Our living room had never had any celling lights at all, so we cheated out of the kitchen at this point, and installed lights in there, along with a ceiling fan!
Step 3: Ordering (a.k.a. Hoarding) | 27 Hours
With the center wall gone and the electrical situation sorted out, we took a break here. As you may be aware, global supply chains have been in absolute CHAOS since the pandemic began, and it was probably at its worst this past Spring with the crazy fulgurations in lumber and metal pricing.
We knew that our previous method of renovating — essentially ordering things in sequential order, having vendors scheduled to work the day after they arrived — wasn’t going to fly this time. So we decided instead to get everything ordered before we started any serious work.
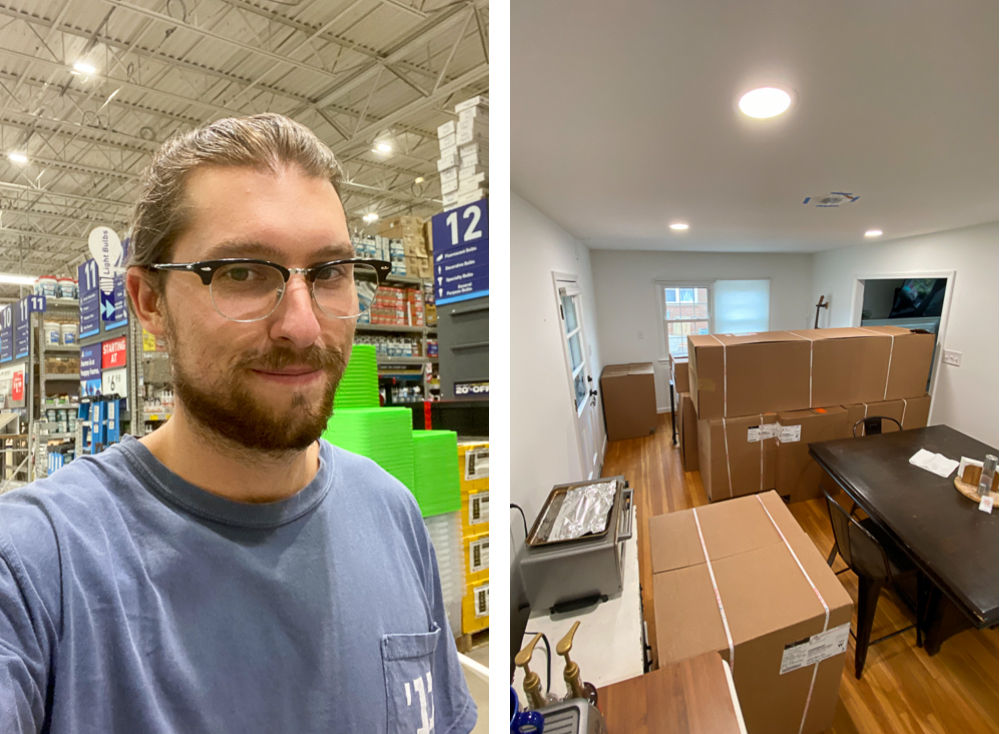
This is also where we ran into our first major frustration. We had basically built a virtual version of our kitchen inside IKEA’s virtual kitchen planner. We planned everything, down to the most minute details like which cabinets would have lights beneath them, and which cabinets would have doors and shelves vs. drawers.
When we went to place the order, we saw that only ~100 of the 120 total items from our order were in stock. That’s not too bad, right? More than 80%? Well, the 20 items that were out of stock were the cabinets themselves. So we could get all the drawers, countertops, knobs, handles, and lights that our hearts desired. But just nothing to actually put them on ????♂️
We put in the order anyway, hoping that the base cabinets would come back into stock soon. Aaaaaaand we waited. And waited. Weeks went by, checking IKEA’s website every single day and calling every time a single item came in, with almost no luck. It was massively frustrating. We mentioned this to a friend and former mentor of ours, Eric Kelley, who immediately had the solution.
For just a few hundred dollars more than IKEA, we could source the cabinets from a local building supply company. Not only would they be delivered in 48 hours (as opposed to several weeks after they came into stock with IKEA, which was still a totally mystery), but they would also come pre-assembled! I was sold right away, as that would probably translate to 20+ hours of NOT assembling IKEA cabinets. They wouldn’t be as customizable, but they’d at least be in place. Sure enough, two business days after putting in the order, they arrived!
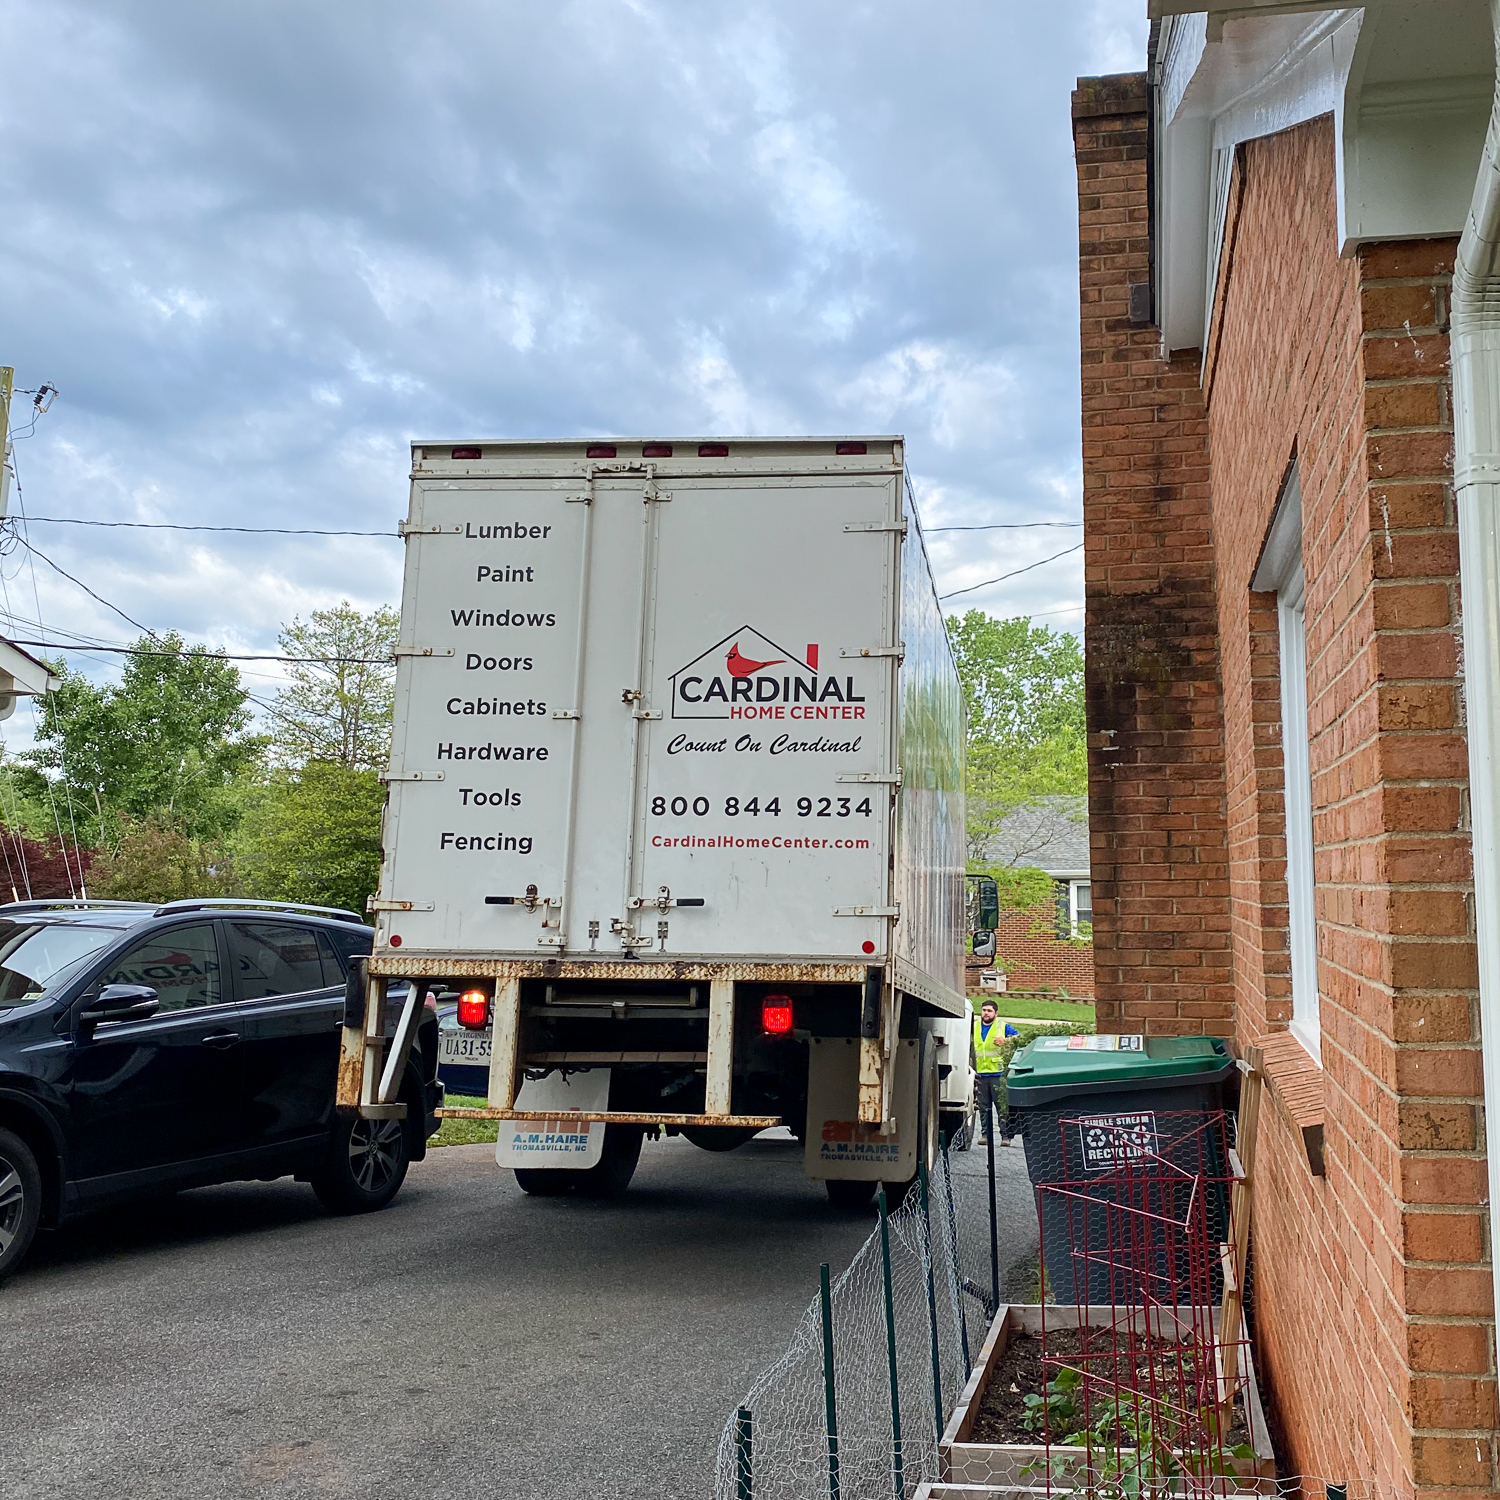
However, our appliances, sink, faucets, countertops, etc. were all on backorder for a few weeks. We knew that the next step was going to be the most disruptive; once we tore out the cabinets and countertops and appliances, we’d have no access to a working kitchen for days, if not weeks. So we spent most of the Spring ordering pieces one at a time as they came into stock at various places.
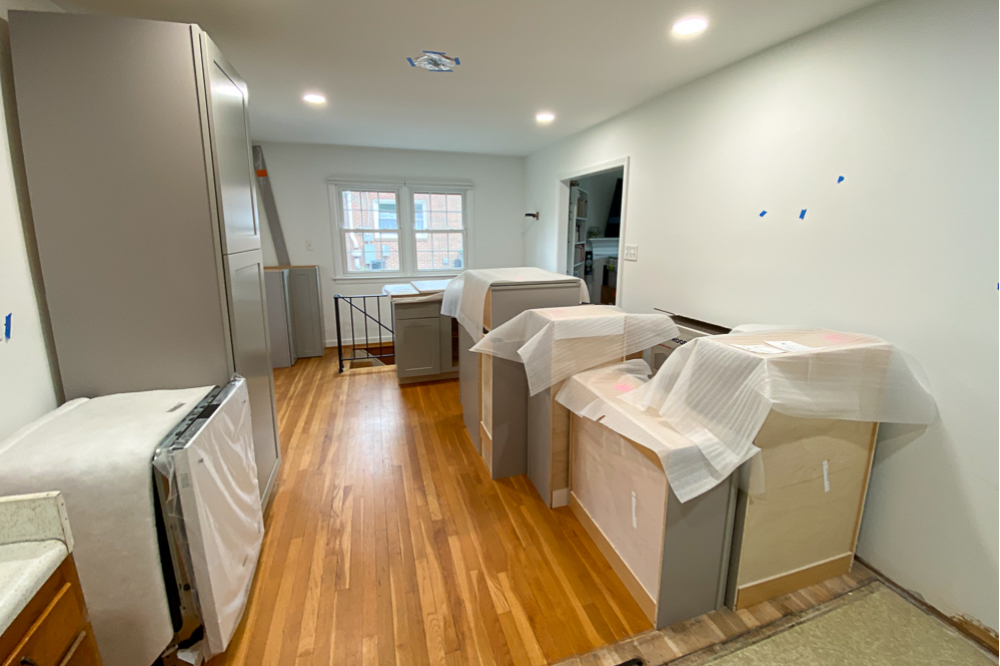
It was at that point that a thought dawned on us. It would probably be late-May by the time everything was in stock and arrived, and we’d actually be ready to start work. Why spend three weeks living in a chaotic construction zone, only to leave immediately after, and spend almost the entire following month on the road? What if instead, we just lived with all the boxes and uninstalled cabinets, then had the major reno done while we were gone?!
It had worked so well when we were in DC for the first round of demo, so we decided to give it another shot. So we re-arranged all of the deliveries and put our kitchen into another sort of “steady state”. It felt a little bit like living in a warehouse, but at least we still had a functioning kitchen, and places to cook and sit to eat dinner. And this is how we lived for the better part of 6 weeks as items arrived one by one!
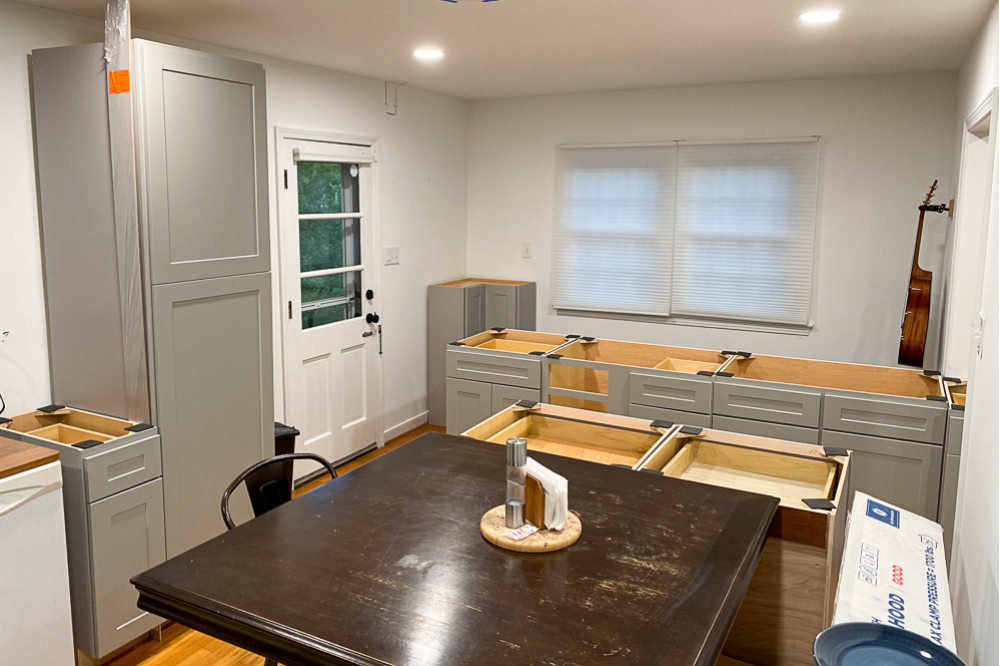
PHASE II: A Whole New World
Step 4: Demo Part 2 (Down to Nothing) | $470 | 6 Hours
With our mega-month of June approaching, we again packed up our kitchen — this time mostly into the guest bedroom — and left for New York, North Carolina, Hampton Roads, and the Outer Banks.
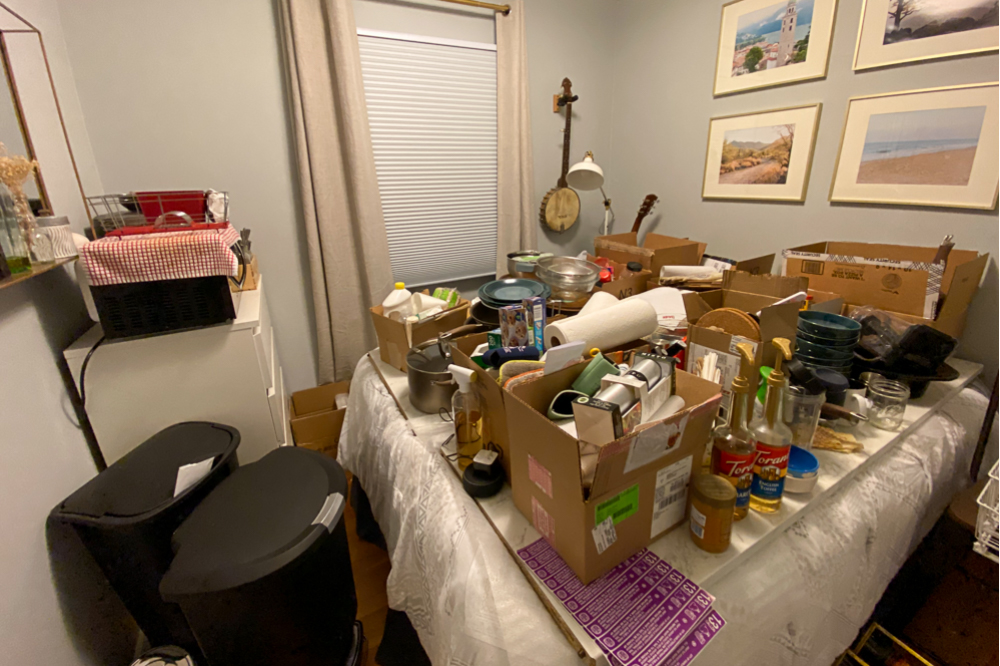
June was absolute chaos for us, as we photographed weddings all over the East Coast, and spent only a handful of nights at home. While we were away, putting 3,000+ miles on our car, we were getting occasional updates from Charlottesville.
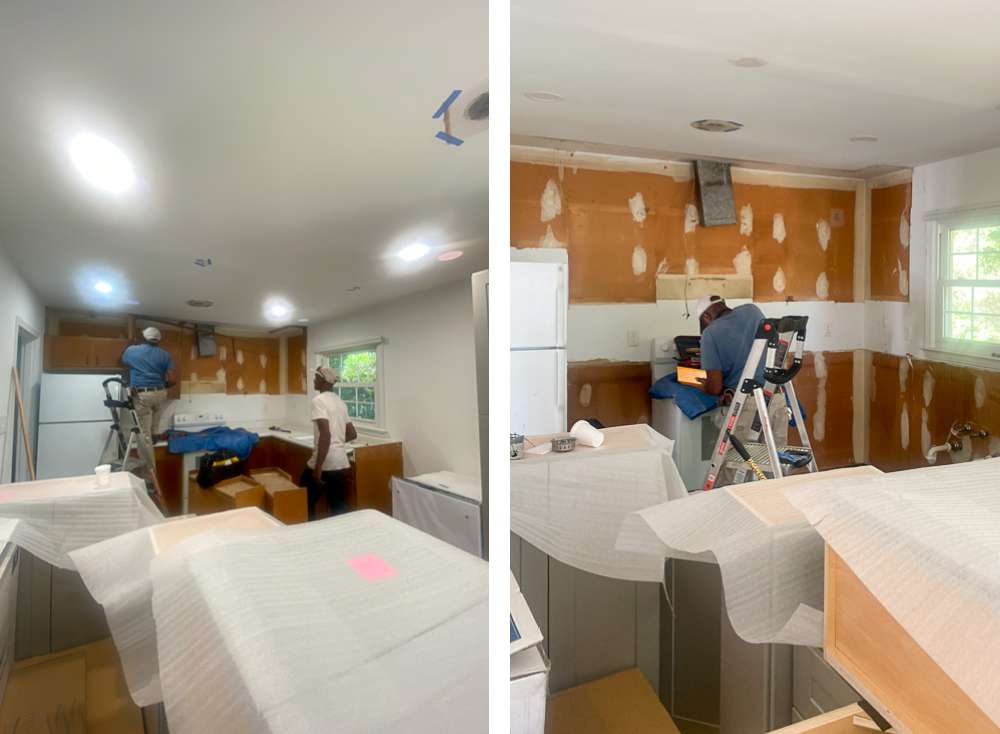
Tim gutted the entire old kitchen, from the laminate floor all the way to the cabinets and countertops. Everything went, including the kitchen sink ???? And just like that, in only a couple of days and for less than $500, all of the cabinets were gone, hauled off to the dump, all while we were off shooting and spending time with family!
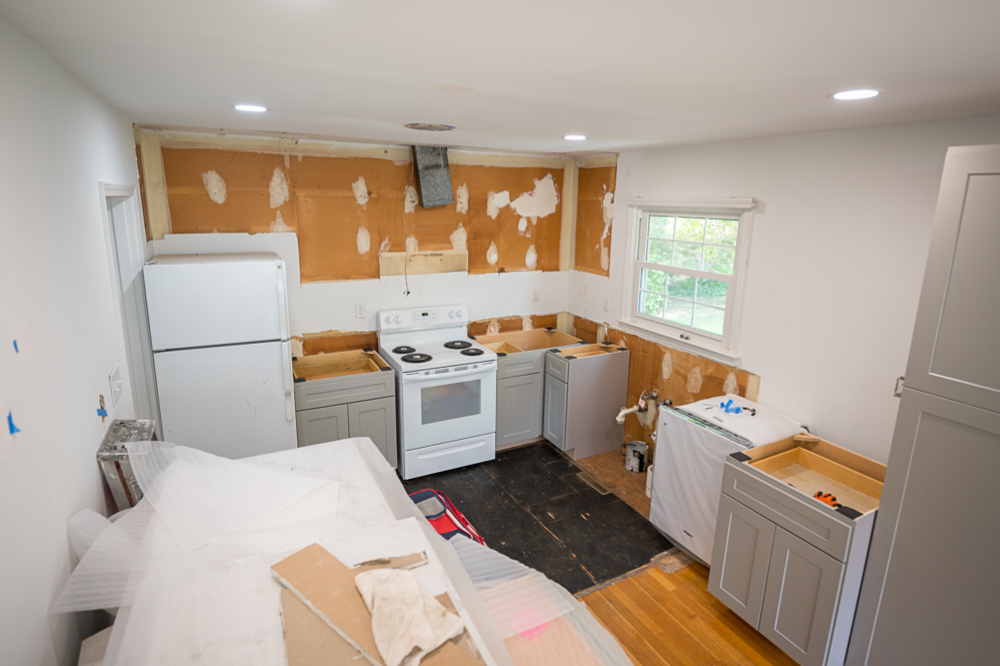
Step 5: Cabinets, Countertops, and Appliances | $10,364 | 2 Hours
While we completed our travels in June, Tim continued to work while we were gone. The process went SO smoothly, and when we came home, it felt like a totally new world!
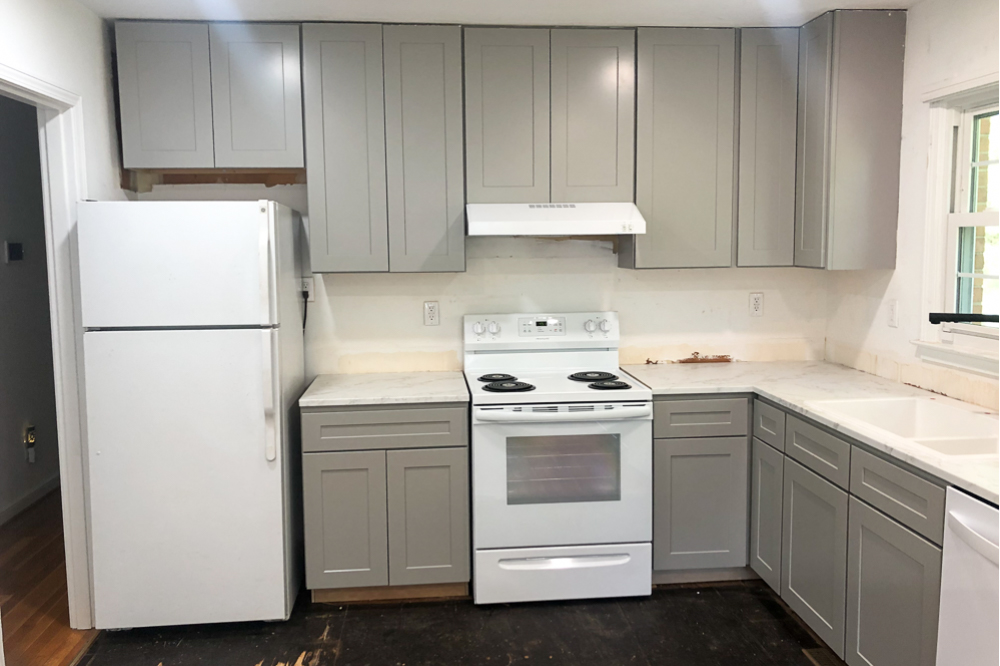
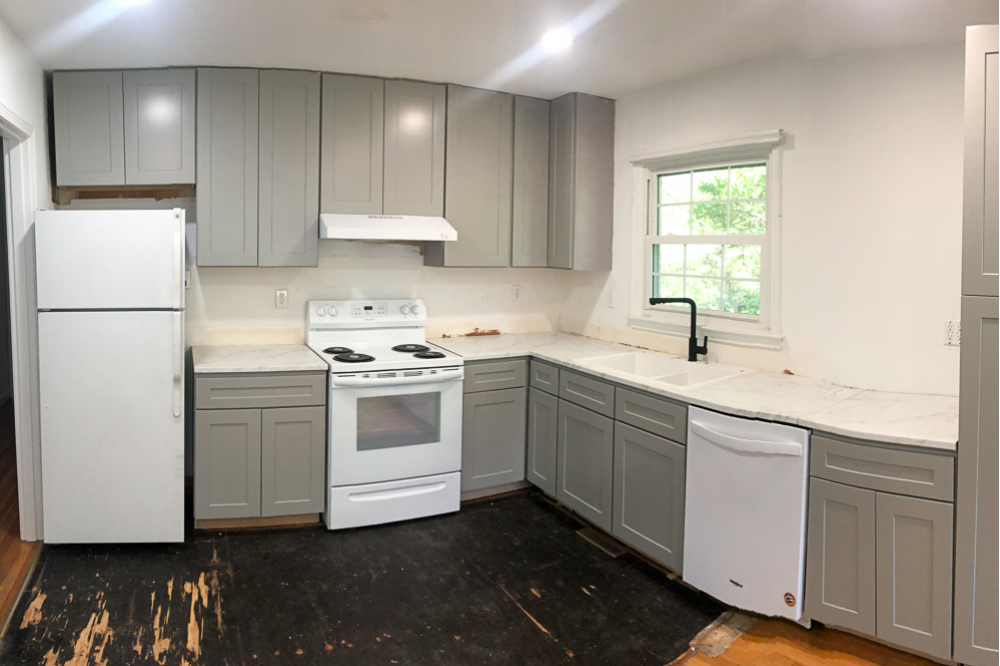
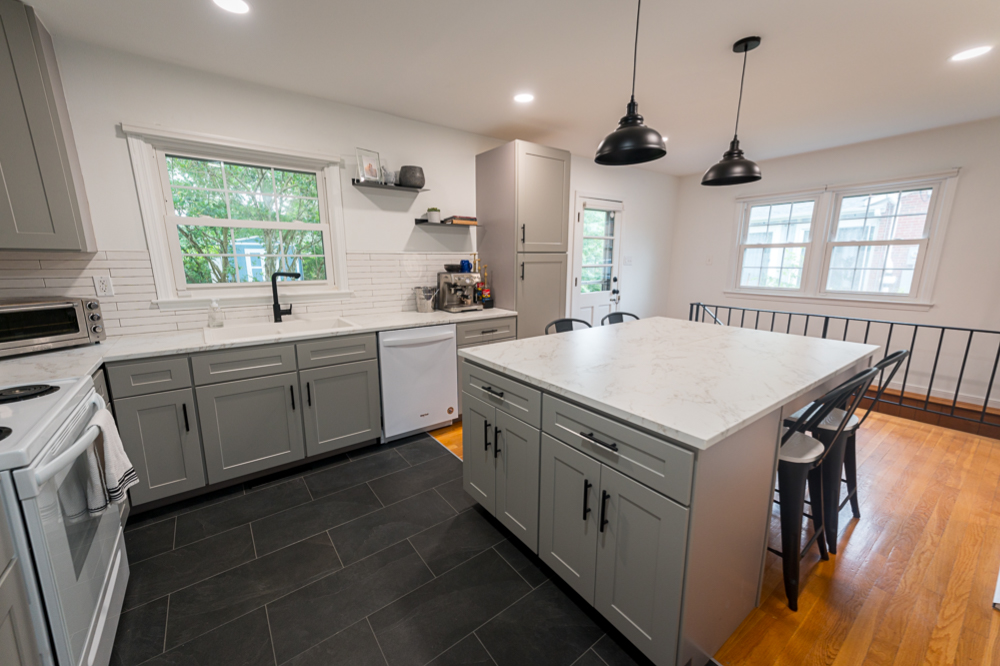
When we walked into our kitchen, freshly returned from our trips, we had all new cabinets, a new range and range hood, a new kitchen sink. AND we had something we had never had before as a married couple… A WORKING DISHWASHER! ????
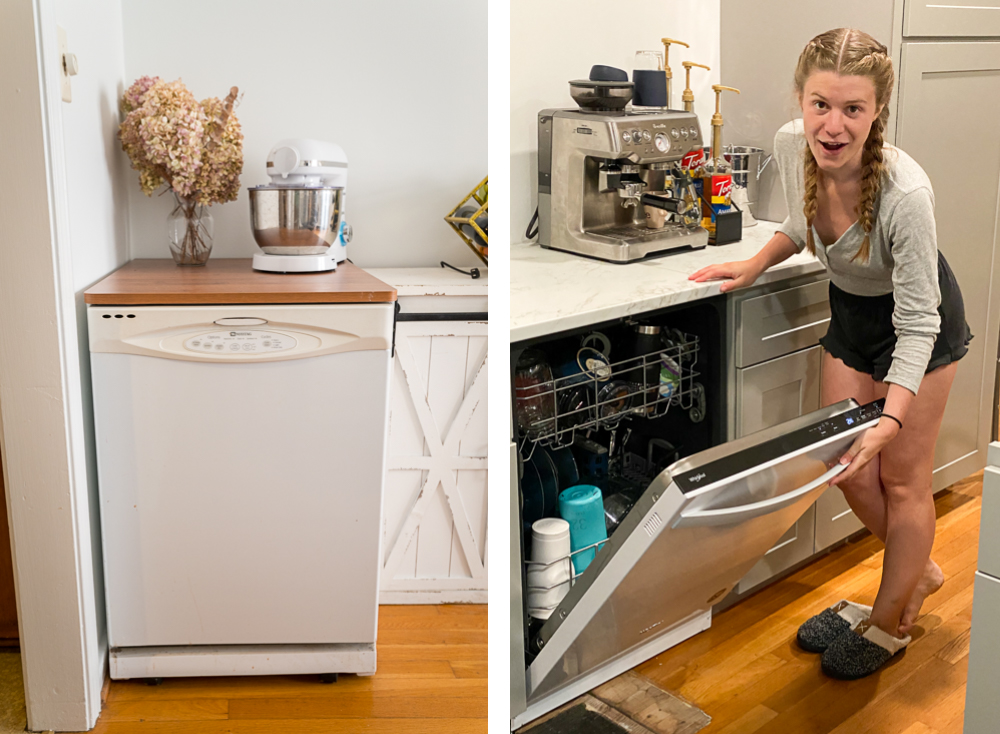
When we purchased this house, it came with a dishwasher that — no joke — was on wheels. We would roll it into the kitchen, hook it up to the sink, plug it into a standard wall outlet, and it would run (as loudly as an airplane).
It was such a hassle, that we only used it a handful of times in the year and a half we had been in the house. Needless to say, we were thrilled with this near-silent upgrade. After just a couple hours of bringing the kitchen back from the guest bedroom, we were almost living in a normal kitchen again!
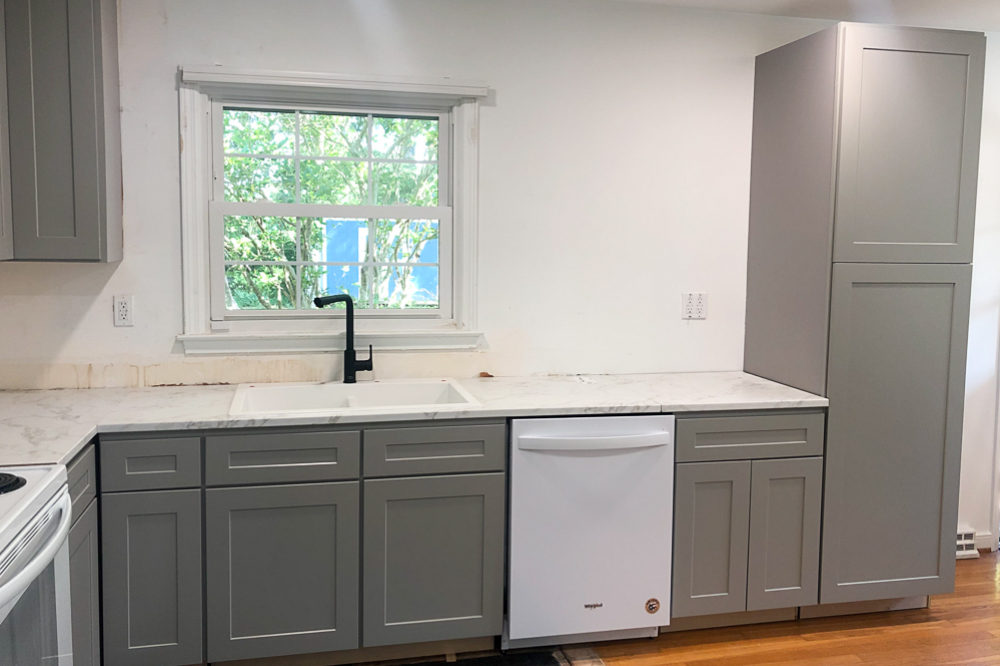
By the way, here’s how the $10,000+ cost of this step breaks down: $5,240 was for the cabinets themselves, $1,820 was for the new range, range hood, sink, faucet, and dishwasher, $600 was for the laminate countertops (about 5X cheaper than real stone, and easier to replace in the future), and $2,700 covered the installation of ALL of that. Tim also patched the many new drywall holes that had appeared since he was in a couple of months prior.
Step 5: Electrical Part 2 | $450 | 1 Hour
Now that we had our new cabinets and countertops in place, it was time to have the electricians back over. And this time, we set our hopes a bit higher than just keeping the place from burning down ???? We replaced all of the old outlets in the kitchen with GFCI outlets, and replaced the oil-lamp style light fixture with sleek black hanging pendant lights mounted above the island!
It was now early July, and we knew that the end was within our grasp. But it also meant that we were almost done with the work we were hiring out, and the time was coming for more hands-on projects. Good thing we only had 15 weddings booked for the summer! ????
PHASE III: Finishing it Up
Step 7: Pantry | $385 | 8 Hours
Since we had purchased this house in the fall of 2019, we had been using the hall closet, around the corner from our kitchen, as our pantry. The old cabinets weren’t very big, so our dishes and cookware basically filled all the storage space in the kitchen. We were so excited for the one floor-to-ceiling cabinet that was going to hide away our microwave and serve as a pantry!
However, we knew that having pull-out drawers inside that pantry would allow us to use the space much more efficiently than shelves. IKEA had gotten the idea in our heads but, when we canceled the order, we lost that option. So I did some research, and found some pull-out shelves on Amazon. The only problem was that there was no avoiding a serious retrofit, since the manufacturer of our cabinets didn’t make drawers.
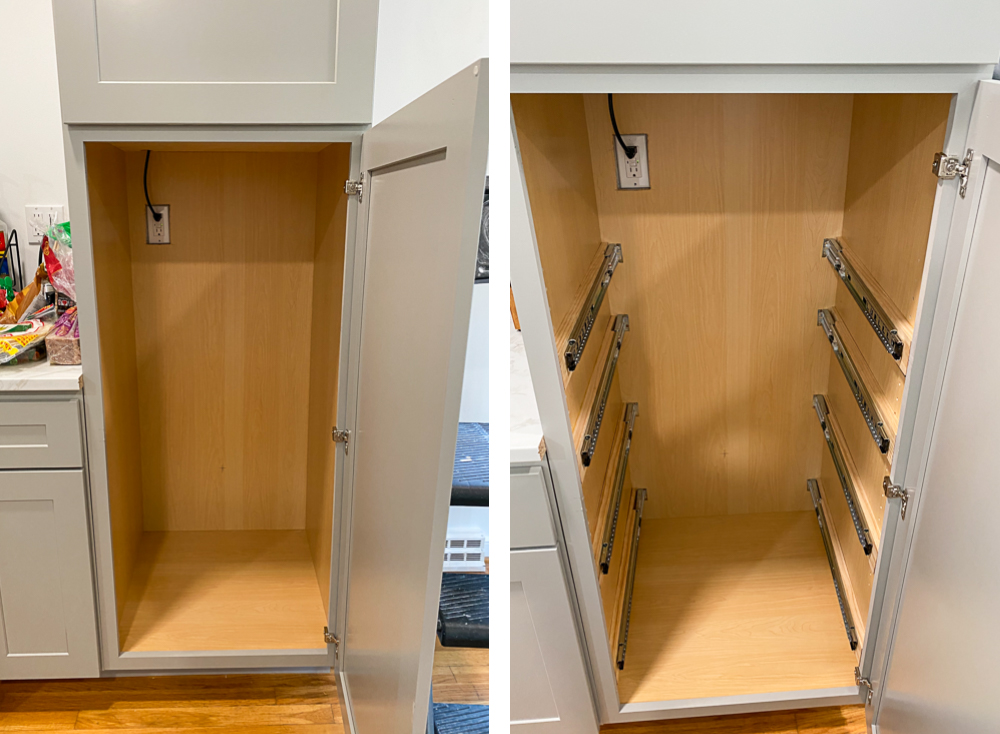
This was the biggest pain of the project, and took three attempts. The first attempt failed spectacularly. I thought I had figured out a way to mount the drawers with minimal effort, loaded the sliding drawers up with food, and presented my work to Sarah like a proud school boy who had finished his homework… only for them to collapse in the middle of the night ????
The second attempt was more realistic, but ran into another unforeseen problem. Finally, after custom-cutting mounting boards for the pull-out drawers, these things are so over-engineered, we could probably leave dumbbells on them. But the end result is definitely worth the frustration!
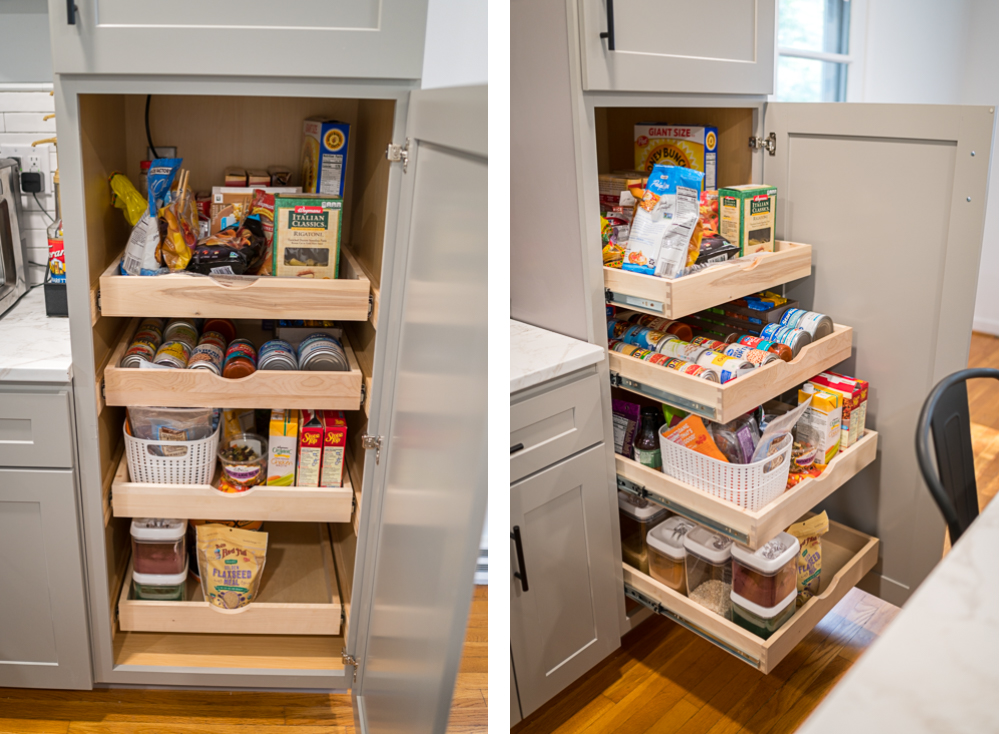
Step 8: Island | $221 | 18 Hours
Other than the pantry drawers, this was the part of the kitchen reno that I treated as my one major DIY contribution. While many aspects of the project were certainly better off in the hands of professionals, this was one area I felt excited to tackle myself.
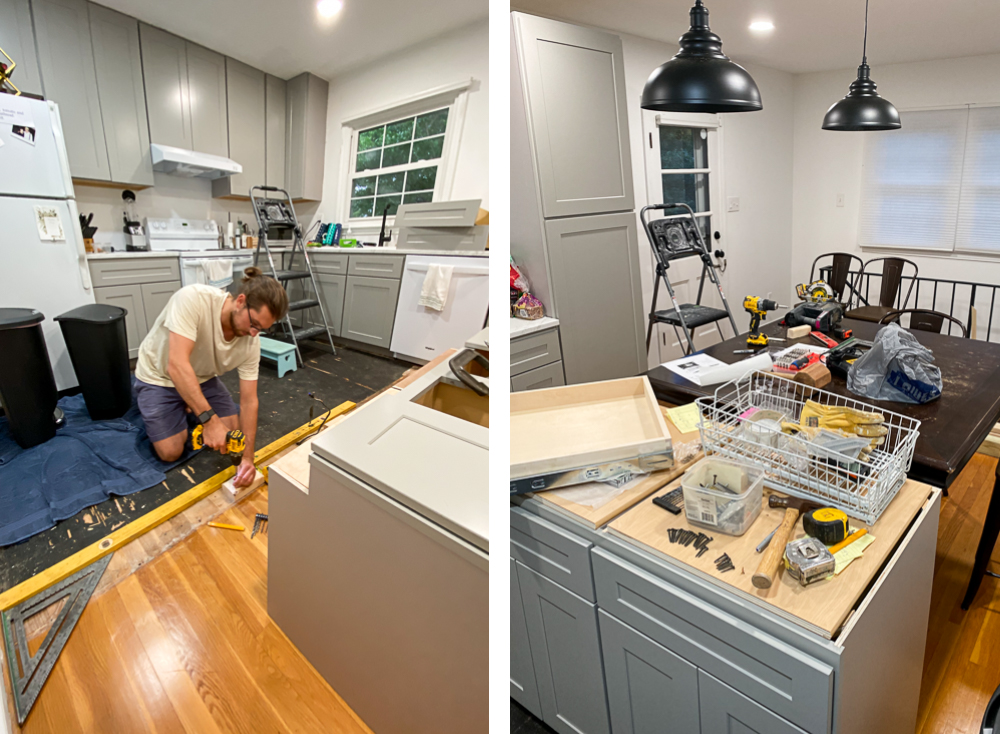
The island would be anchored with two full-sized kitchen base cabinets, and would be topped with countertops. Both the cabinets and countertops were exact matches to the rest of the kitchen, so it would all feel like one big cohesive unit. So step #1 was to anchor the cabinets to the floor!
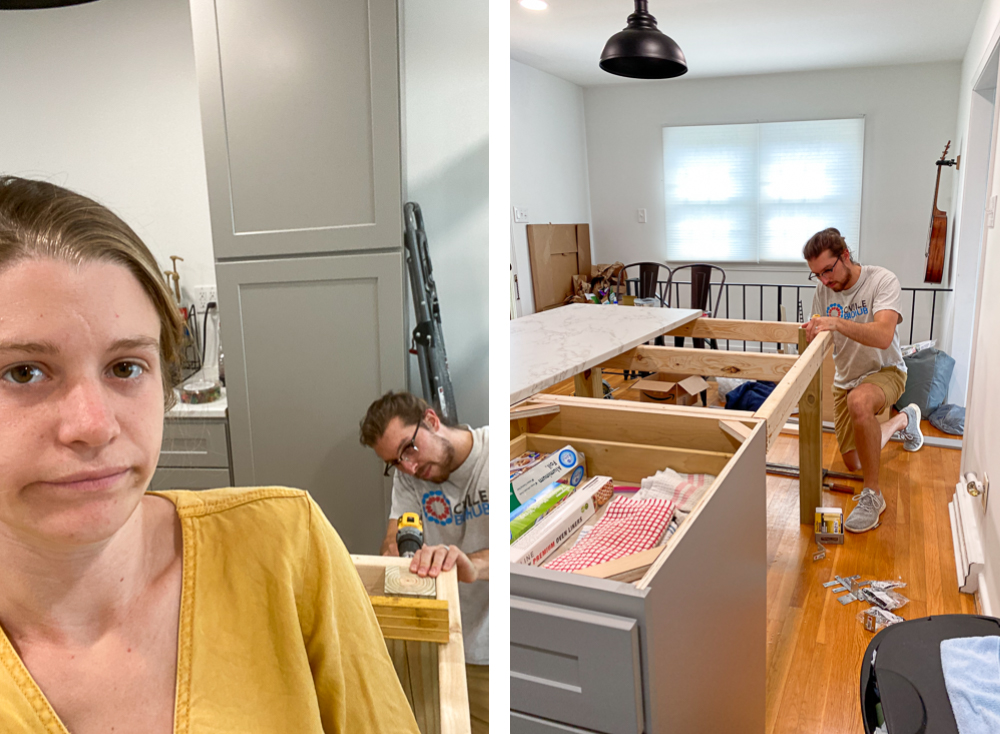
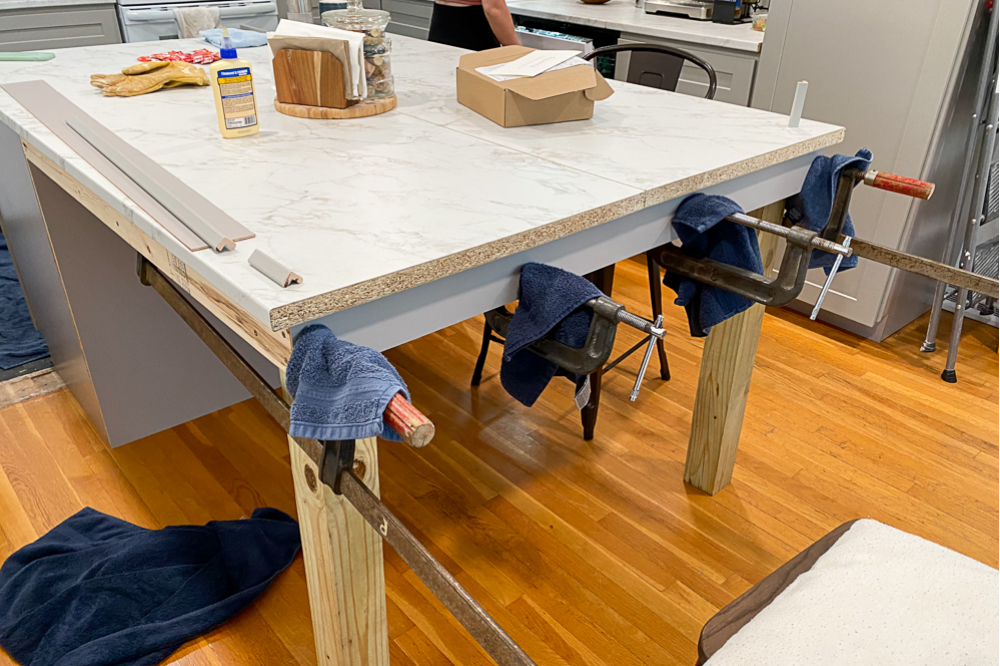
Once the base cabinets were anchored and the decorative back-plate was on, I just built a simple two-legged table frame out of 2x4s and 4x4s and attached it to the back of the cabinets. The countertop was mounted to the frame, and boom! We had an island!
There were a lot of smaller touches to polish it, like trimming the end of the countertops flush, repurposing cabinet kick plates as trim to cover the raw 2x4s, and putting on the decorative end caps so it all felt like one flush countertop.
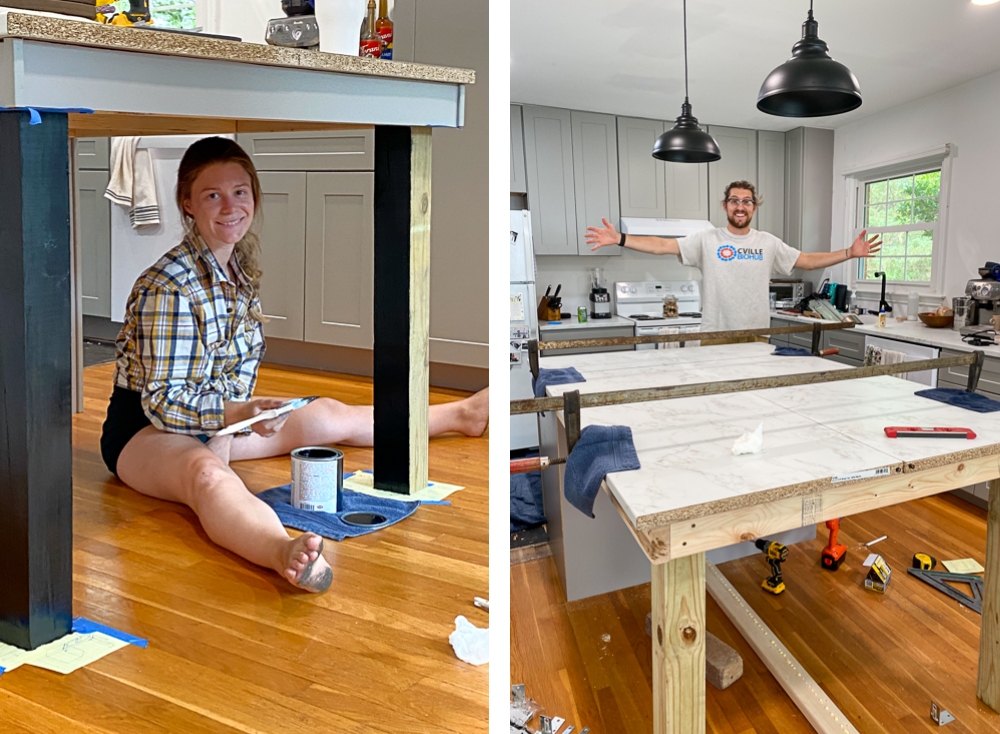
And of course, the legs needed some painting. But as we mentioned in our bathroom reno blog, I’m not allowed to paint anything, so Sarah got to leave her own mark on the island as well!
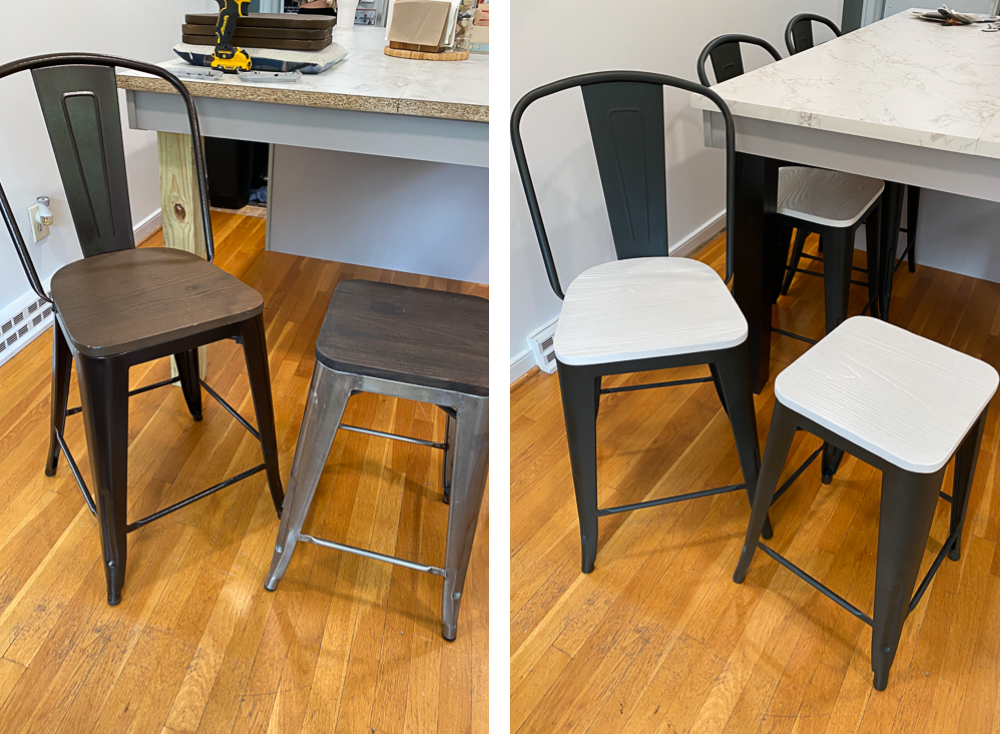
We even took our 3-year old brown and dark-wood chairs from Amazon and gave them a fresh coat of paint to match our new monochromatic aesthetic! (And by, “We”, you know that I mean, “Sarah”) ????
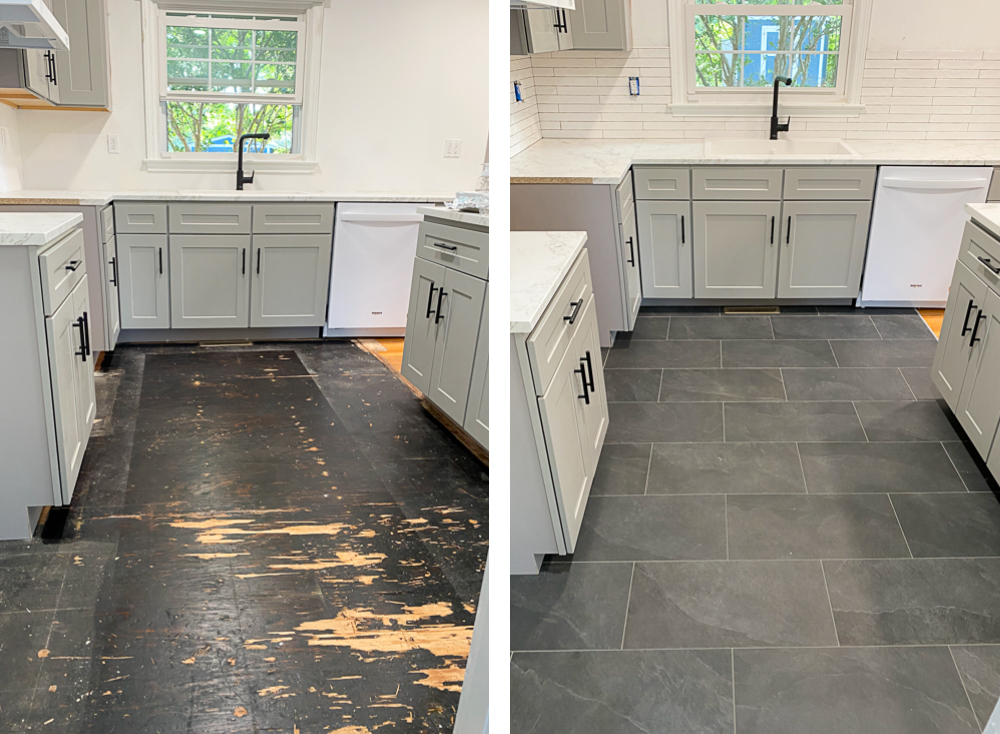
Step 9: Tile | $3,287 | 12 Hours
The last vendor to come into a space is almost always tile. We used Jorge Calderon for the third time, as we’ve had such good results with him and his company in the past! If you recognize the floor tiles, that’s because they’re only one shade darker than the tiles we used in our basement bathroom and upstairs bathroom. However, we splurged on the 20″-long backsplash tiles from Italy via Sarisand Tile ????♂️
We had a long discussion about how we wanted the floor tile oriented, and even made a couple of very quick low-res approximations to make sure we’d like a standard brick-stacked pattern.
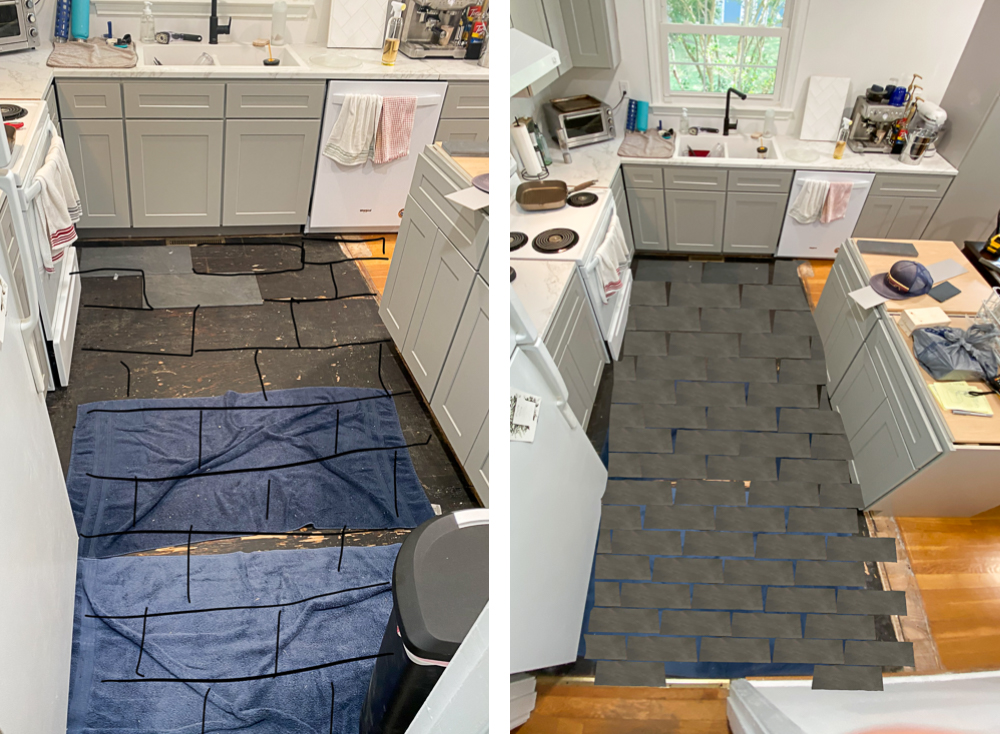
Since we had gotten used to the whole “we leave and come back and the work is done”, we scheduled the majority of tile install (a multi-day process because of all the different components that need to sequentially dry) while shooting! An out-of-town, triple-wedding weekend in early August provided the perfect candidate for install. We left the kitchen with bare sub-flooring and walls, and came back to a beautifully-tiled masterpiece!
The tile itself cost just over $1,000, with the rest going to our very-talented tile installers. As far as time goes, about half of the hours we spent on tile was picking it out, measuring, and otherwise prepping the kitchen for install (like moving the fridge and range carefully to the other side of the kitchen). The other half was working with Jorge and his team, and tidying up a bit after they left.
Step 10: Finishing Touches | $768 | 15 Hours
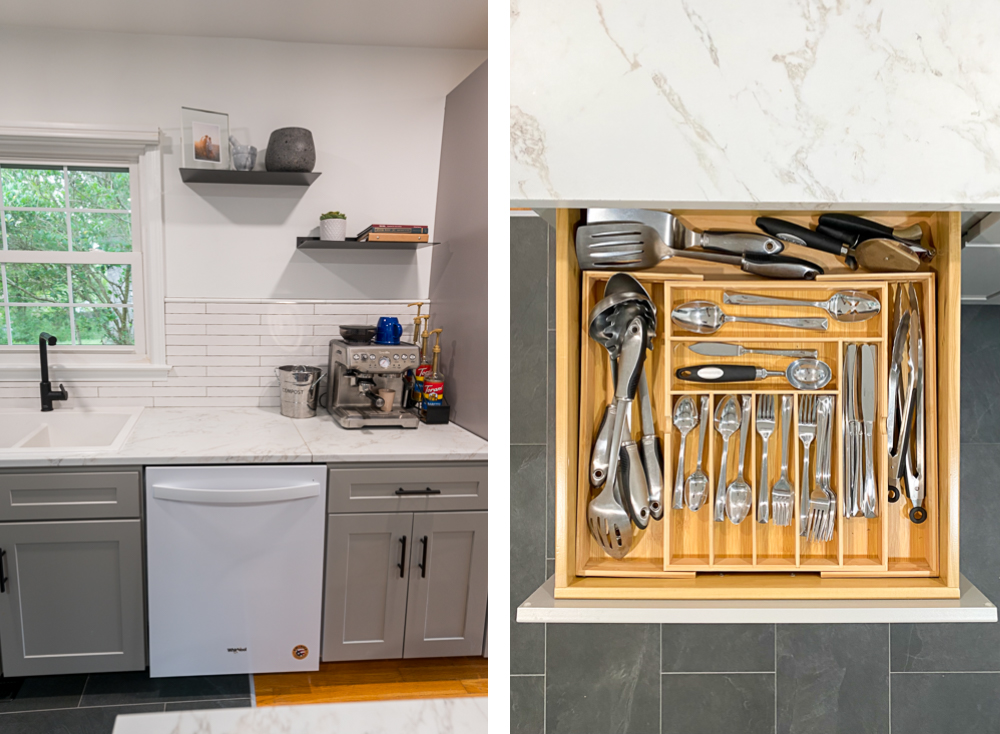
Once tile was done, we were officially on the home stretch. Even though we had shot for more than 24 hours over that three-day weekend, plus spent another 10 hour in the car, we walked into our kitchen and couldn’t help but move all the appliances back into place and attend to a few finishing touches ????
During the last couple of weeks, we mounted handles on all the cabinets. Sarah touched up paint all over the ceiling and walls. I hung a painting. We mounted a couple of shelves. We installed various organizers in drawers and on the countertop (this was our first time with a dedicated silverware drawer — we were stoked.
And we FINALLY moved all of the kitchen stuff out of our basement, living room, and guest bedroom into the kitchen where it belongs!
Final Count | $17,245 | 111 Hours
By lunchtime on August 10th, 2021 we were FINALLY finished. We had invited some friends over that evening a couple weeks prior, knowing that would force us to complete the finishing touches without letting them drag on forever ????
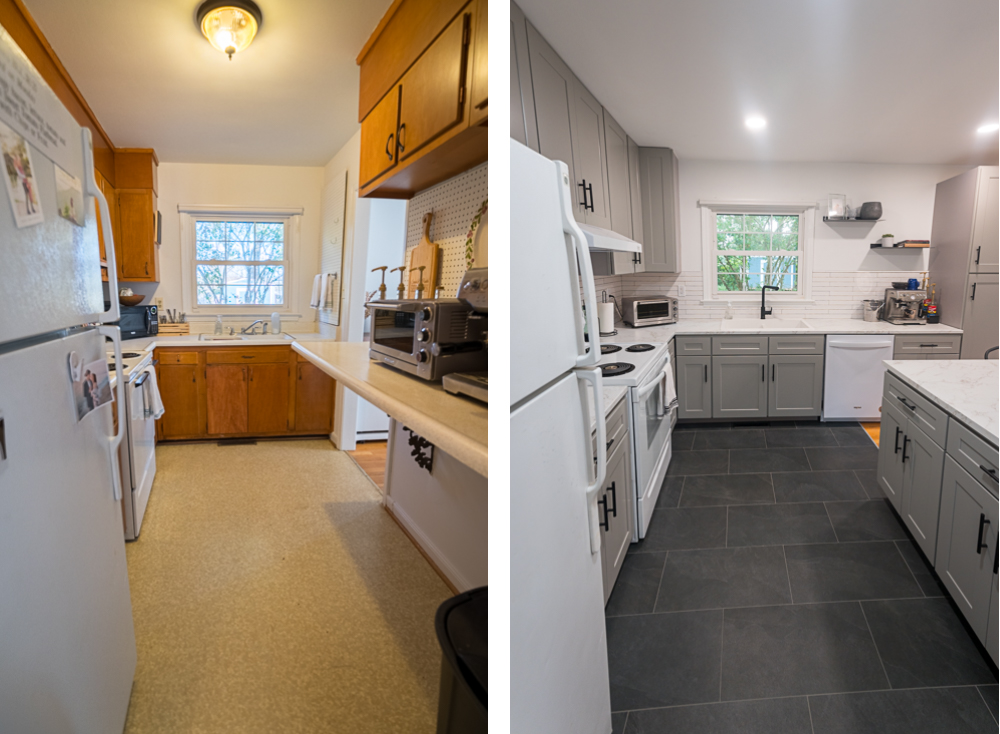
In the end, this project took us almost 3.5 months — almost as long as our way bigger basement renovation. But this project had been at a slower pace, and we had spent less hours personally, really standing firm in our conviction that we make better wedding photographers who manage contractors on the side, than we do people trying to be full time wedding photographers and DIYers at the same time.

After all, from the time we started the project on March 27th to the time we finished in mid-August, we had met with 14 engaged couples, completed 26 hour-long coaching meetings with our Apprentices, captured 20 weddings and elopements, 21 engagement sessions and surprise proposals, and managed a UVA graduation photoshoot season with more than 60 grad sessions. It wasn’t exactly a slow season!

But boy, when it was finished, it felt SO good to be done. Not only had we been living, eating, and cooking in a construction zone for 3.5 months straight, but this was also the final big reno for our house! We’re done for real this time! And coming in almost $8,000 under-budget certainly didn’t hurt either!

Lessons Learned
Here are some of the major lessons we learned during this most recent renovation:
1. Renovating from Afar Requires Trusted Vendors – We are 100% confident that the only reason we were able to schedule so many major steps in this renovation while we were away is because we had a handful of trusted vendors that we had worked with on multiple occasions before.
Not only did we totally trust them to be alone in our home while we were away, but we trusted that when we gave them instructions, they would understand what we meant, and call us when our instructions were unclear or if they ran into any issues. After living and working for a month just a few feet away from an active bathroom reno, it was a wonderful change to be a bit more disconnected from the worst of the kitchen demo and install.
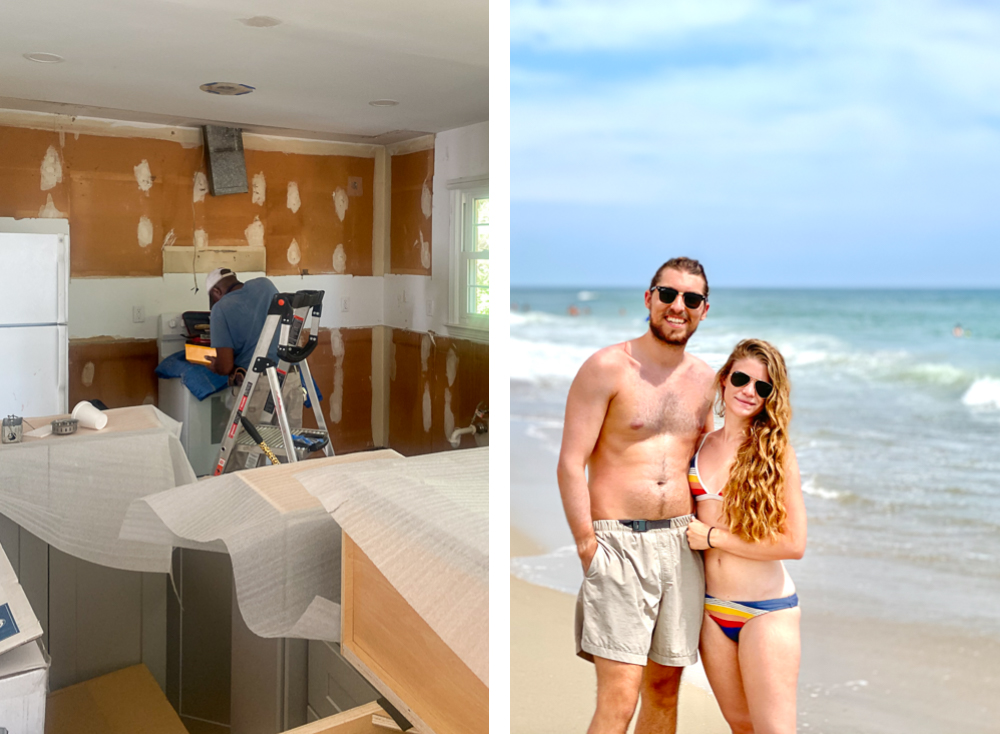
2. Slow and Steady is Perfectly Fine – In the end, we committed fewer than 6 hours per week across the 19-week project. Because we scheduled the most intense and disruptive parts of the renovation while we were traveling, there were long periods of slow -progress (or no progress at all), followed by short bursts of activity while we were gone, followed by some projects of our own.
That 6 hours each week was down dramatically from 20 hours each week for the basement reno and 10.5 hours per week with the bathroom reno. We’re clearly getting better at delegating and managing, and less ambitious about projects we don’t want to do or can’t work on ourselves!
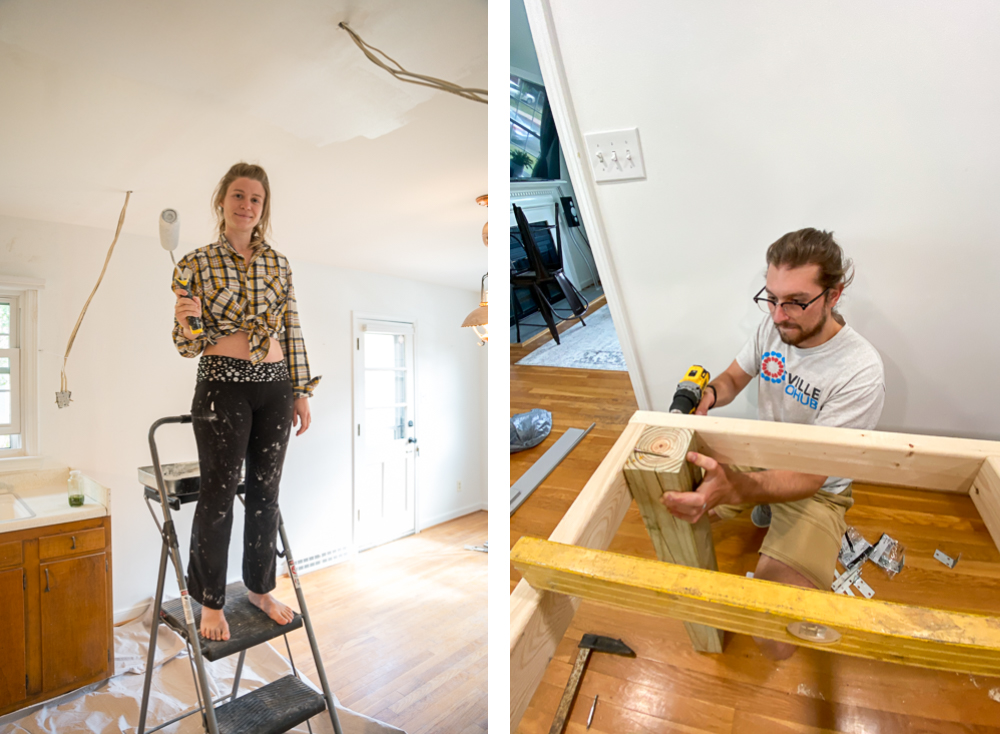
3. You Get Better and More Confident with Time – If you’re reading this blog and feel like this whole process is totally unimaginable for you, don’t be deceived. We have gotten a lot better at this than when we started our first reno almost two years ago! We noticed that we spent less time researching, made fewer mistakes, and generally felt more confident than during our first two renos.
Practice really does make perfect (or at least better) — whether it’s shooting, running a business, or renovating a room in your house! Also, now that we’ve tackled extensive overhauls in a kitchen and a bathroom, as well as complete construction from the ground up of a full basement apartment, we feel like we can tackle just about anything!
Well, thanks so much for reading! Although we’re done with major reno projects on this house, that doesn’t mean we’re done with renovating for good ???? We don’t know when, but we know this won’t be our last major reno project! But until next time, thanks for following along!
I you want more Hunter and Sarah renovation blog goodness, check out our $60,000 Basement Renovation here, or our total overhaul of a 1960s bathroom here!
—
Vendor List
For those that have been asking, here are all the awesome vendors we used who we would recommend! Let them know we sent you ????
- Carpentry/General Handyman: Tim Banks with Banks Handyman Services, (434) 305-6153
- Home Automation/Low Voltage Electrical: Protection & Audio/Video by Design, (757) 258-1285
- Tile Supply: Thomas with SeriSand Tile, (434) 964-4680
- Tile Install: Jorge Calderon with Jorge’s Tile, LLC, (434) 987-2033
- Cabinets: Wolf Cabinets via Cardinal Home Center, 9434) 964-1701
- Dishwasher, Range, Range Hood, Sink, Faucet, Countertops: Lowe’s
Filed in:
Wedding Photography & Photography Education
Charlottesville, Virginia and Beyond
HOME
ABOUT US
WEDDINGS
JOURNAL
FOR PHOTOGRAPHERS
PRESS & PRAISE
BLOG
CONTACT
e. hunter@hunterandsarahphotography.com
p. (434) 260-0902