VIEW BY CATEGORY:
Hi, we're Hunter and Sarah, a husband-and-wife, luxury wedding photography team. We’re also educators, helping other photographers build profitable and sustainable photography businesses.
MEET US
LOOKING FOR SOMETHING?
How We Renovated our Basement Into an AirBnB Apartment
May 5, 2020
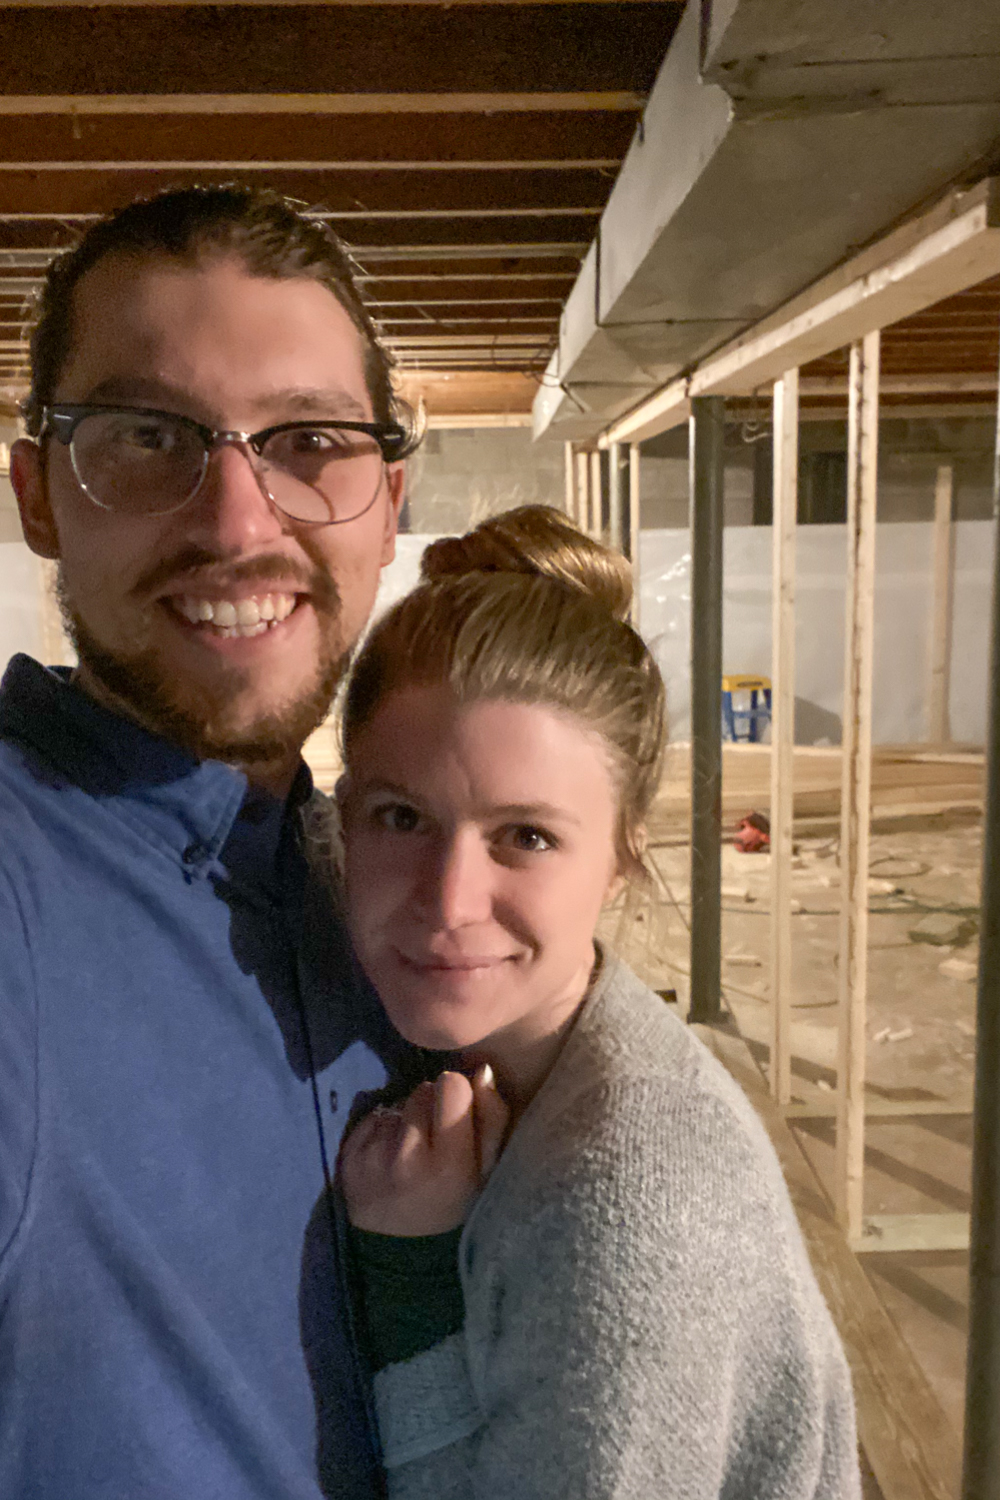
Happy Tuesday everyone! For those of you who have been following along on social media, you couldn’t have helped but notice the journey that Sarah and I went on during the first 4 months of 2020. Between January 6th and April 19th of this year, we transformed a dark, empty basement with cinder block walls and a damp, concrete floor into a bright, modern two-bedroom basement apartment!

We’ve had a lot of friends and followers reaching out to congratulate us, as well as asking for more pictures! We’ve also had some friends (who are interested in doing their own renovations) ask about the process. Since we took such precise notes on how much the project cost (in dollars and in hours), we took some time to prepare this thorough and in-depth tell-all: our start-to finish renovation process!
Although we are by no means general contractors, we’ve learned a lot from this process (both about home renovation AND each other), and we wanted to share both the journey we went on, and what we learned along the way!
But let’s start at the beginning…
PHASE I: DRY AND LEGAL
Step 1: Laying the Plans | $0.00 | 25 Hours
It all began with a LOT of planning. We talked to my parents, who had designed and served as general contractors (the people in charge of all the other contractors) for the house that I grew up in. We talked to our photography mentor Eric Kelley, who had finished his own basement a few years ago. We talked to friends in construction and in architecture and interior design.
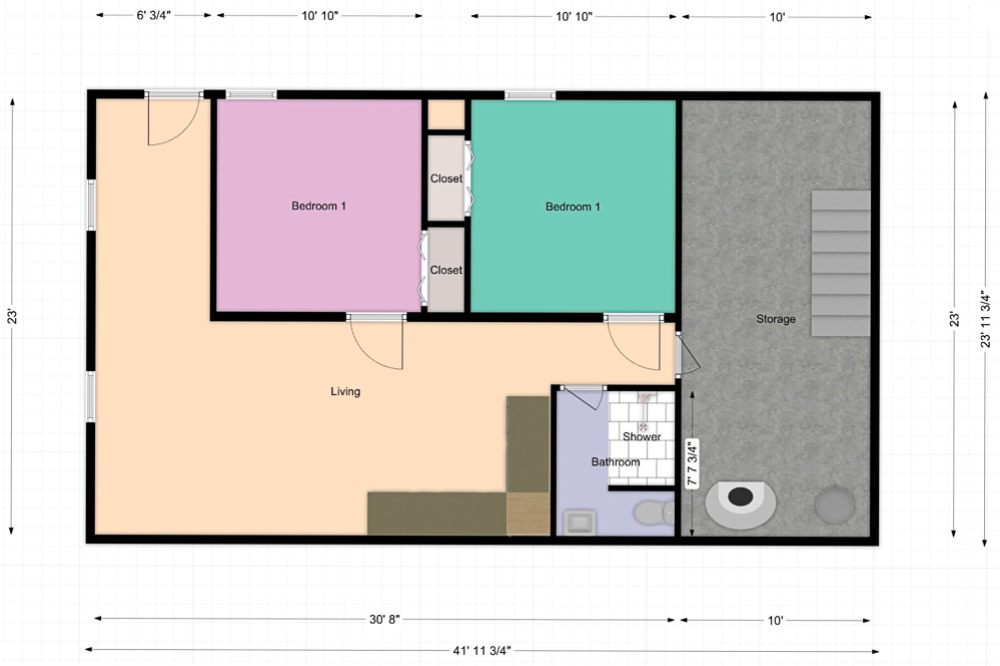
We moved into the house in late-October, and were meeting with vendors about the basement within a week! After lots of advice and meetings with vendors, we used a free floor planner app to come up with the following design, and landed on an estimated budget of $35,000, with an estimated end-date of Easter Sunday, April 12th. I think this final floor plan was the 3rd or 4th iteration 😅
Step 2: Waterproofing | $14,000 | 25 Hours
Although we didn’t realize it when we purchased our home last October, we had water issues in the basement. Like most houses built in this area in the mid-60s, during and after a heavy rain, water seeped through the cinder block walls of our basement 😭
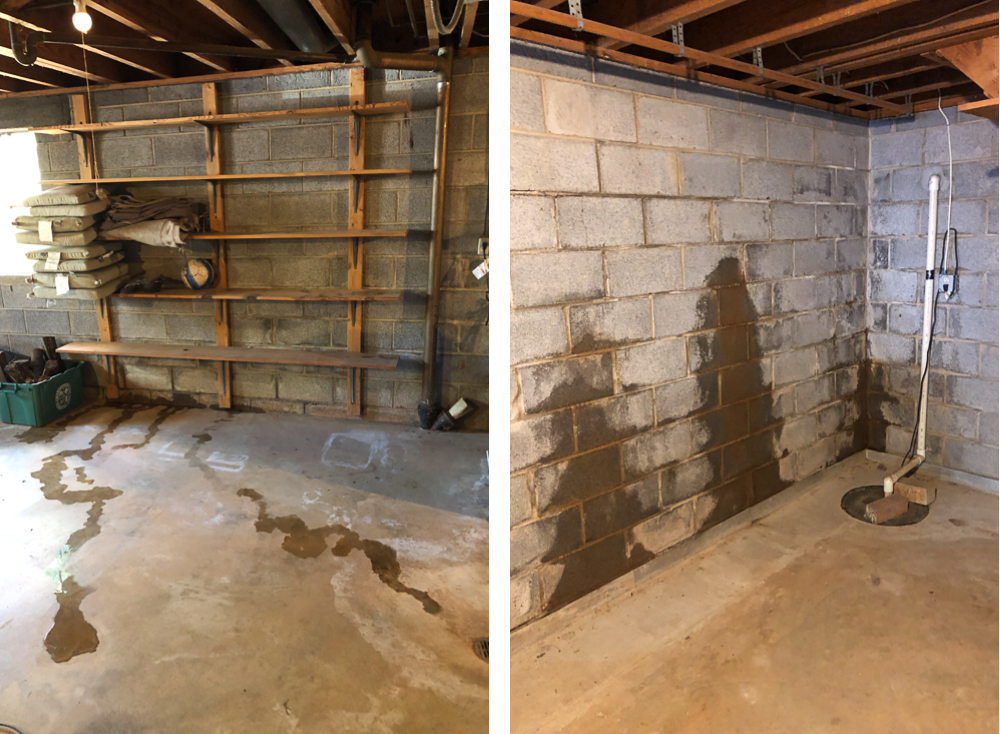
Although it wasn’t too bad – just some damp walls and a small puddle on the floor – we knew that if we were ever going to finish the basement, we would have to deal with this thoroughly and completely. There’s no use in building walls if they’re going to get wet and moldy and need to be replaced after every big rain!
So we met with several different foundation repair companies for quotes, and before we had even started the project we shelled out almost half of our entire budget just to get the place water-tight. In other words, our budget was wrecked from the start. So our new goal was to keep the project at or around $50,000 🤦♂️ But we scheduled the foundation repair and the waterproofing as step #1, and on January 6th, the jackhammering commenced.
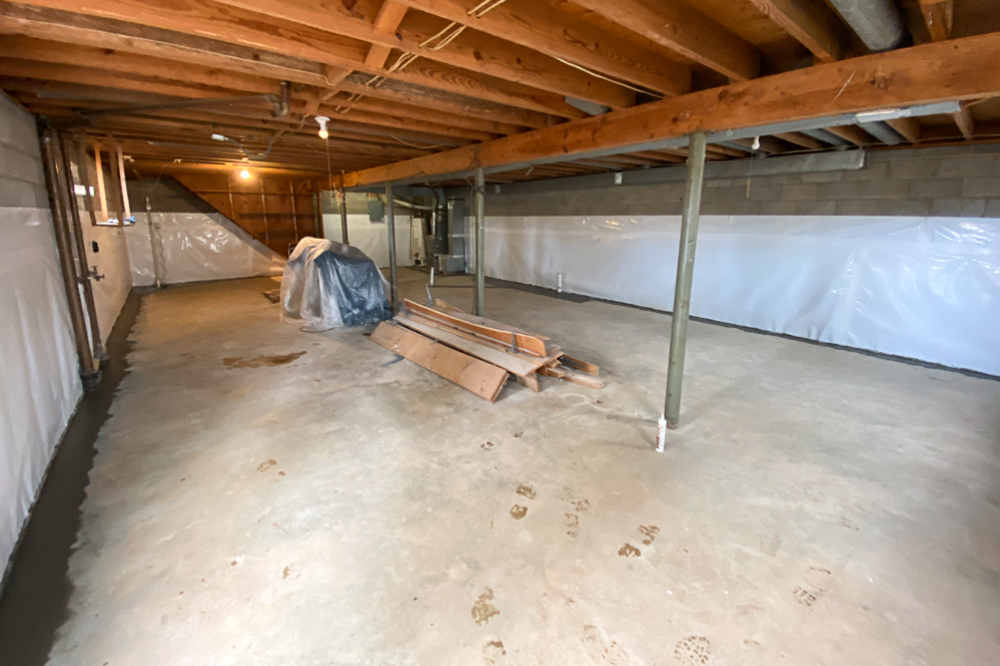
And if you’re wondering why we spent more than an entire day’s worth of labor on a project that we hired someone for, it’s because of another issue we discovered. Apparently, the sump pump that was collecting and safely removing all the water from our basement AND the gutters on half of our house were all running to an underground pipe that was damaged and placed in a bad location.
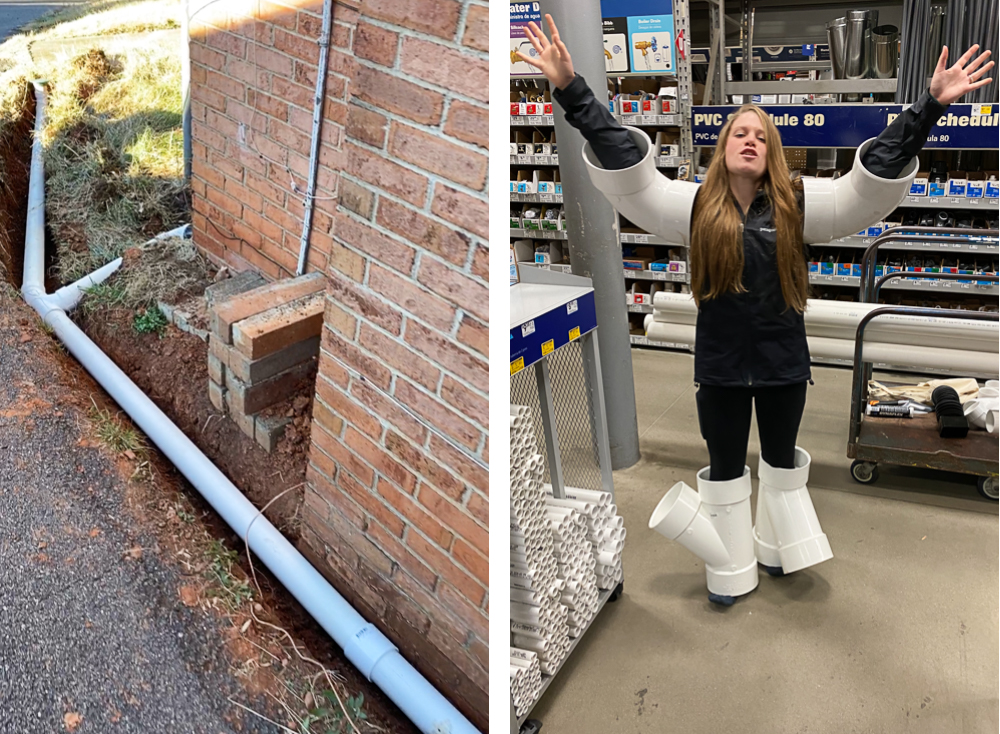
So with the help of a few friends from our Community Group, we painstakingly dug up 25 feet of broken pipe and replaced it with more than 40 feet of new PVC pipe. We had to be sure that we always had the right “grade” (downward angle of the pipe) so that the water was actually running away from the house, and not just being dumped right back at the foundation. Plus, things take longer when you bring a goofball to Lowe’s 😂
Step 3: Meeting Egress | $6,300 | 6 Hours
One very important thing we learned during the planning phase of our project was about “egress”. Basically, for a home or apartment to be legal, each room considered a bedroom needs to have two means of egress — two ways to get out of the room in the event of a fire or other emergency. The first is easy: there’s a door into the bedroom. The second is typically a window. But… our basement didn’t have any windows that were big enough to meet egress code.
And with the basement being… you know… mostly underground, it wasn’t going to be easy to get multiple windows that someone could actually escape through. But we knew that we wanted two bedrooms, which meant we needed at least two windows that met egress.
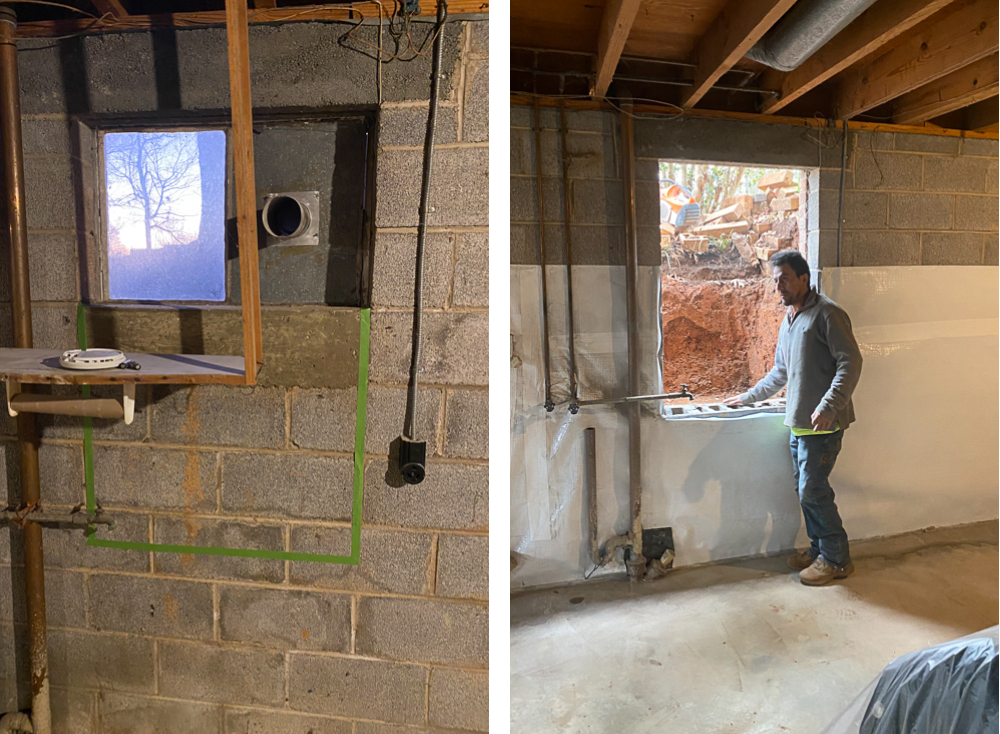
This was probably the most complicated part of Phase I, since we had to delve into city and state codes to find the requirements, purchase windows that met those requirements, dig a hole big enough for an egress landing, coordinate a stone mason to cut through the cinderblock to make room for that window, hire a carpenter to install the windows, then install the absolute BEAST of a window well to ensure that if someone ever did have to escape through the window, they had a way to get back to ground level.
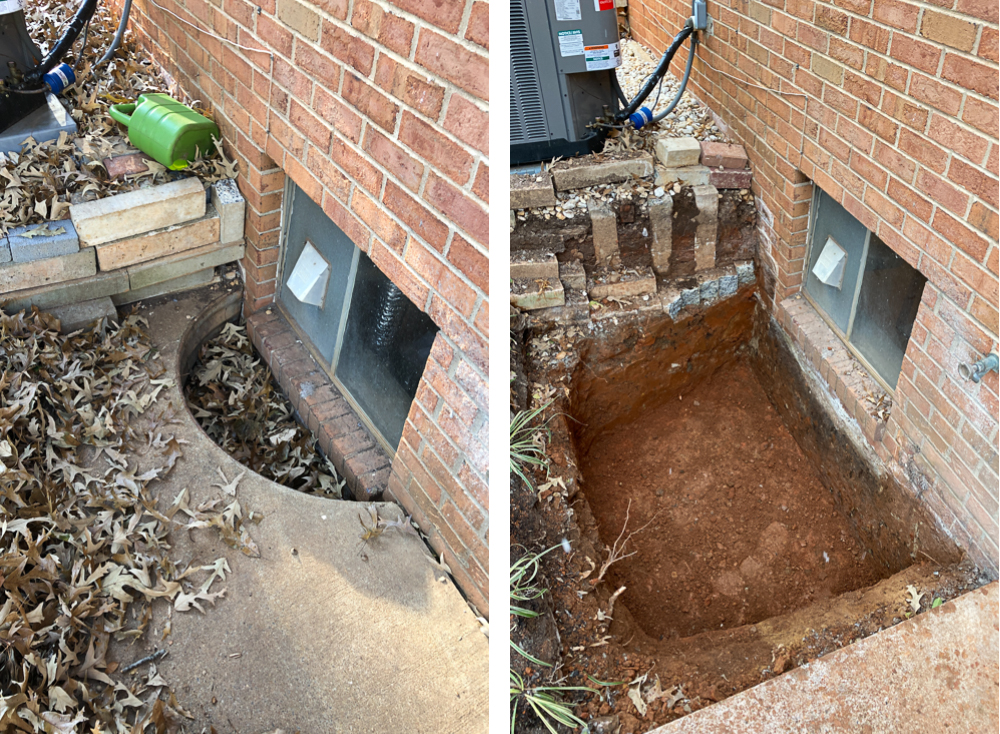
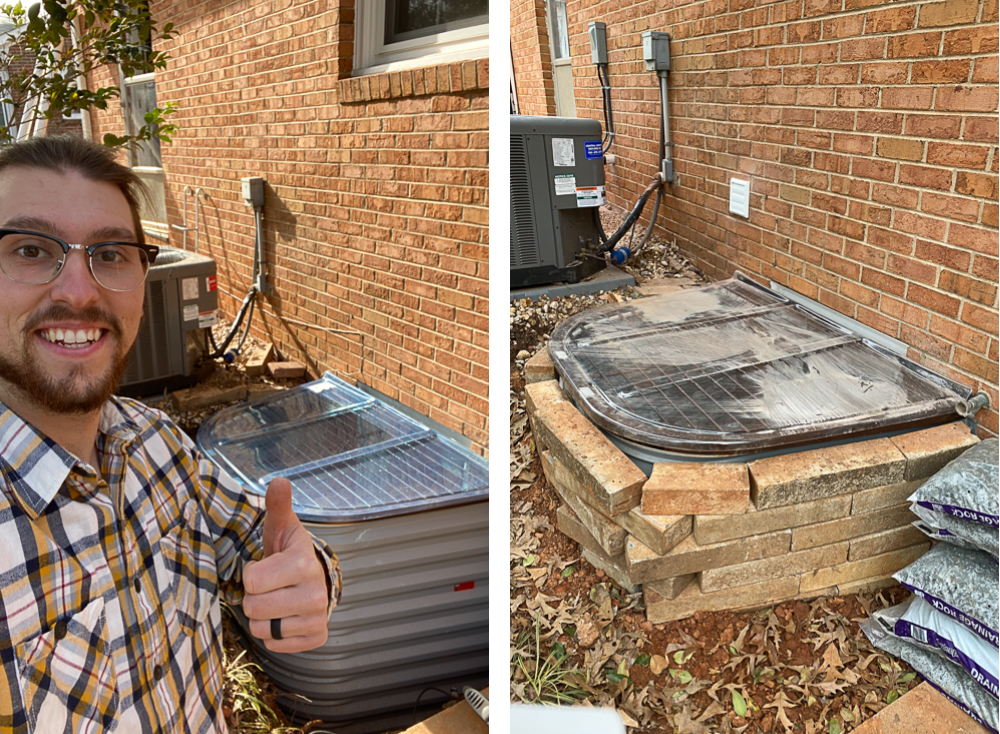
Although most of these tasks were too skilled for us to do ourselves, it took a lot of hours to manage and coordinate. Plus, I was able to get my hands dirty and use a hammer drill to mount the window well to the outside of our home, then rebury it and pretty it up a bit!
Step 4: Plumbing the Drains | $3,400 | 4 Hours
Before we started renovations, the basement had a single water source running to it and draining out of it: a washing machine hookup. But we needed a full bathroom and a kitchen! Getting water to the basement would be easy. But draining a toilet, shower, and two sinks was another story.
Although we had several options, we landed on the following. We hired a plumbing company to cut through the concrete slab and find our house’s sewer connection, and tap into. They left pipes visible for all of those water sources to drain, then re-poured new concrete.
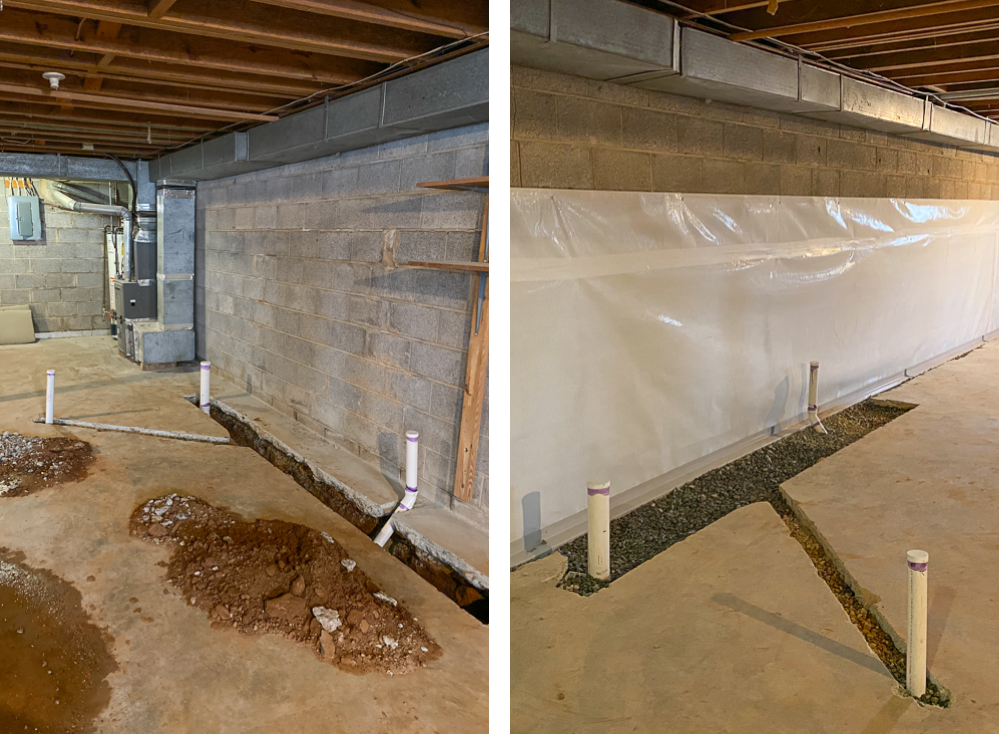
By the time we completed Phase I (just 8 days after we started), we had spent nearly $25,000 – most of our initial estimated budget! And when you went down into the basement and looked around, you could barely tell that anything had changed. We had a fancy underground system for handling water intrusion, two new egress windows, and three PVC pipes sticking up from the ground. It didn’t feel like much to show for $25k! But we pressed on…
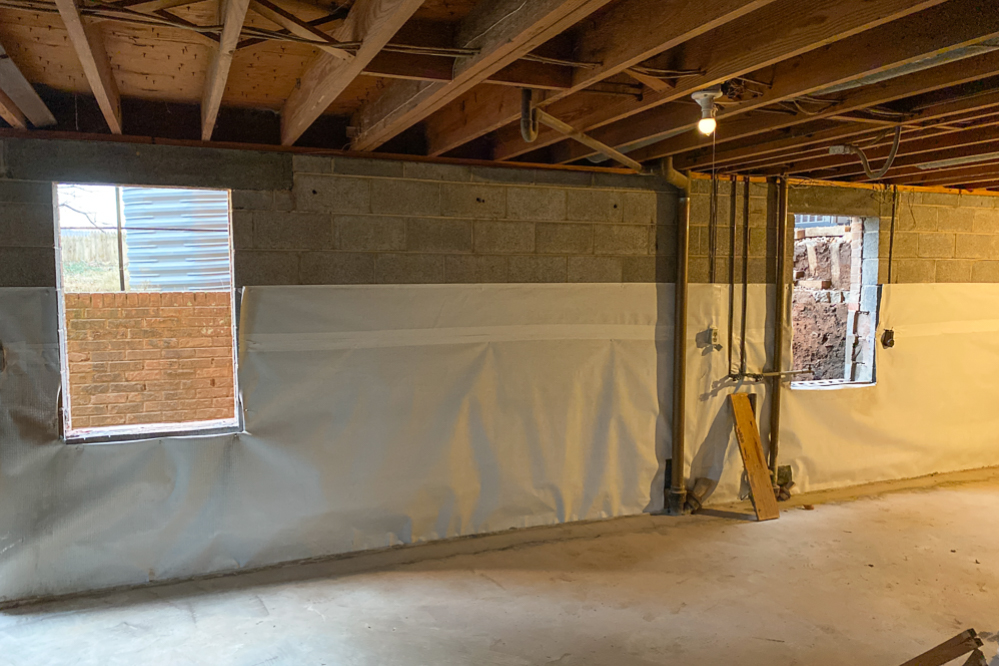
PHASE II: ROUGHED IN
Step 5: Framing | $1,500 | 5 Hours
This is where things suddenly felt real. Our friend and mentor Eric helped us figure out how much lumber we would need for framing, then connected us with a local framer who spent a couple days in our basement framing the entire apartment by himself for only $500! He did good work, and followed our floorplan to a tee.
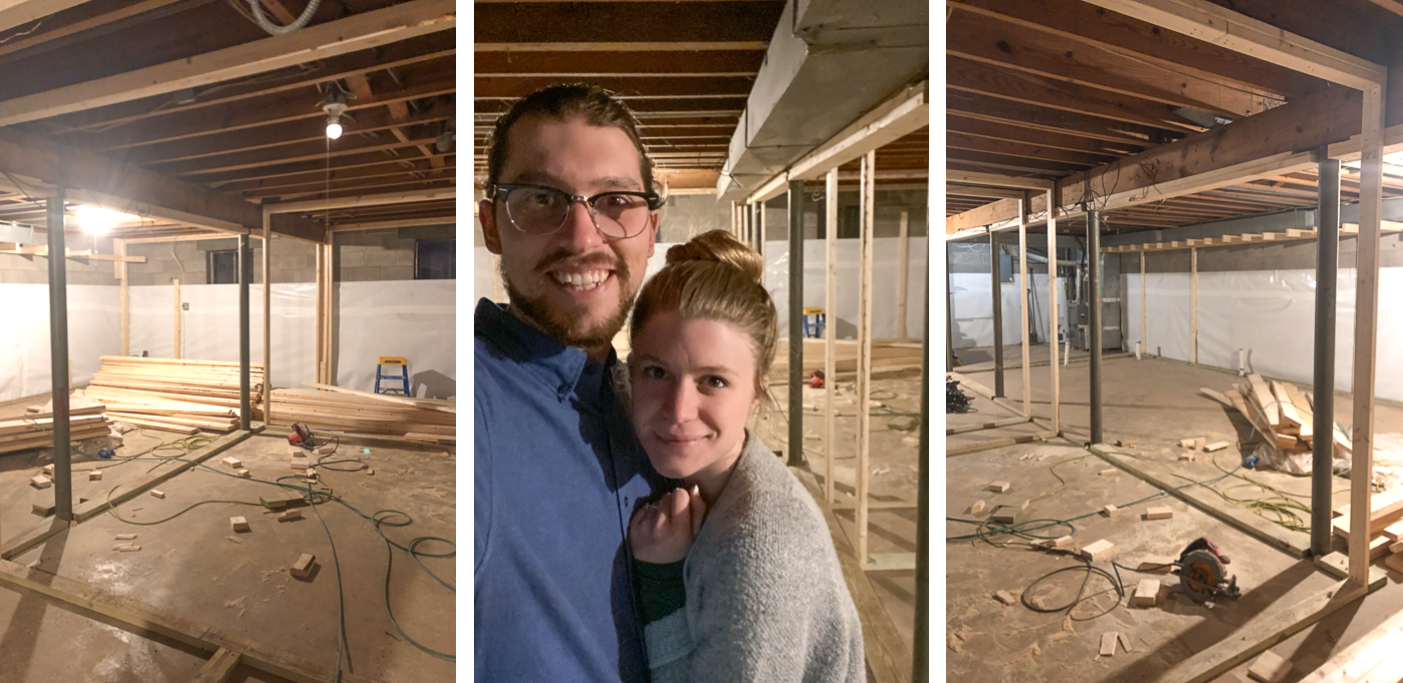
Although it took some hours for us to get the order straight (and a few trips to Lowe’s for extra boards near the end), when the walls were up, we suddenly had an appreciation for how the space would feel as a finished apartment.
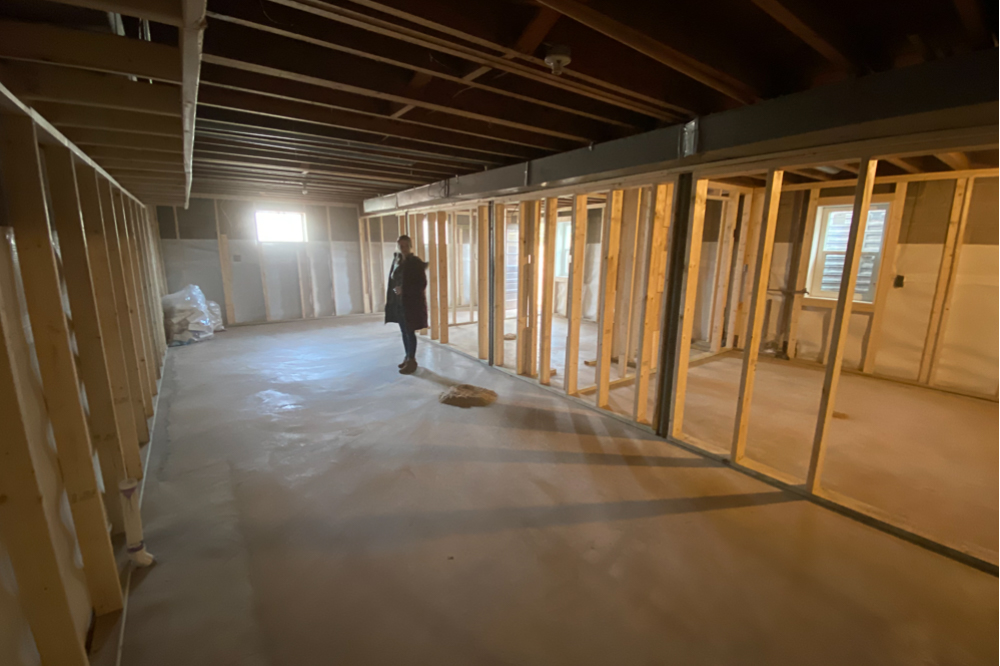
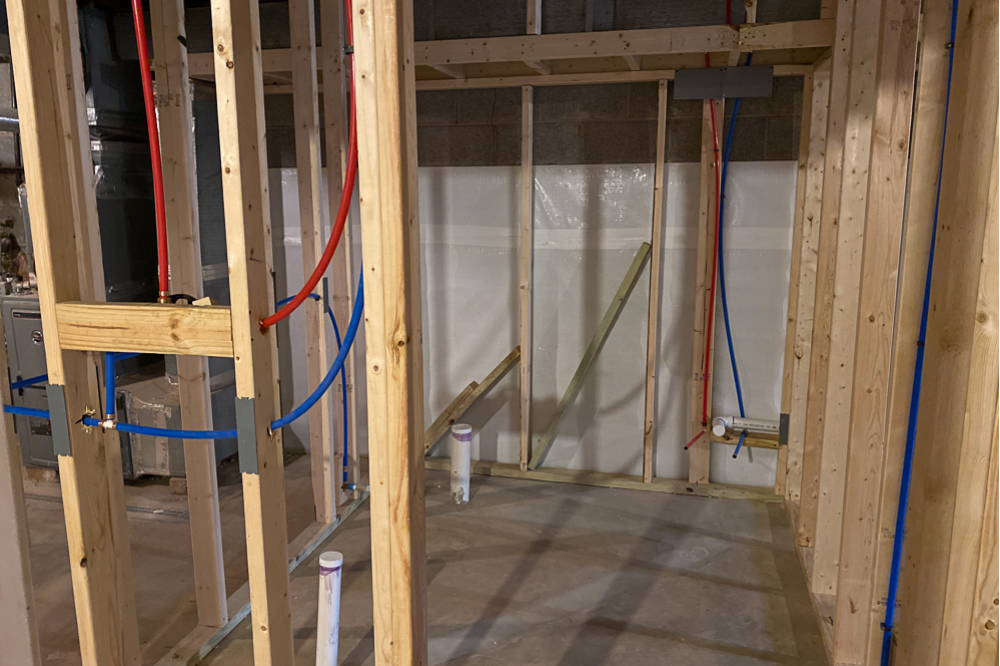
Step 6: Plumbing Rough In | $900 | 1 Hour
If you aren’t familiar with the term “rough in”, it basically means bringing some aspect of construction into a space, but without any final hookups. So a plumbing rough in involved our plumbers running water lines from their current location to all of the new locations – where our sinks, toilet, shower and relocated washer and dryer would be. Once we connected with the right company, all it took was a walk-through of the space, and they were done in a few hours.
Step 7: Bathroom Tile | $4,000 | 5 Hours
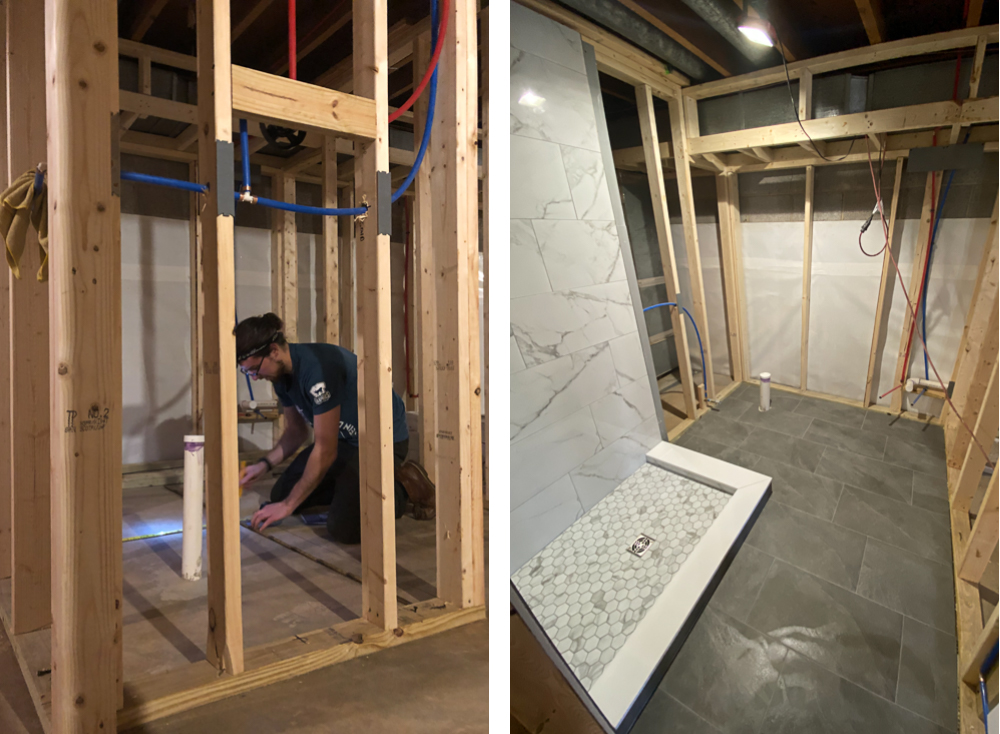
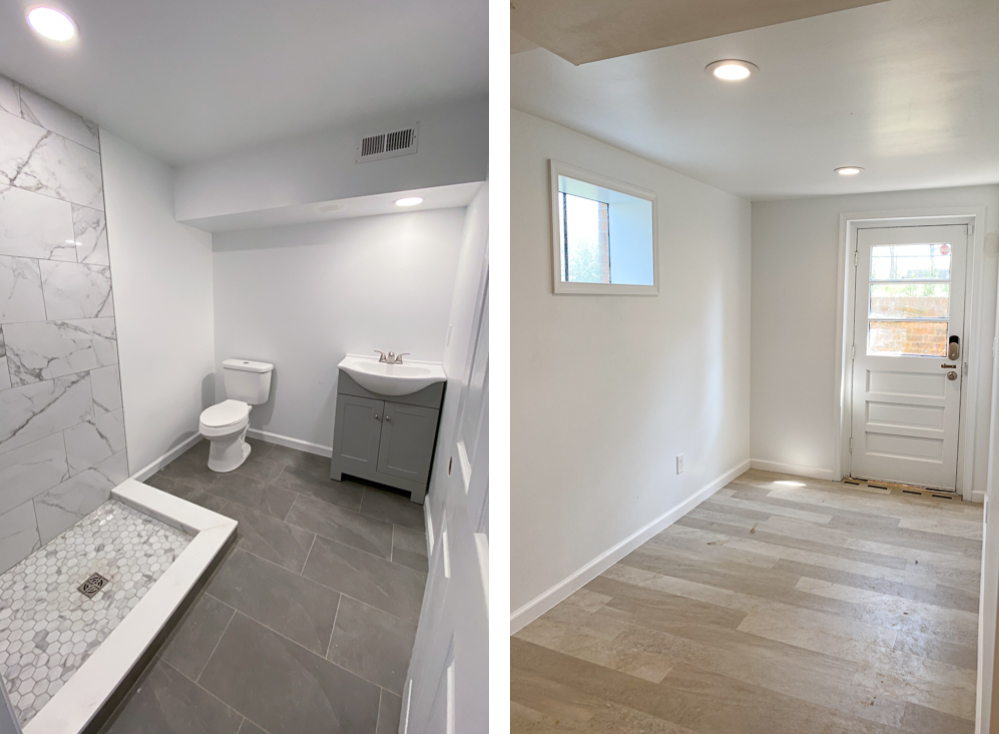
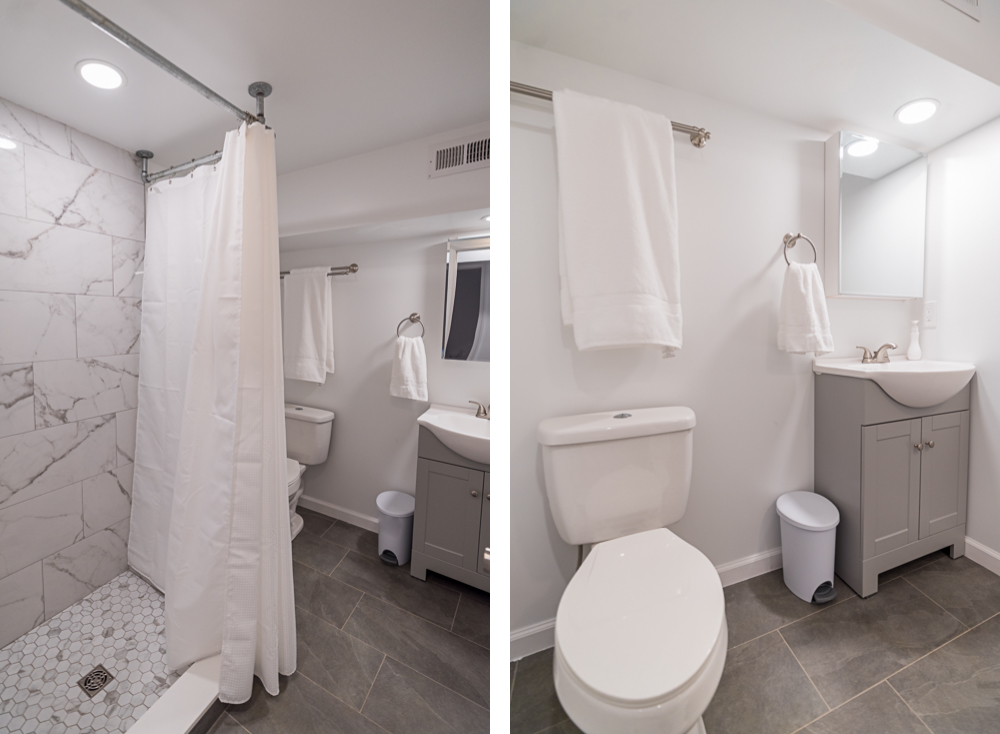
We were totally blown away at how expensive it was to purchase high-quality tile and have it installed by a professional company. However, after doing our research, we learned about all the complicated nuance of tile: ensuring water didn’t get past the tiles into the walls, having the right grade to ensure your shower actually drained, and how faulty installation could lead to easily-broken tile. So we splurged a bit, and accidentally turned our rental’s bathroom into the nicest room in our house 😂
After lots of measuring and almost a week of the tile company’s work, the tile was fully-installed and Sarah treated it like it was made of gold. We covered the entire bathroom floor and shower with a layer of plastic, then covered the plastic with multiple layers of cardboard. We knew we’d have plenty of other vendors in and out of the bathroom, and we wanted the tile to look as good for our renters as it did the day it was installed!
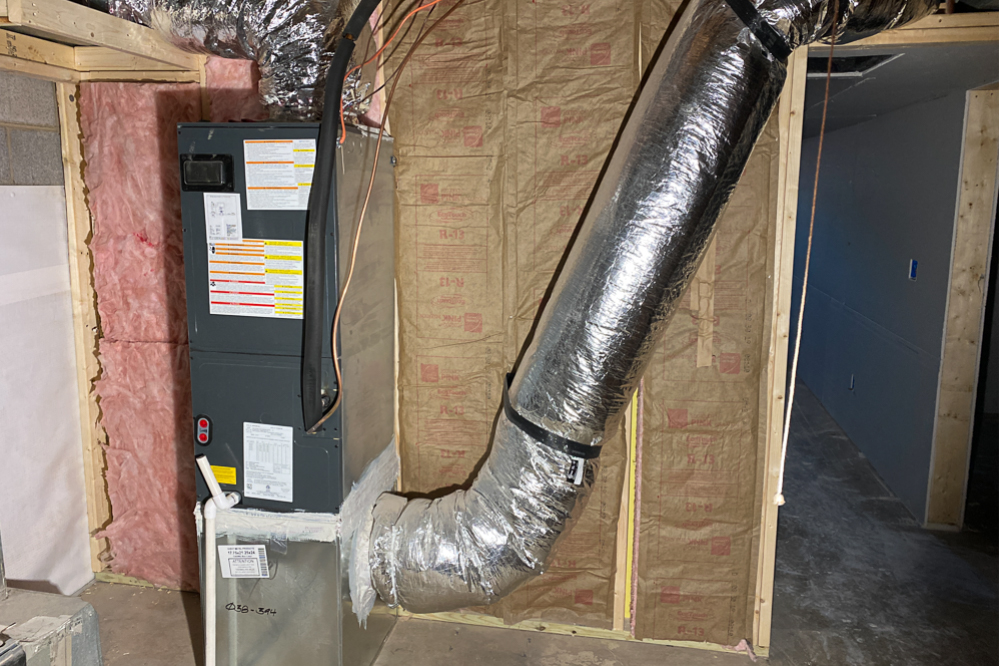
Step 8: Install HVAC System | $4,200 | 5 Hours
This was the area that Sarah and I had the most regrets. We ended up hiring a guy who came recommended from a friend as someone who “was cheap but would get the job done right”. Although his labor really was cheap, it was an absolute circus from the start. For starters, he was “going to come start the job first thing tomorrow morning” for 6 days in a row. Each day we’d be expecting him at 8:00 am, and by 9:30 we’d call him and get an excuse as to why he couldn’t make it, but how he would definitely be there the next day. And since we couldn’t move forward until HVAC was done, each day he delayed was delaying the entire project.
When he finally did come, he argued so loudly with his partner that we could hear them through the floor from our living room. On the third day of the job, he fired his partner 45 minutes into working and left to take him home. He didn’t come back until two days later to finally finish the job. All of the 5 hours we spent on HVAC was spent just talking to him in the basement and trying to figure out what was happening.
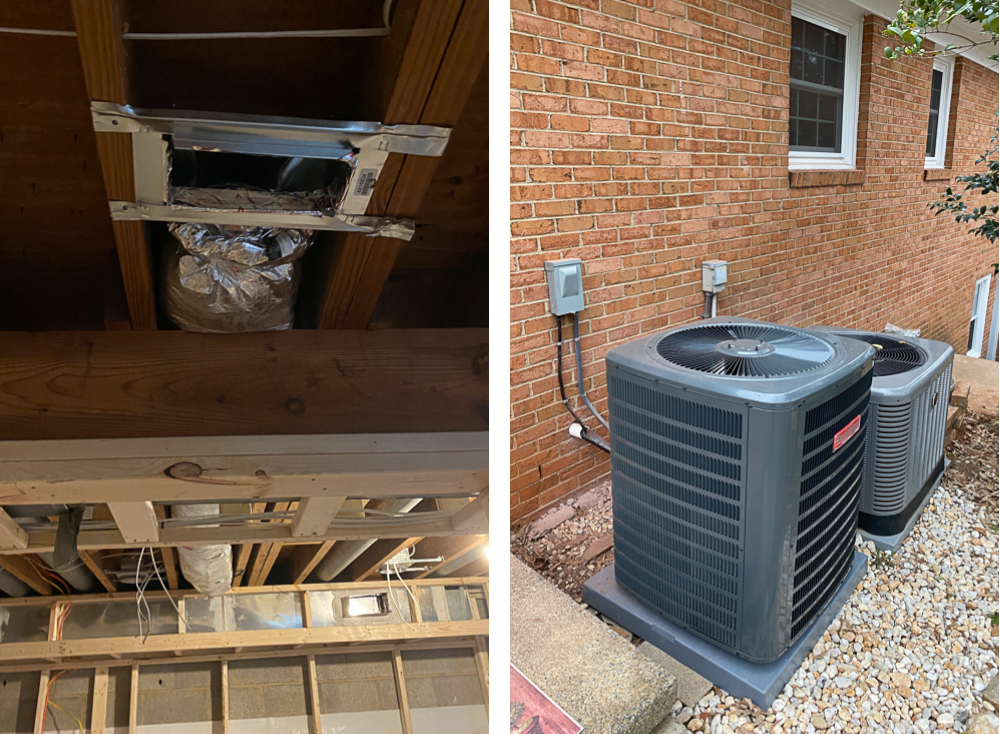
They also accidentally cut our internet cable while they were doing their install, which left us without internet on Sunday afternoon, which is usually our Sabbath rest day to prepare for the week ahead (read: the day we like to lay around and watch Netflix). That was just icing on the frustration cake. When it was all said and done, we had a functioning HVAC system for the downstairs, but we wouldn’t have minded paying a bit extra to have had a more professional company come in and finish the job in far less time, and with far less headache.
Step 9: Venting the Bathroom and Dryer | $400 | 6 Hours
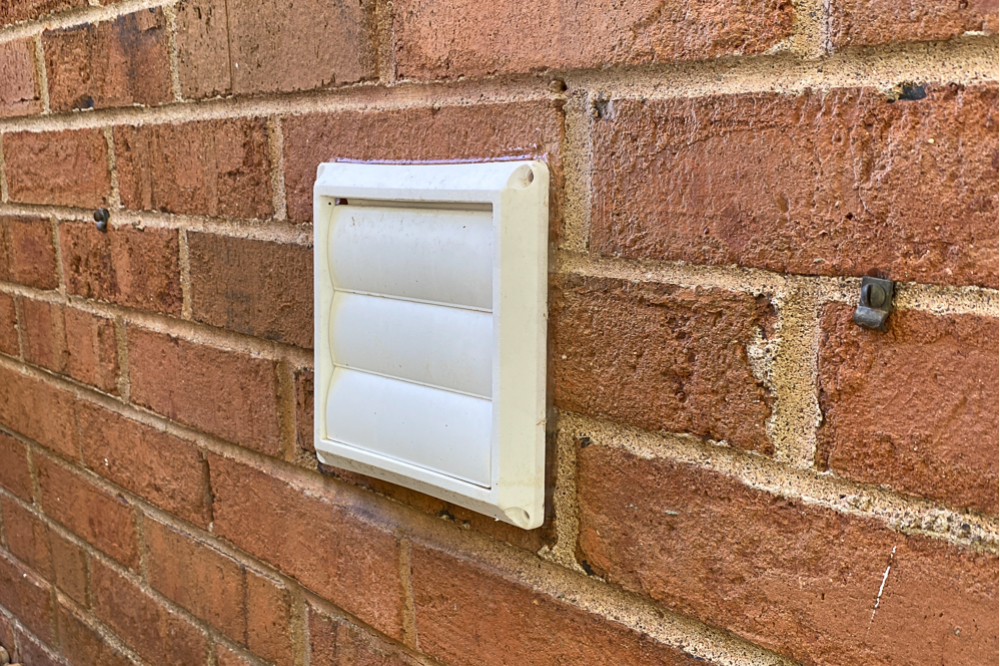
Since the dryer and the bathroom vent both needed to exhaust their hot and wet air outside the house, we had to bring the stone mason back in to punch a couple of holes through the exterior wall. Then, I installed flexible duct work and connected the outlets. It was a relatively small project, but one of the first ones that I was able to do mostly myself.
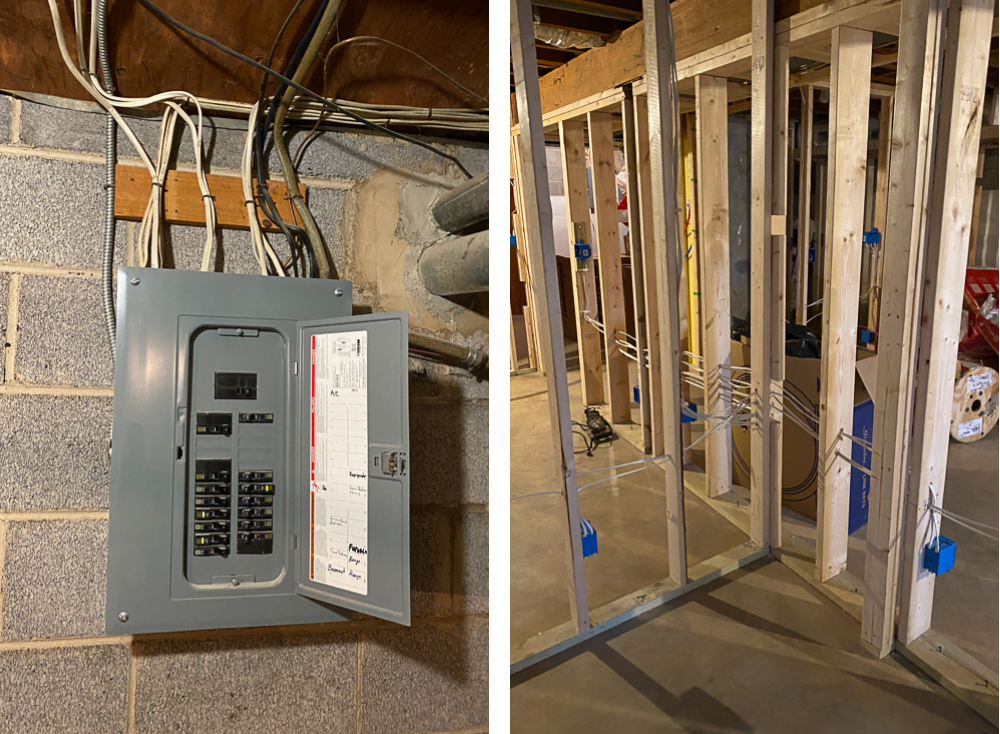
Step 10: Electrical Rough In | $3,100 | 7 Hours
This is one area where we were extremely lucky. My parents own a company that specializes in home automation and home security, and they have more than a dozen technicians on staff, many of whom are trained and certified electricians or low-voltage contractors. And since we were doing our project in the dead of winter (the slow season for most construction), they were able to spare a couple of guys to come help us with roughing in all the wiring for the basement.
So more than half of that $3,100 and 7 hours was spent just purchasing the electrical supplies – mostly wiring, outlet boxes and cable connectors. After the HVAC nightmare, it was a breath of fresh air to have such friendly and competent professionals working in the basement! And since the contractors worked for my parents, I had known them since I was a kid.
We did have to hire a master electrical as well, since the basement apartment needed its own electrical panel, which also required our electrical service for the entire house to be upgraded. Apparently, houses built in the 1960s don’t have as much juice running to them as modern houses, and with an extra apartment downstairs, it made sense to upgrade.
Step 11: Insulation | $1,300 | 45 Hours
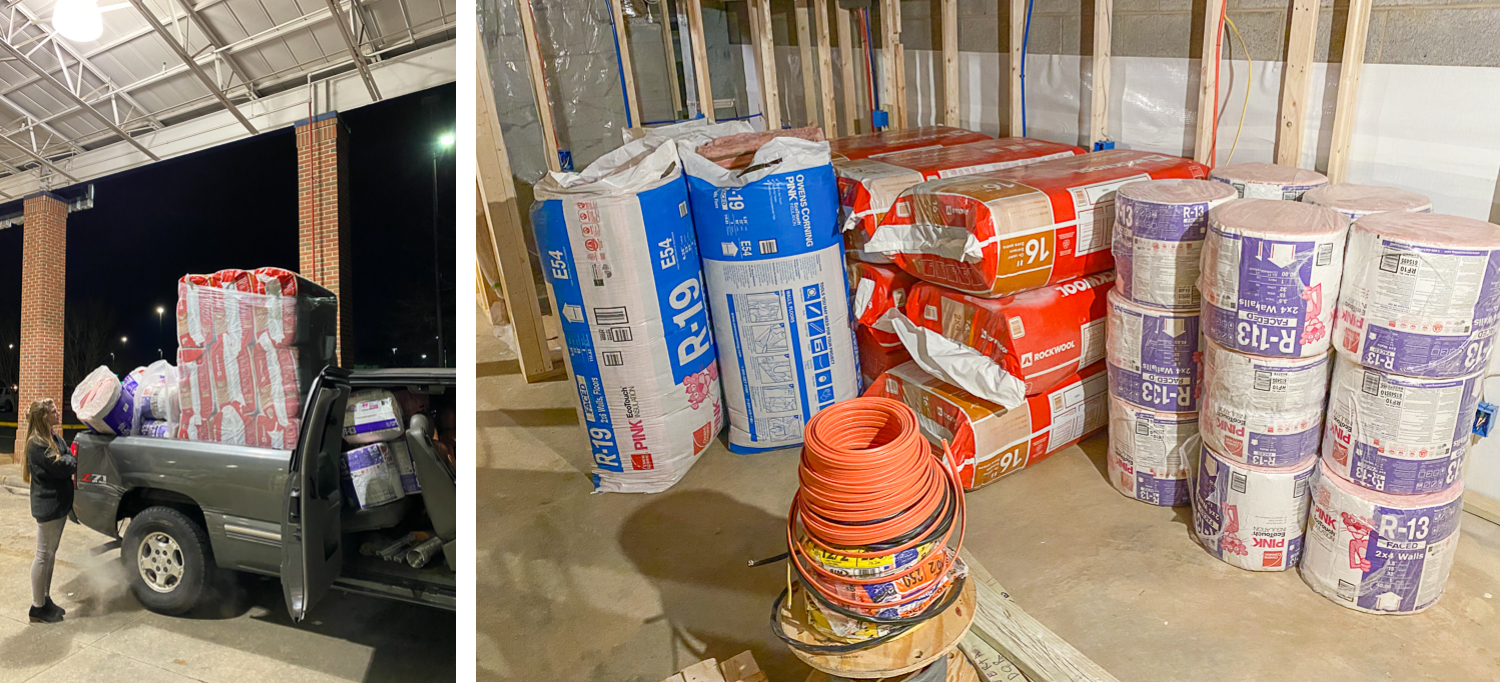
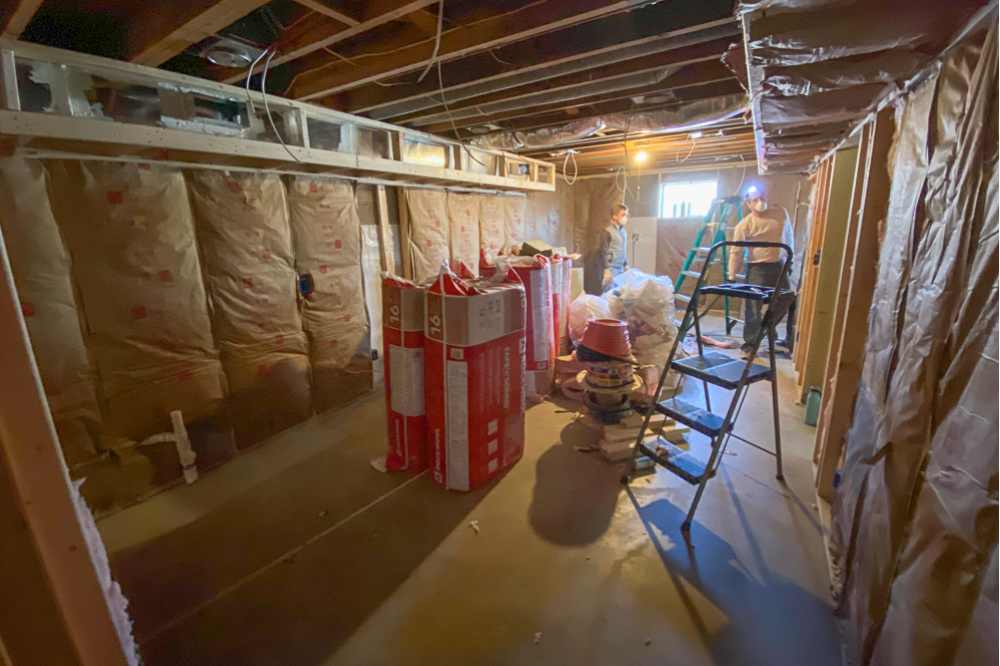
Now that the walls were up and all the piping, wiring, and duct work was in place, it was time to close up the walls! But before we could do that, we had the first major project that was simple enough that we didn’t have to hire a professional: insulation. After lots of research on insulation (and soundproofing), we placed an order and (over)loaded up a friend’s borrowed truck!
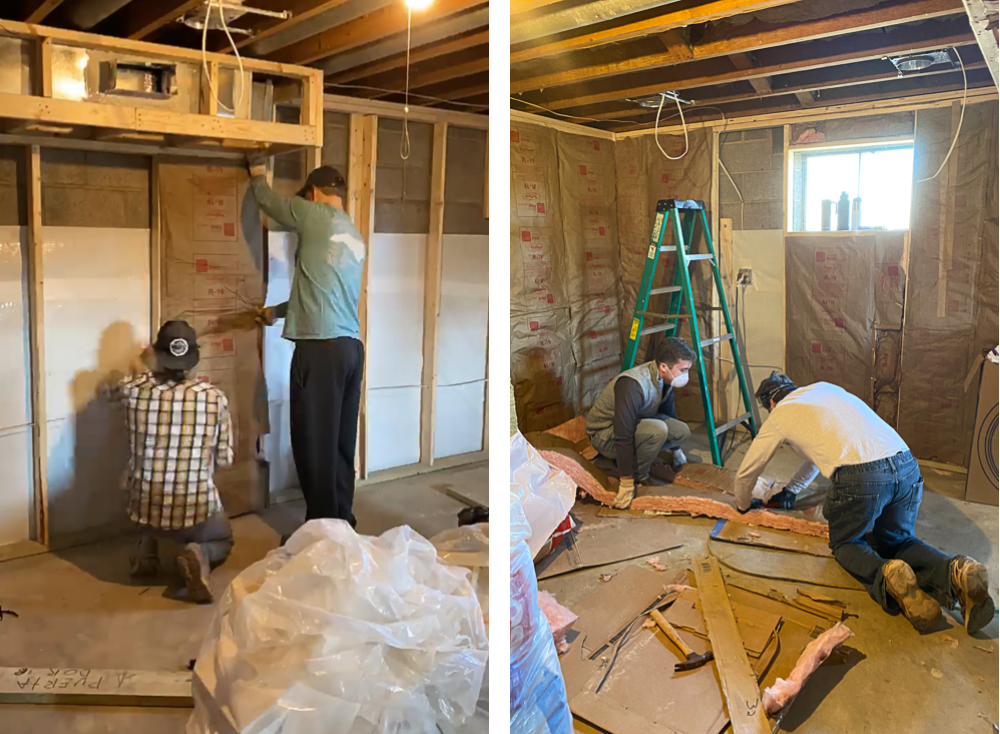
Then, on our last free weekend before wedding season began, our incredible community group took shifts helping Sarah and I hang insulation. Because the 45 hours were split between so many helpers, we knocked the project out in 10 hours, split between two days. We used standard thermal insulation on all the walls, and special sound-proof insulation in the ceiling to help cut down on noise between our home and the apartment. We couldn’t have done this without our wonderful community!
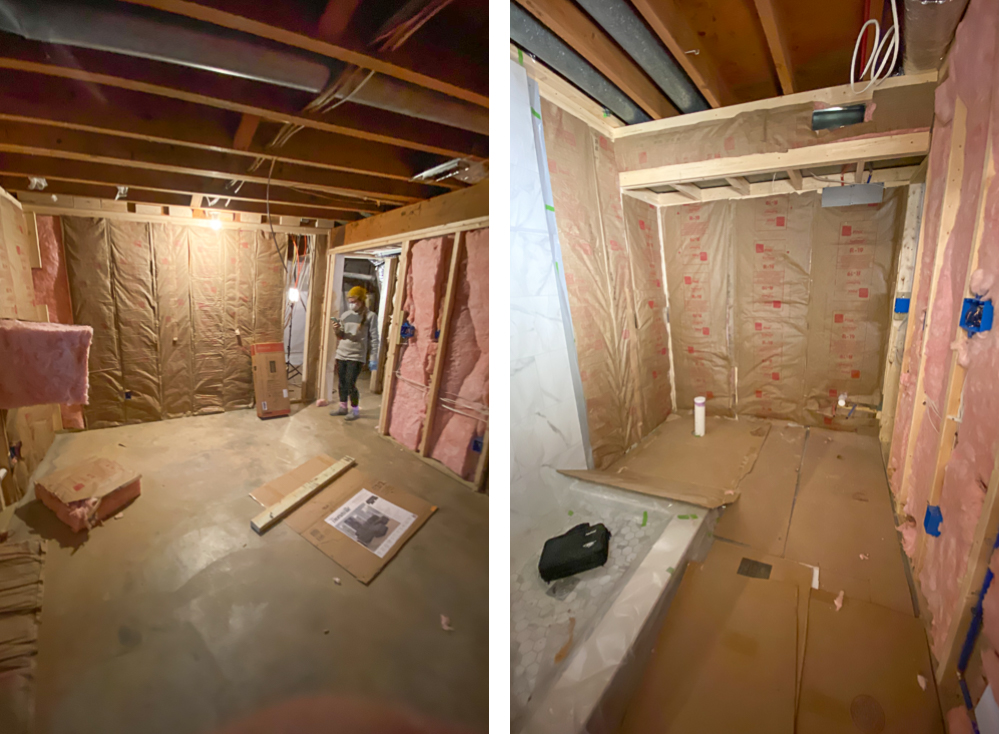
With insulation up, we could no longer just walk through walls on our way across the basement. But we could finally walk into a room and feel how big it was going to be!
Step 12: Drywall | $5,500 | 4 Hours
Over the course of 6 days, a drywall company completed Phase II. Even with a double-layer of extra-thick drywall on the ceiling (separated by a special noise-proofing compound called “green glue”), they were in and out in barely a week. It was crazy to see the place finally feel like an actual space, and not just a construction site!
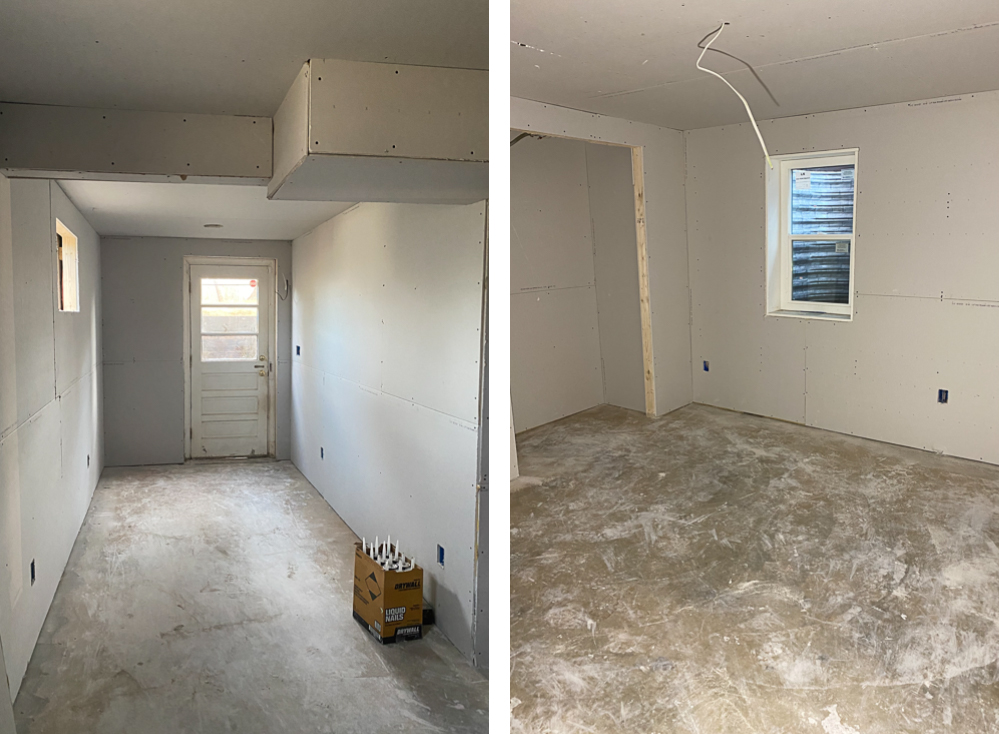
A little more than 8 weeks after breaking ground in our basement, we were finished with Phase II. The space felt like an apartment, although we knew we were still quite far from being done!
PHASE III: TRIMMED OUT
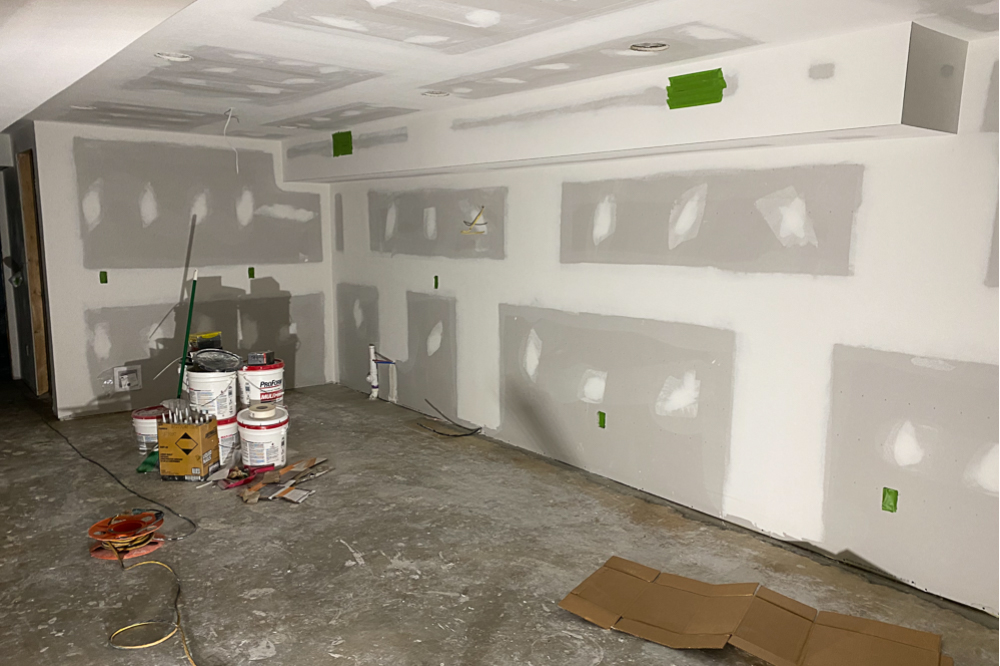
Step 13: Painting | $800 | 15 Hours
Here was another project that we could do ourselves: painting. Thanks to a friend who let us borrow a paint spraying machine, I was able to single handedly paint the apartment in about 7 hours. However, there was a lot of prep time and several trips back and forth to the paint store as I very quickly realized that they paint sprayer laid it on heavy and left a lot of paint hanging in the air. Goggles and mask were a must!
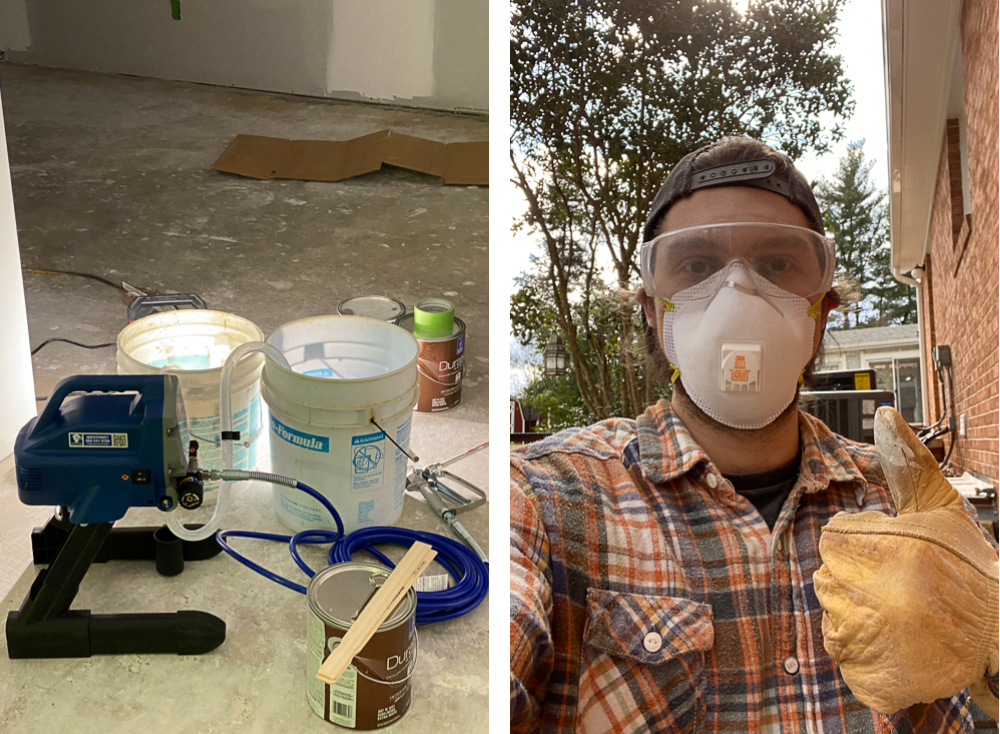
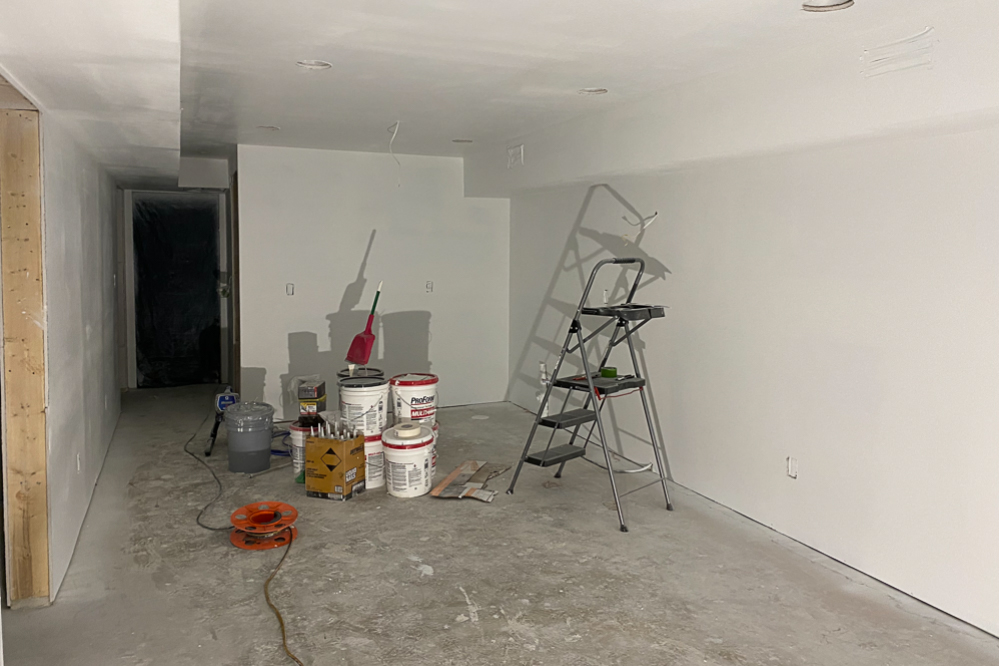
There was a serious learning curve to using the machine, and it made a colossal mess. However, once I got the hang of it and went in for the second coat, I was able to paint the entire 700 sq-ft apartment (walls and ceilings) in only 2 hours!
Step 14: Cabinets | $1,300 | 12 Hours
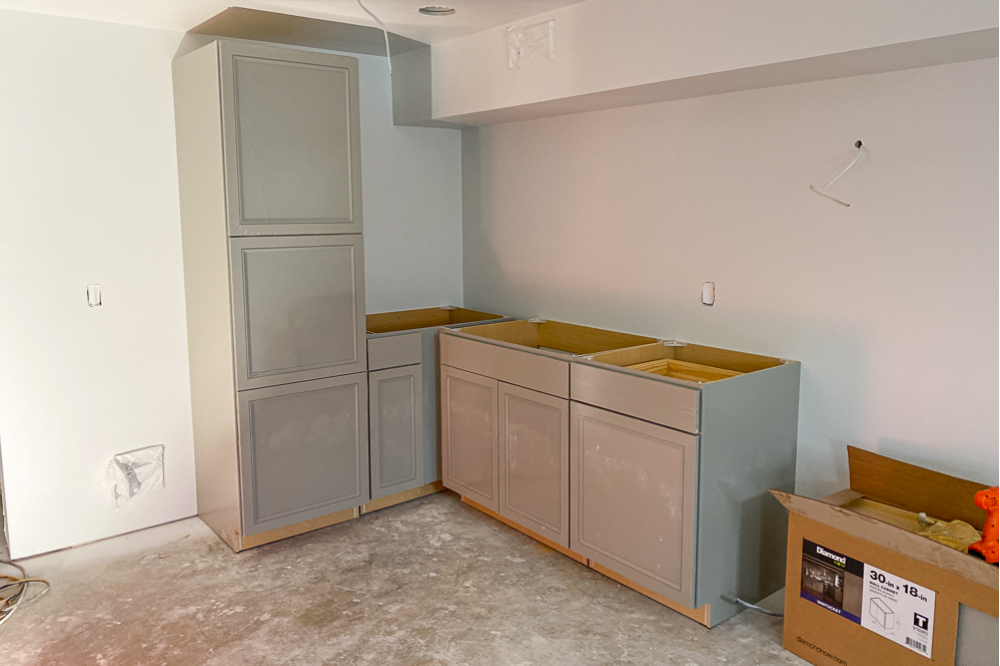
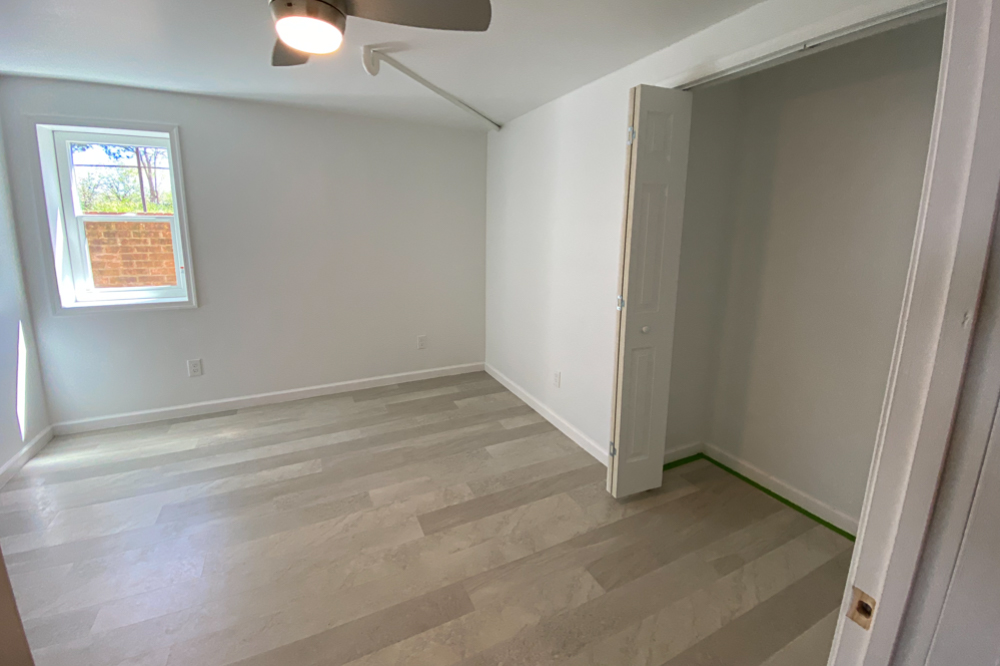
We kept things simple by ordering our cabinets from – you guessed it – Lowe’s. Between picking them up with a friend and installing them myself, this project took another dozen hours. But with the kitchen cabinets and the bathroom vanity installed, we were really starting to get a feel for the finished space!
Step 15: Flooring | $3,600 | 25 Hours
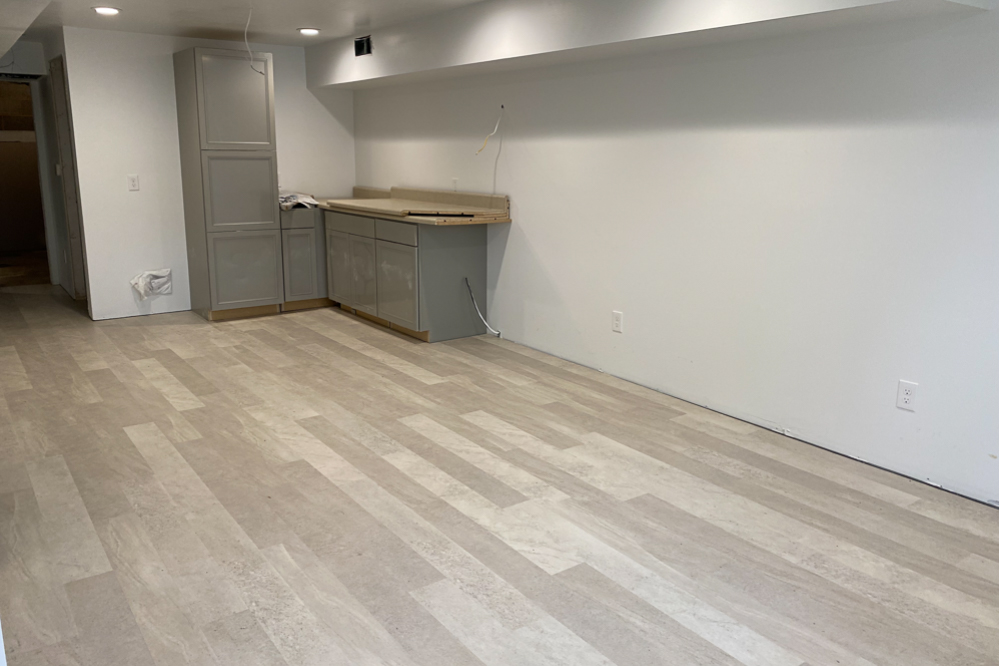
Another project that we were able to tackle without hiring a professional was installing our “luxury vinyl plank” (LVP) flooring. We splurged a bit here as well to get flooring that not only looked great and brightened up the space, but was scratch-proof, spill-proof, long-lasting, and came with the underlayment already attached. This also meant that installing our flooring would be like one giant jigsaw puzzle!
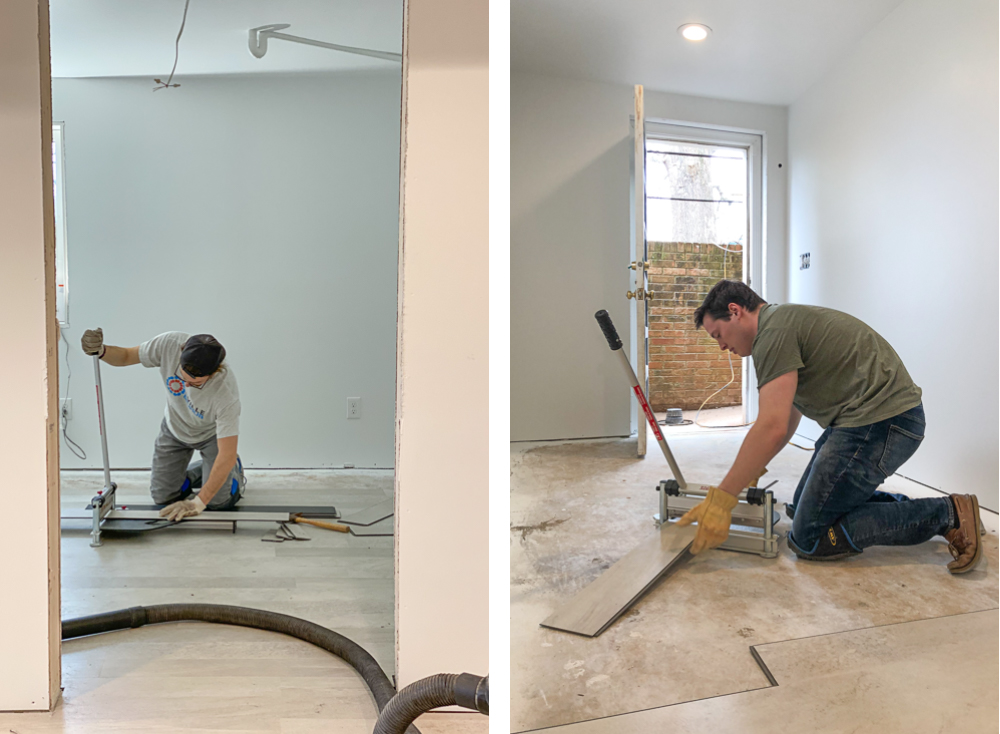
Luckily, our small group leader had installed this flooring before. He generously came over one Friday morning with his floor-cutter and spent almost 6 hours with me, making a huge dent in the flooring. The following day, we shot a full-day wedding, then on Sunday afternoon we were back in the basement (before our engagement session) to finish up the flooring with a friend. I was incredibly sore from all the cutting and hammering on my knees, but we had knocked it out in a weekend and it looked fantastic!
Step 16: Electrical Trim Out | $1,000 | 6 Hours
The counterpart to “rough in” is the term “trim out”. This is where the previously roughed-in plumbing or electrical lines meet their final destination. For electrical, this is when electrical boxes with loose wires became functioning outlets or light switches. This is also when the ceiling lights were finally installed! For the first time in more than two months, we no longer had to rely on portable construction lights or headlamps!
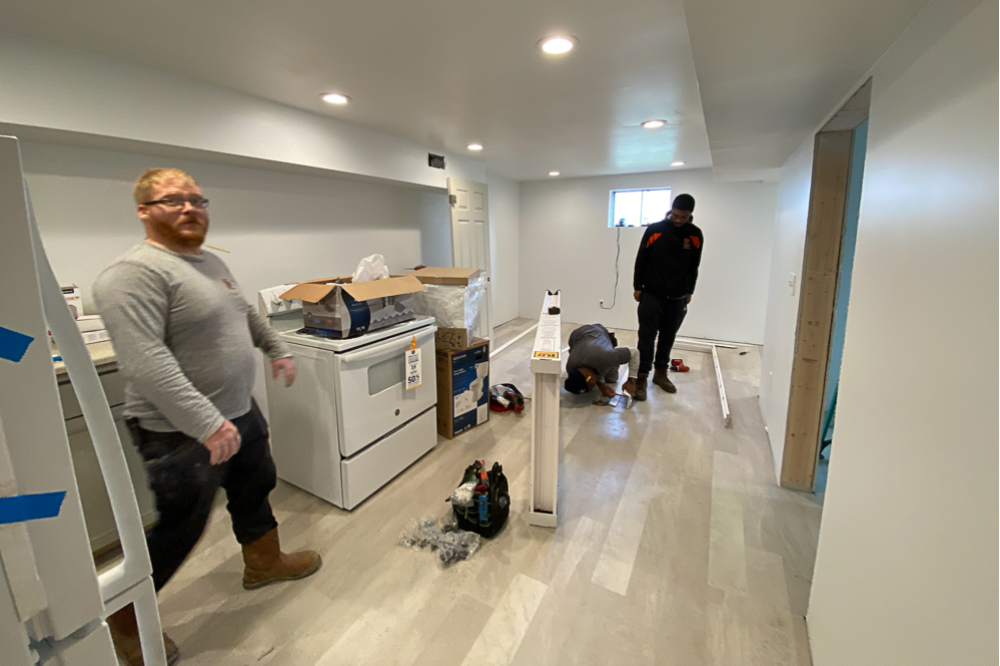
Since we saved so much here again with the help of my parents’ crew, we spent a little bit extra when it came to the lighting in order to fill the space exclusively with LED lighting. We know in the long-run this will save energy and lightbulbs in the future, saving us money (and helping the environment). Things got a bit crazy during the electrical trim out, as it overlapped with carpentry and appliance delivery at times 😂
Step 17: Carpentry | $3,800 | 12 Hours
Although I know my way around a table saw and an impact drill as well as any amateur DIY-er, skilled carpentry was outside of my wheelhouse, and I knew it would take a ton of man-hours. So after a few trips to Lowe’s and a local building supply company, we hired a local handyman who spent almost two weeks straight in the basement tackling all things carpentry related.
That included baseboard trim, cutting and hanging all the interior and closet doors, building and mounting window wells, cutting and installing the countertop, plus installing all the window and door casing. There were a lot of trips back and forth to Lowe’s during this process, as we always seemed to find “one more thing” that we hadn’t thought about initially. But our carpenter continued to work, even when COVID-19 struck in mid-March and working became slightly more dangerous for him. And of course, since we were serving as our own general contractors, nothing was a standard size 😂
Step 18: Plumbing Trim Out | $1,300 | 2 Hours
Now that the kitchen countertop was installed and the sink was in place, the plumbers could get all of the water running. The hardest part of this step was picking out which fixtures we’d use throughout the house! We went with a simple brushed nickel throughout the kitchen and bath (a silver/chrome color, but not as shiny). The plumber and his team had everything installed and running, including the water-efficient toilet, in just a couple of hours.
And with that, on March 27th — 11.5 weeks after we had started — our professional contractors were done! The place was technically “finished”, although it was still pretty far from move in ready.
Step 19: Appliances | $900 | 3 Hours
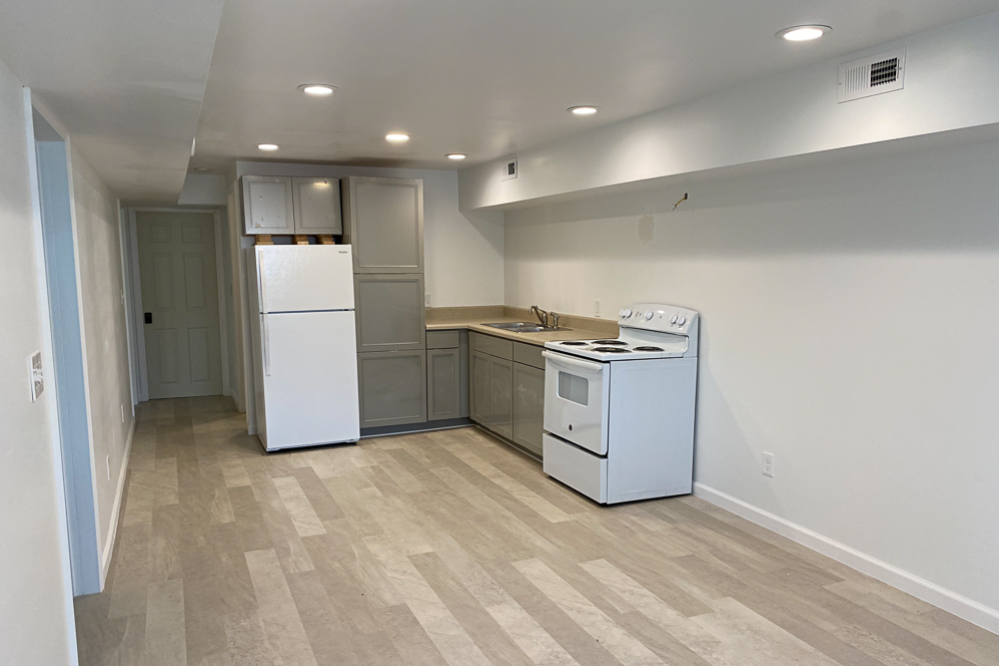
Just like the previous step, picking out our kitchen appliances took much longer than actually hooking them up. Lowe’s was kind enough to deliver them right to the basement and unload them in place! Which would have been great if the microwave hadn’t been damaged when it arrived 😑 So I drove to Lowe’s to exchange the microwave for an undamaged version, then a few hours later, Sarah and I decided that an over-the-range microwave wasn’t going to fit, and I returned it again 😂
But in the end, we went simple and we stayed white to keep the space as bright as possible, even without a ton of natural light. It really pulled the kitchen together nicely!
Step 20: Finishing Touches | $500 | 60 Hours
This may seem like a ridiculous number of hours, but this was one area that Sarah and I had to handle completely on our own. And you wouldn’t believe the number of little things that were left. For starters, all of the doors in the apartment, as well as the baseboard trim and the casing around the windows and doors ALL had to be painted with two coats of paint. Sarah tirelessly attacked that project night after night and on our free afternoons so that we could finally get furniture in without worrying about getting paint on it all.
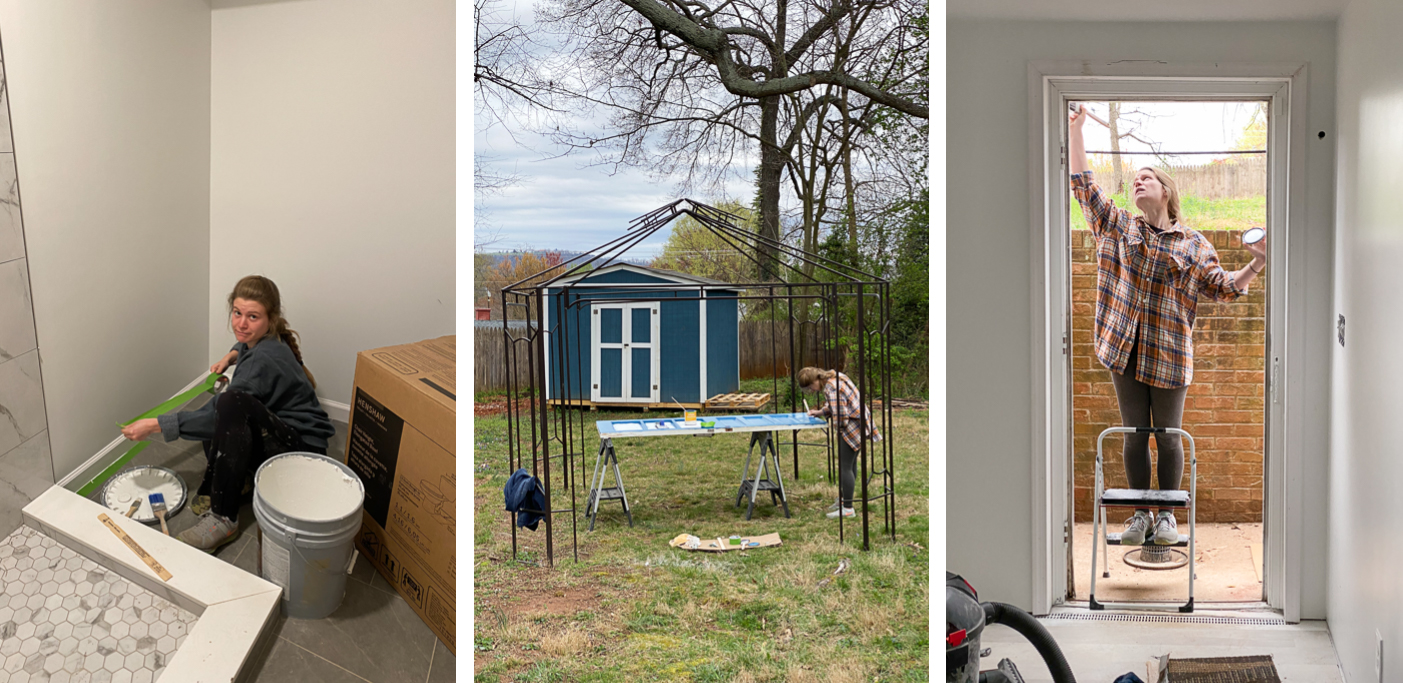
And while she tackled the painting, I took on the million little things that were left. I had to mount the boards in the bedroom closets so that there was a rack to hang clothes on and a shelf for our guests. I mounted the towel racks and medicine cabinet in the bathroom. I hung galvanized metal piping in the bathroom to serve as an industrial shower curtain rod. I hung a shelf in the kitchen for additional glassware and decorations. I mounted handles on all the doors and cabinets. I hooked up the electronic locks so we could control access to the basement. I cut a hole in the tall cabinet to hide the microwave away. Etc, etc.
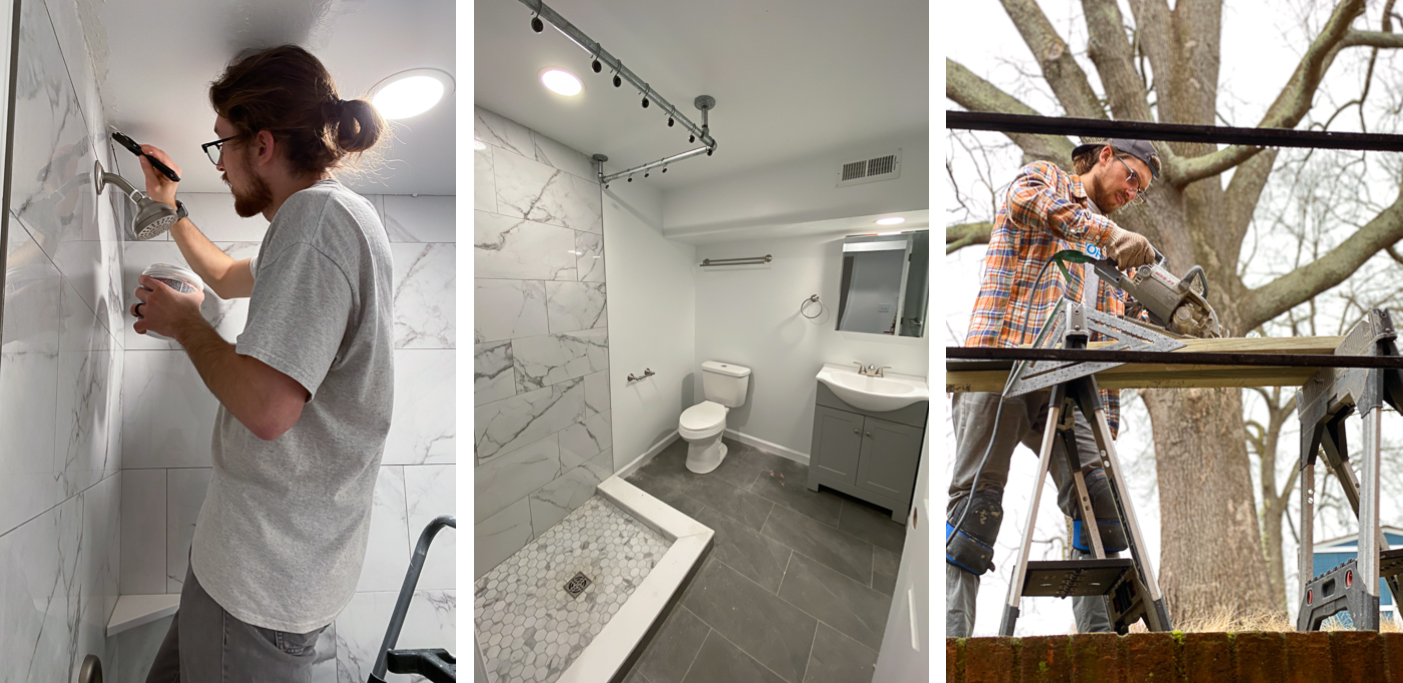
Like I said, a million little things, and it all added up to two or three full weekends of work down there. If it hadn’t been for the calendar-clearing pandemic, it would’ve taken us several weeks longer to complete these finishing touches!
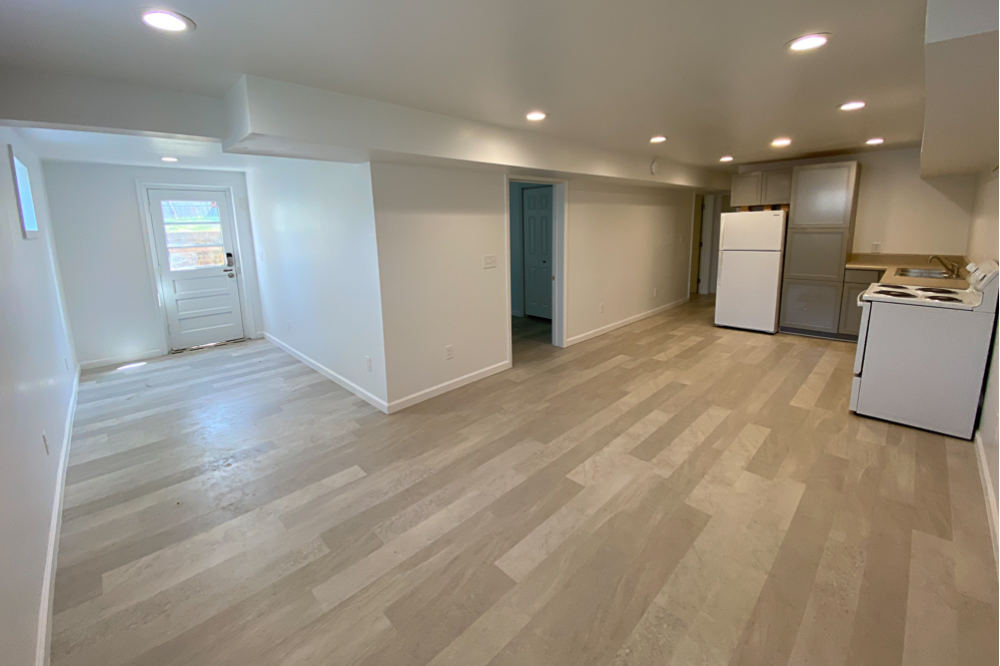
Step 21: Furnishing | $2,500 | 30 Hours
This was another area where we got really lucky. My parents were in the process of downsizing, so we scored a ton of free furniture. The only caveat? We had to drive to Williamsburg, rent a Uhaul, and transfer it back to C’ville ourselves.

Honestly, it was a small price to pay for all the free stuff. The bedroom set in one of the bedrooms was mine from my childhood bedroom, and the dishes and silverware are the same that I had used for years with my family 😂

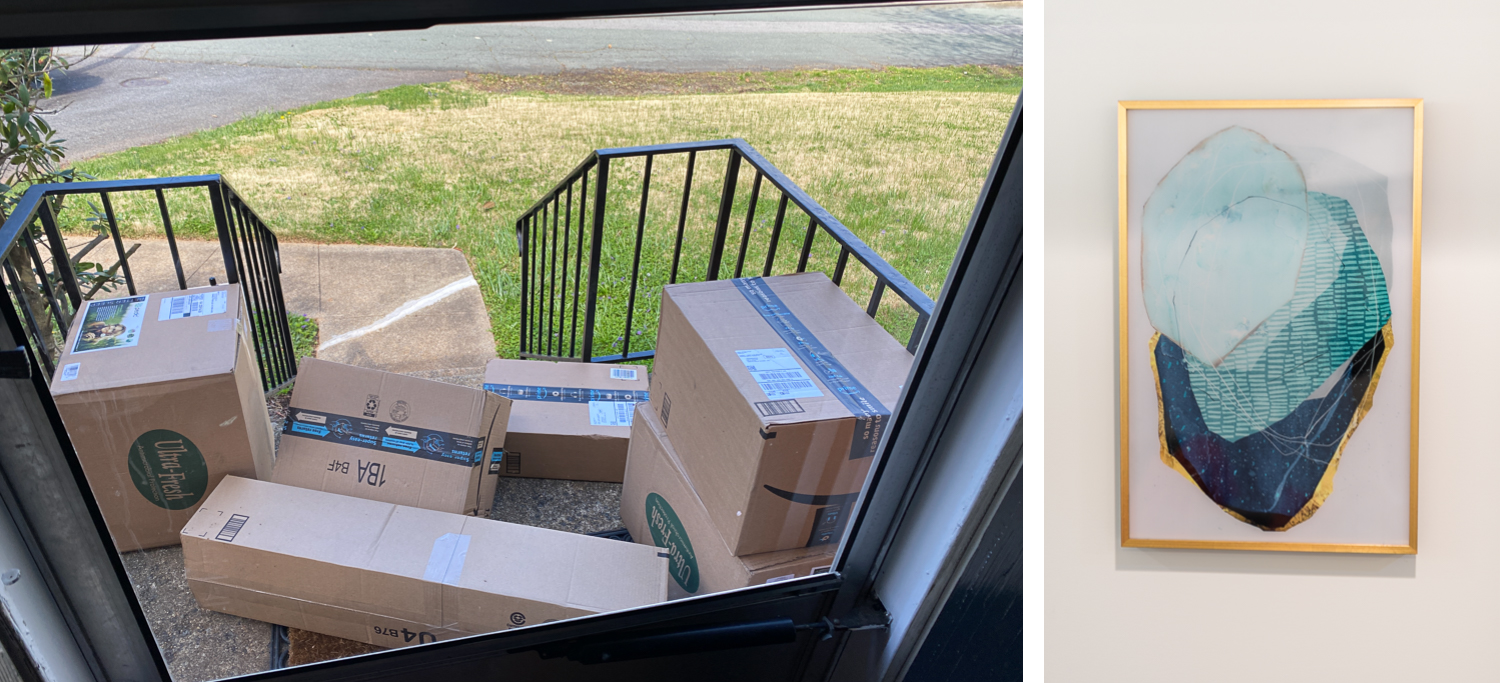
But of course, we still had plenty of pieces we had to purchase, including one new mattress and bed frame, as well as all of the smaller items like pots, pans and utensils to fully-stock the kitchen. And we may have let ourselves go a little crazy when it came to decorating the place with wall art that we felt matched our bright and modern aesthetic. But of course, because of the quarantine, everything had to be ordered online!
Final Count | $60,300 | 303 Hours
In the end, we couldn’t have been more proud of the space, or what we had accomplished.
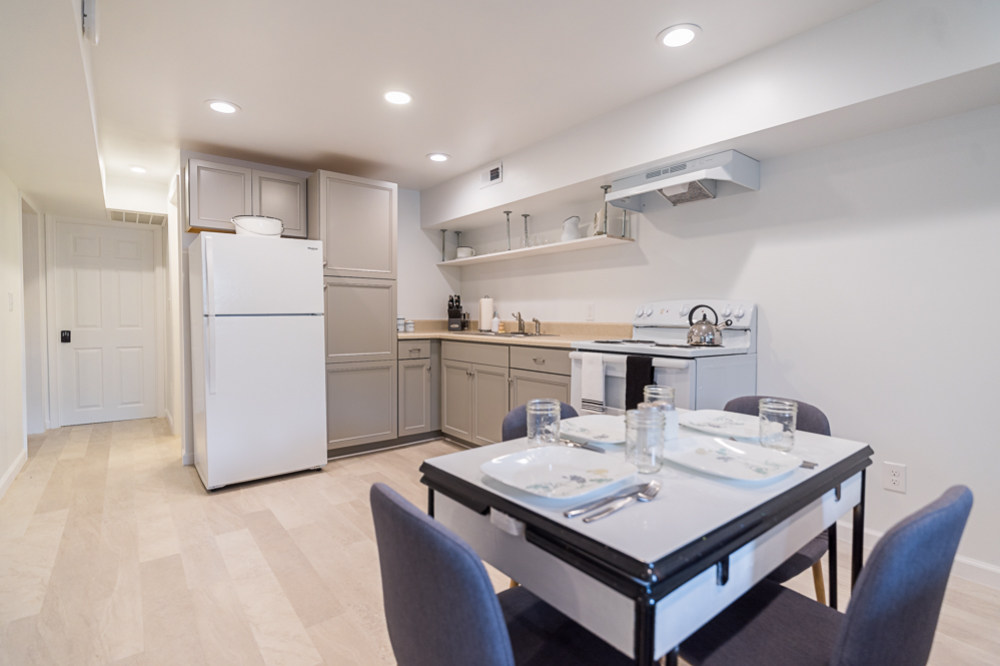
On the morning of Sunday, April 19th, we hung the final pieces of art on the walls and plugged in the appliances. By 4:00 pm that afternoon, our first AirBnB guests had checked-in! We were DONE!
LESSONS LEARNED
Here are just a few quick lessons we learned throughout the process of renovating:
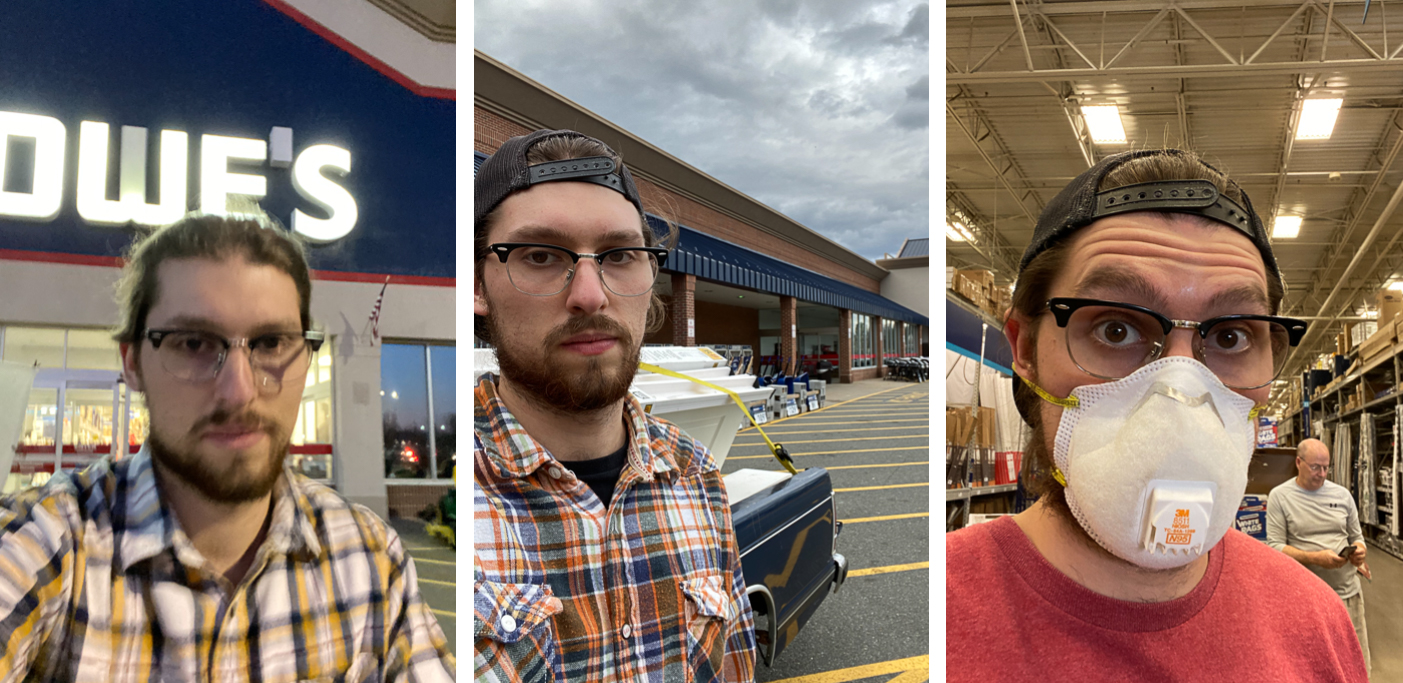
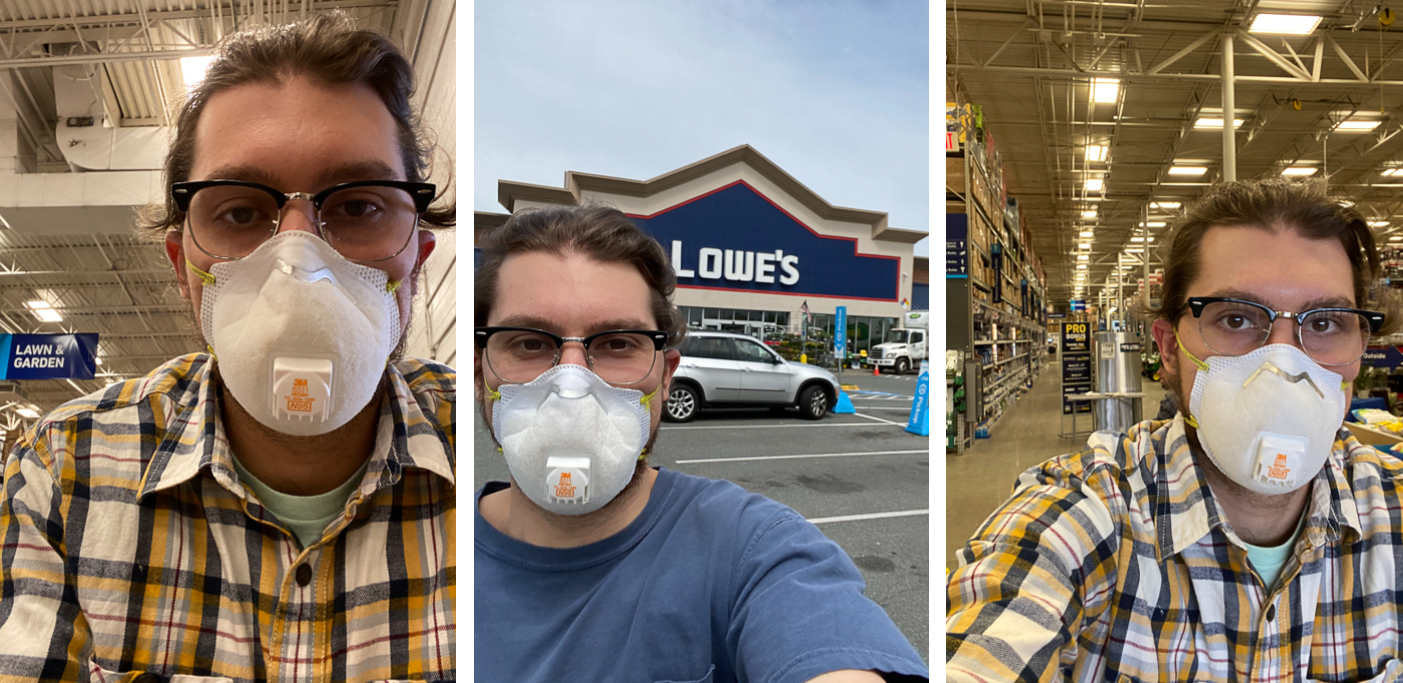
1. You will make a lot of trips to the hardware store – In the 15 weeks that we spent on this project (not including planning) we took over 25 trips to Lowe’s. Almost half of them saw me wearing the N95 mask that I just happened to purchase for painting, less than 2 weeks before the quarantines began in America.
2. When it comes to contractors, you get what you pay for – When we were walking through our home with a home inspector and our realtor, we got talking about contractors, and he gave us a warning: “If you pay with peanuts, you get monkeys.” In other words, if you find someone who doesn’t charge much, it’s probably for a reason. Sure, sometimes you get a great deal. But sometimes, you just got some cheap work. We found that out of the following three priorities, you only get to choose two: work done professionally, work done quickly, or work done inexpensively.
3. For an entrepreneur, sometimes saving money isn’t worth it – As you noticed from the list above, there were a lot of things we hired others to do. Electrical work and plumbing are a no-brainer, but there were some that we probably could have learned to do ourselves. However, just because we could have done them ourselves, doesn’t mean it would have been right to.
For example, our framer spent 20 hours in our basement and framed the entire apartment for $500. Could I have watched a ton of YouTube videos, gotten advice from friends, and framed the entire thing myself? Probably. But there’s no way it would’ve taken me 20 hours. After the learning curve, the trial and error, and all the trips back and forth to Lowe’s, it probably would’ve taken me closer to 50 hours. And in the end, I would’ve missed things that my lack of expertise blinded me to. All that for $500?
If you offered to sell me 50 hours of extra time for $500, I’d take that deal in an instant. We can make $500 doing what we’re actually experts at (running a successful wedding photography business) in far less than 50 hours, or we can use that 50 hours to hustle in our business and make way more than $500. Of course, it’s totally different for someone who works a 40-hour job and has no control over how much they make, but we thought about our “hourly rate” a lot during this project.
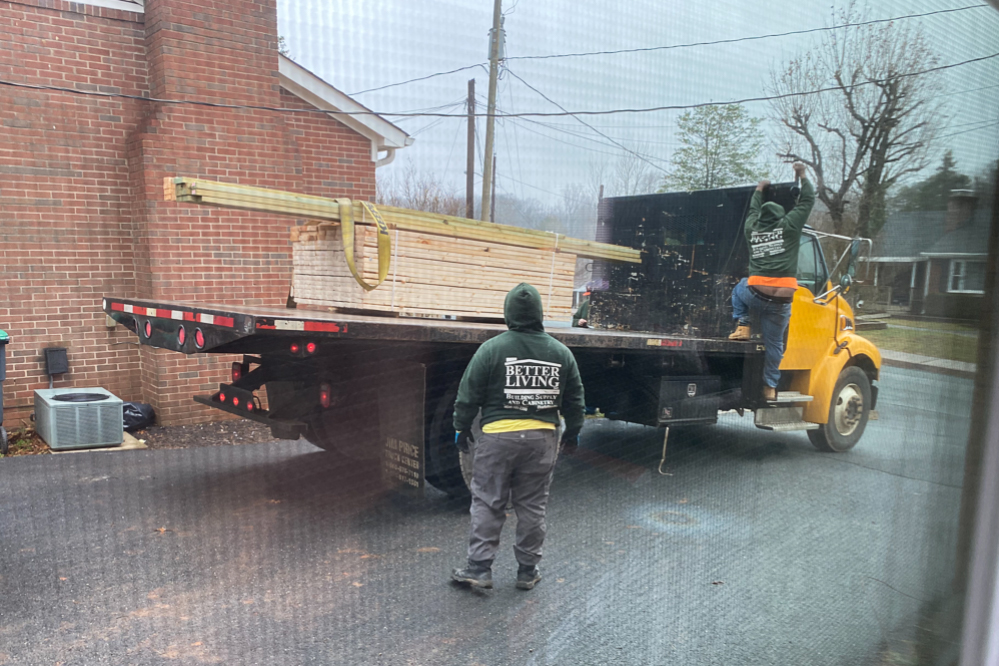
4. Being a general contractor takes up a lot of time — and head space – across the 15 weeks of this project, we spent almost exactly 20 hours per week on average. If it hadn’t been the winter (the slowest time of the year for wedding photography), there’s no way we would have been able to complete this project so quickly. And even more than the time was the amount of brain space the project took up. For most of those 15 weeks, thinking or talking about the next step and the next project we had to do felt like all Sarah and I did! But we know that we saved tens of thousands, and learned a lot in the process.
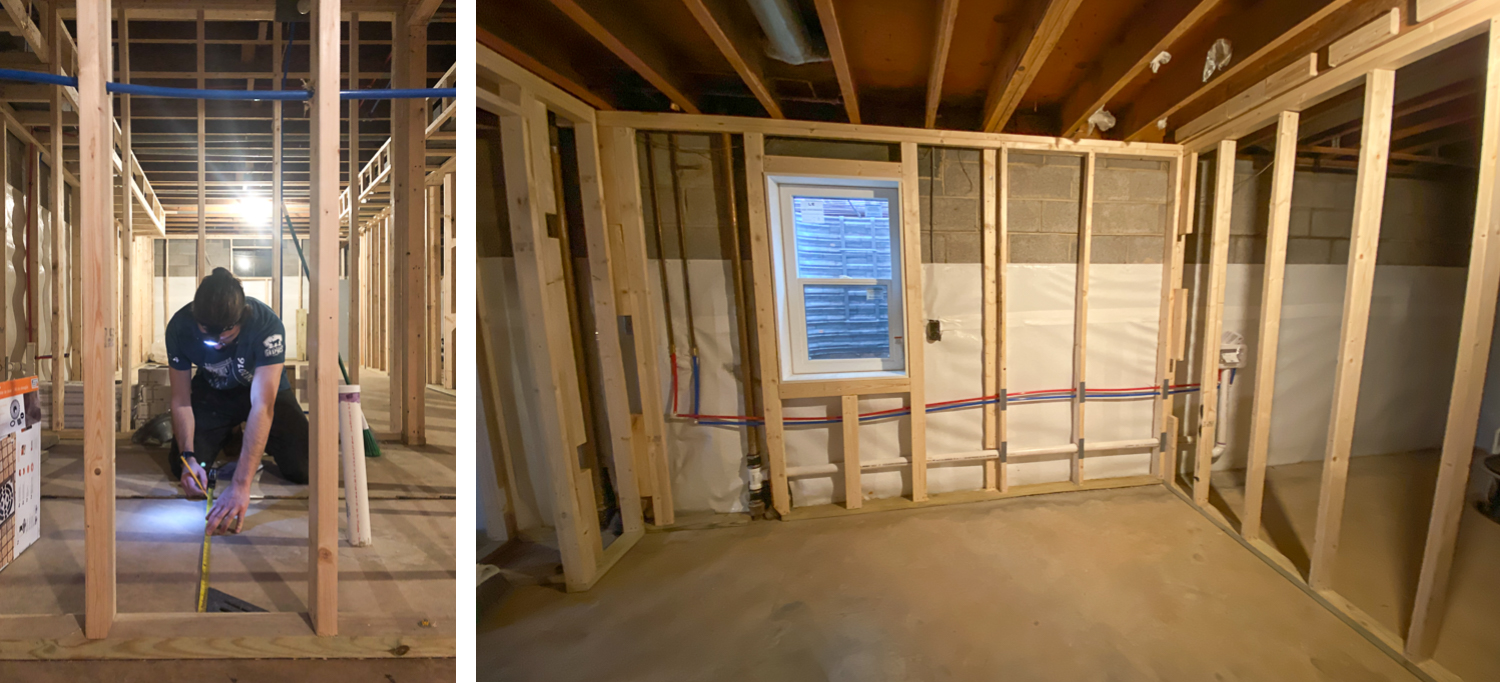
5. Everything takes twice as long and costs 50% more than you expect – save yourself the heartache later on, and just assume everything will cost more. Maybe we had unrealistic expectations from the start, but even after adding the unforeseen waterproofing into our budget, we still ended up going almost $10,000 over-budget. But hey, it’s an income-generating investment in our future!
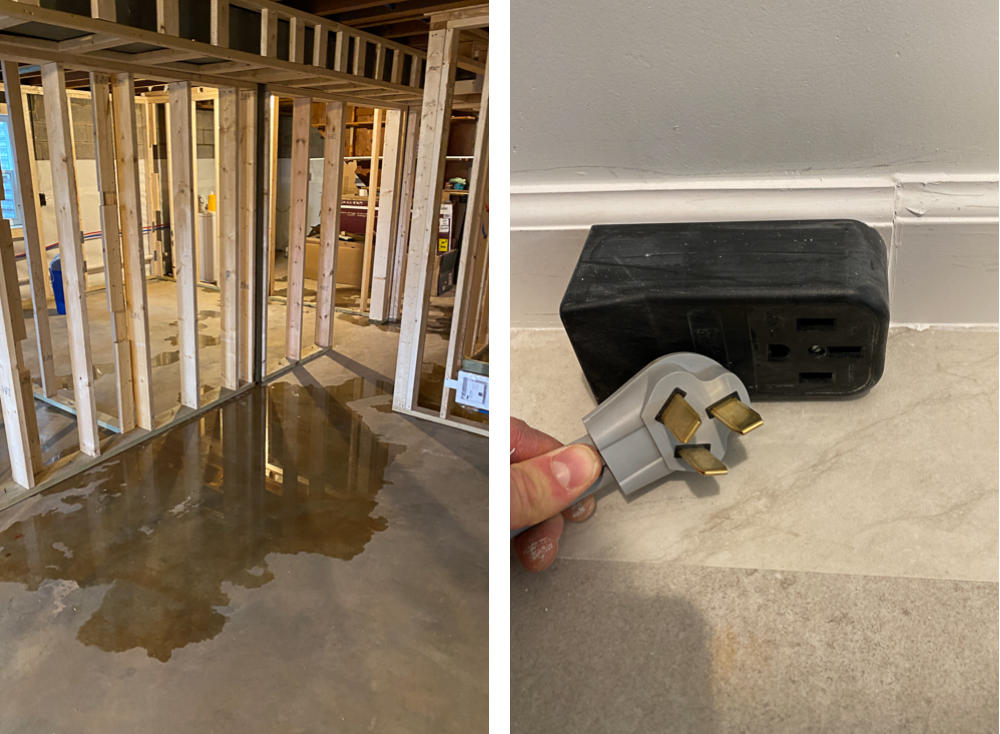
6. Things will go wrong – we woke up one morning to find that we hadn’t hooked the washer up properly to its new location and there was water all over our newly-waterproofed basement. The truck we were borrowing from a friend broke down and we had to push it to a mechanic with the help of a stranger. We installed the wrong power cable to the range – twice. But you learn, shake off the frustration, and keep moving!
7. We still love each other – we renovated our basement and spent $60,000 (basically our entire life savings) in just 15 weeks. Oh, and not to mention that during those same 15 weeks, we met with 21 engaged couples and 2 wedding planners, interviewed 5 new apprentices, and photographed, blogged, edited and delivered 20 portrait sessions and 4 weddings! And we STILL like each other!! Mission accomplished! 😂
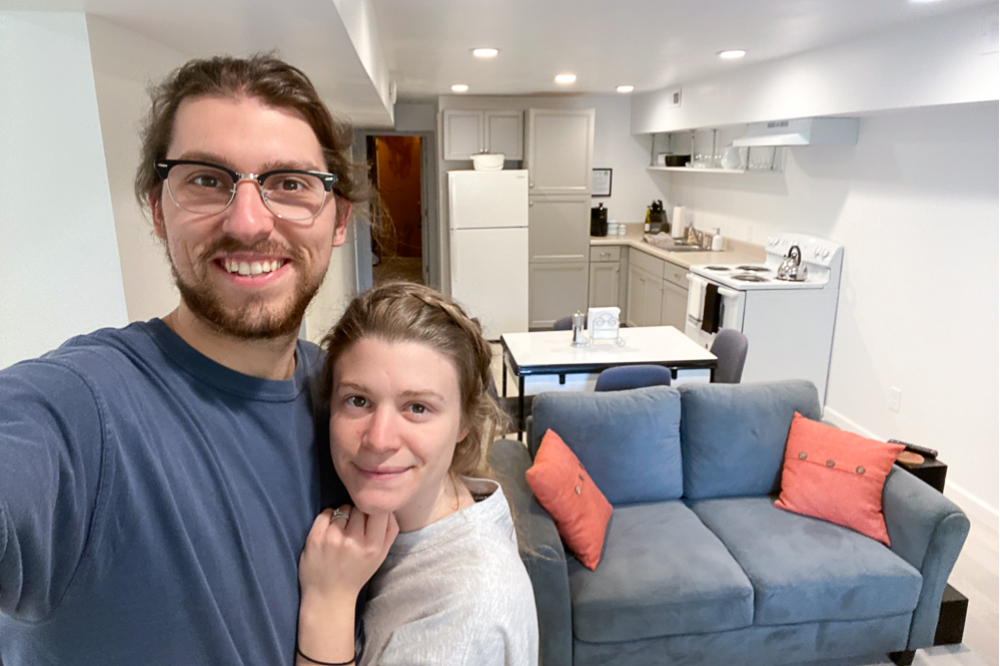
Thanks for following along! We have a feeling that this won’t be our last renovation adventure (check out our upstairs bathroom reno here!), but for now, we hope you enjoyed! Oh, and if you’d like to experience the space firsthand and need a place to stay in Charlottesville, click here to check out our listing on AirBnB! Be our guest!
Vendor List
For those that have been asking, here are all the awesome vendors we used who we would recommend! Let them know we sent you 😉
- Foundation & Waterproofing Work: JES Foundation Repair
- Egress Windows + Window Well: EgressWindows.com
- Foundation-Related Plumbing: Beck-Cohen
- Masonry & Stone Work: Gerardo Telez with Stonescapes by Gerardo, (540) 406-7082
- Buildy Supplies: Better Living Building Supply & Lowe’s & Home Depot
- Framing: Hector Mendez, (434) 825-7824
- Drywall: Doug Lilly, (434) 566-1615
- Carpentry/General Handyman: Tim Banks with Banks Handyman Services, (434) 305-6153
- Home Automation/Low Voltage Electrical: Protection & Audio/Video by Design, (757) 258-1285
- Advanced Electrical Work: Michael Basford with Basford Electric, (757) 876-8320
- Cabinets: Lowe’s
- Tile & LVP Flooring Supply: Thomas with SeriSand Tile, (434) 964-4680
- Tile Install: Jorge Calderon with Jorge’s Tile, LLC, (434) 987-2033
- Plumbing: Phillip Jamerson with Jamerson’s Plumbing, (434) 987-8698
Filed in:
Wedding Photography & Photography Education
Charlottesville, Virginia and Beyond
HOME
ABOUT US
WEDDINGS
JOURNAL
FOR PHOTOGRAPHERS
PRESS & PRAISE
BLOG
CONTACT
e. hunter@hunterandsarahphotography.com
p. (434) 260-0902