VIEW BY CATEGORY:
Hi, we're Hunter and Sarah, a husband-and-wife, luxury wedding photography team. We’re also educators, helping other photographers build profitable and sustainable photography businesses.
MEET US
LOOKING FOR SOMETHING?
Post Production Secrets Step 3: Have You Been Culling/Selecting Wedding Images WRONG this Whole Time?!
April 21, 2022
—
Hey photographers! Welcome back to our series all about culling and editing wedding photos: Post Production Secrets! We know that turning a few thousand raw files into a beautifully-edited, curated gallery of final images can feel like an incredibly daunting task. So this series is all about what happens after the wedding day! If you build these efficient systems from the beginning, you’ll grow and scale your wedding photography business with much less pain. So let’s dive in!
Post Production Secrets Step 3: Have You Been Culling/Selecting Wedding Images WRONG this Whole Time?!
If you’ve been following along with this blog/video series so far, now you’ve backed up your images to a safe place (Step 1), and have imported them into Lightroom and assigned those handy keywords (Step 2). Now, you’re ready for the real work to begin: the cull! In case you aren’t familiar with this term, culling just means narrowing down images and selecting only the best. This is where you’ll take hundreds or thousands of photos that you captured on a wedding day, and narrow it down to the very best that you’ll edit and deliver to your clients. If you’ve ever culled a wedding before, you know that it can be long and sometimes tedious work. Especially if you’re a bit shutter-happy (like most newer photographers are)!
Why Cull in Two Stages?
Last week, when we introduced you to our post production secret of keyword-sorting, we admitted that it’s something that very few photographers do. We also shared all the reasons why we think it’s worth a little extra effort! This week we’re sharing another “secret” that we’ve found saves us time in the long run, even if it sounds like a bit of extra work: a two-round cull. We’ll go into more detail below, but the basic premise is this: during the first round, you separate the “maybe” photos from the “definitely not” photos (blinkers, blurry, duplicates, test shots, etc.). Then, during the second round, you’re separating the “maybe” images from the “absolutely” images!
In our experience, we’ve found the two-round cull (combined with our keywording secret) to be the most effective — and efficient — way to sort a large selection of images down to a more manageable number. The first round is a bit mindless; it’s quick and easy busy-work, so you can crush through it as quickly as possible. The second round, on the other hand, is concentrated, specialized work that takes intentionality and involves decision-making that will affect your final product, and therefore your clients’ experience and your brand. Doing those tasks separately, instead of trying to do it all in one go, will help you do both tasks much more quickly, and do them better while you’re at it!
We might spend 3 hours culling 5,000 images down to 1,500, then another 2 taking 1,500 down to 1,100. And to us, 3 hours of busy work followed by 2 hours of concentrated work sounds far better than 6-8 hours straight of concentrated work where you’re trying to sift through the test shots and misfires, while also making intentional decisions about our best work. Your brain will thank you, and so will your clients!
The First Round Cull
Now, let’s get into the specifics of how this all works. Begin the first round cull by opening up one of the keyword categories that you created when you assigned the wedding day its keywords. We recommend culling the wedding in whatever order you consider to be least-fun to most-fun keywords. So for us, we’re always SO excited to look through our couples’ First Look and Golden Hour portraits, so we save them for last, as a bit of an incentive to get through the less exciting keywords. We usually start with the dancing photos, the reception milestone photos (like toasts and speeches), and the ceremony, since those are usually larger collections of images, and are less photographically creative. But for you, the order may be totally different! If you LOVE culling and editing dancing photos, save them for last!
No matter what order you choose, once you select a keyword category, break the category up further by selecting one lens at a time. Then, go through each category and each lens, one photo at a time, assigning some metric to all the images we want to keep, like pressing the “1” button to make them 1-star images. For example, we’ll start with dancing photos, and cull through all the dancing photos taken with our 35 mm lens, then we’ll cull through all the dancing photos taken with our 50 mm lens, etc. Sorting by keyword and by lens further breaks down the cull into more manageable chunks, and also ensures that during the first round cull, we’re comparing apples to apples. We’re only comparing 35 mm dancing photos to other 35 mm dancing photos. Then, on to the next lens until we finish that keyword. Then onto the first lens with the next keyword. And on and on until you’ve finished the entire wedding!
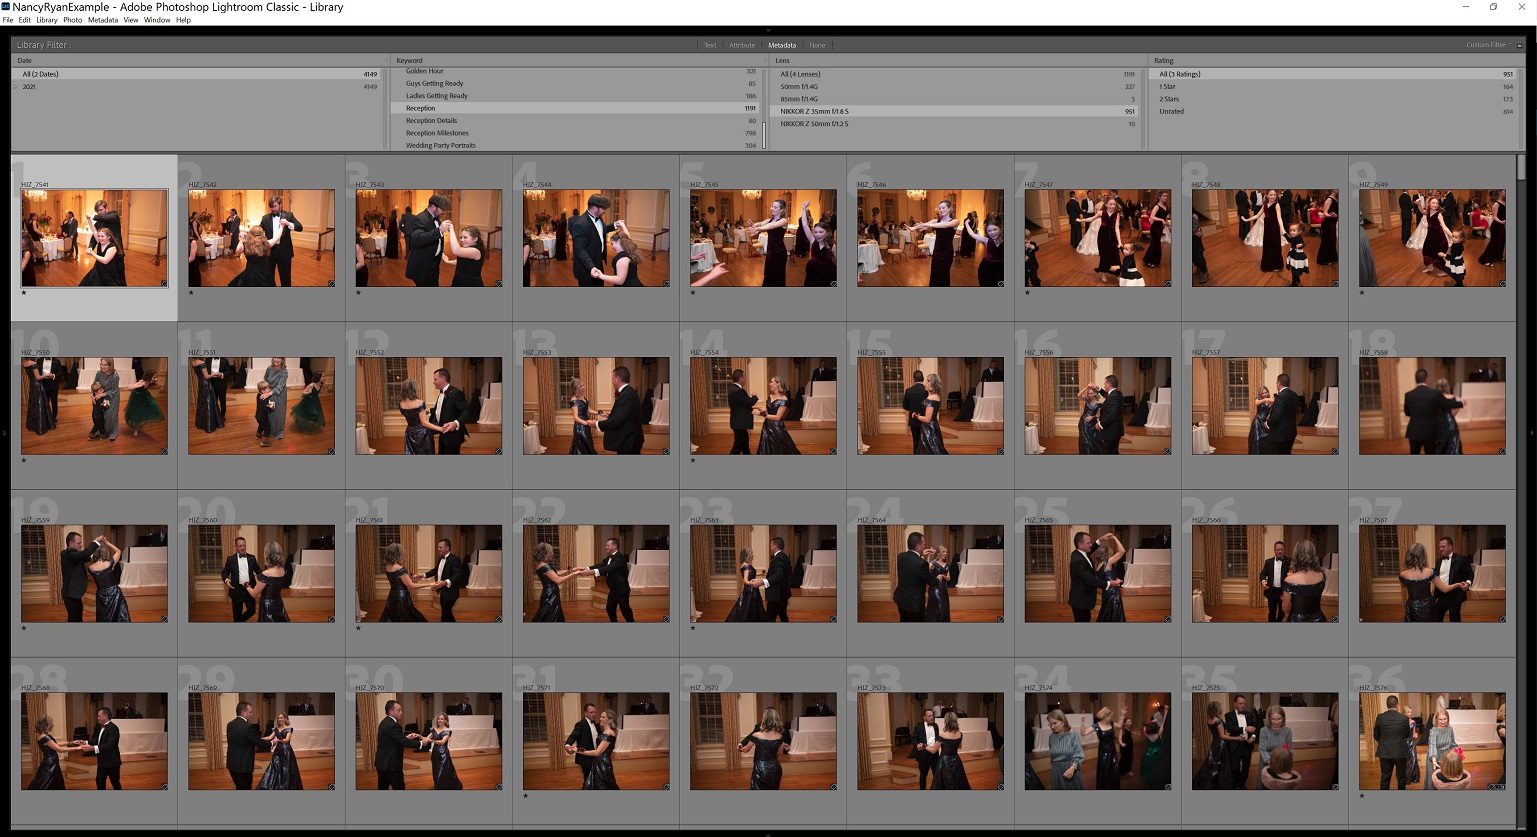
After we’ve done the first round cull for a single lens in a single category (our 35 mm lens in the dancing photos, for example), this is what the gallery might look like. About 1/3 of the images are 1-starred, passing them through to the second round cull.
The operative word with the first round cull is speed. Your goal should be to go as quickly as possible, making split-second, gut decisions for each image. If you have to stop and think about keeping it, just set it to 1-star and move on. After all, 1-star images are your “maybe” images. Images that are blurry, images where your subject is blinking, images that are exact duplicates of something you’ve already 1-starred, or images that are overall just ~meh~ should be skipped over and left at 0-star. These are your “definitely nots”. As you go, you’ll find that you can move more quickly in some categories than in others.
In our experience, less than 30% of what we shoot will make it through the first round cull, but it depends a lot on your shooting style and what part of the day you’re capturing. If you’re one to just hold your finger down on the shutter and take advantage of your camera’s max frames-per-second, that percentage may be even lower. (Also, you should stop doing that during non-action moments. Like, stop doing that… today.) But once you get good at culling, you should be able to first-round cull more than 1,000 images per hour.
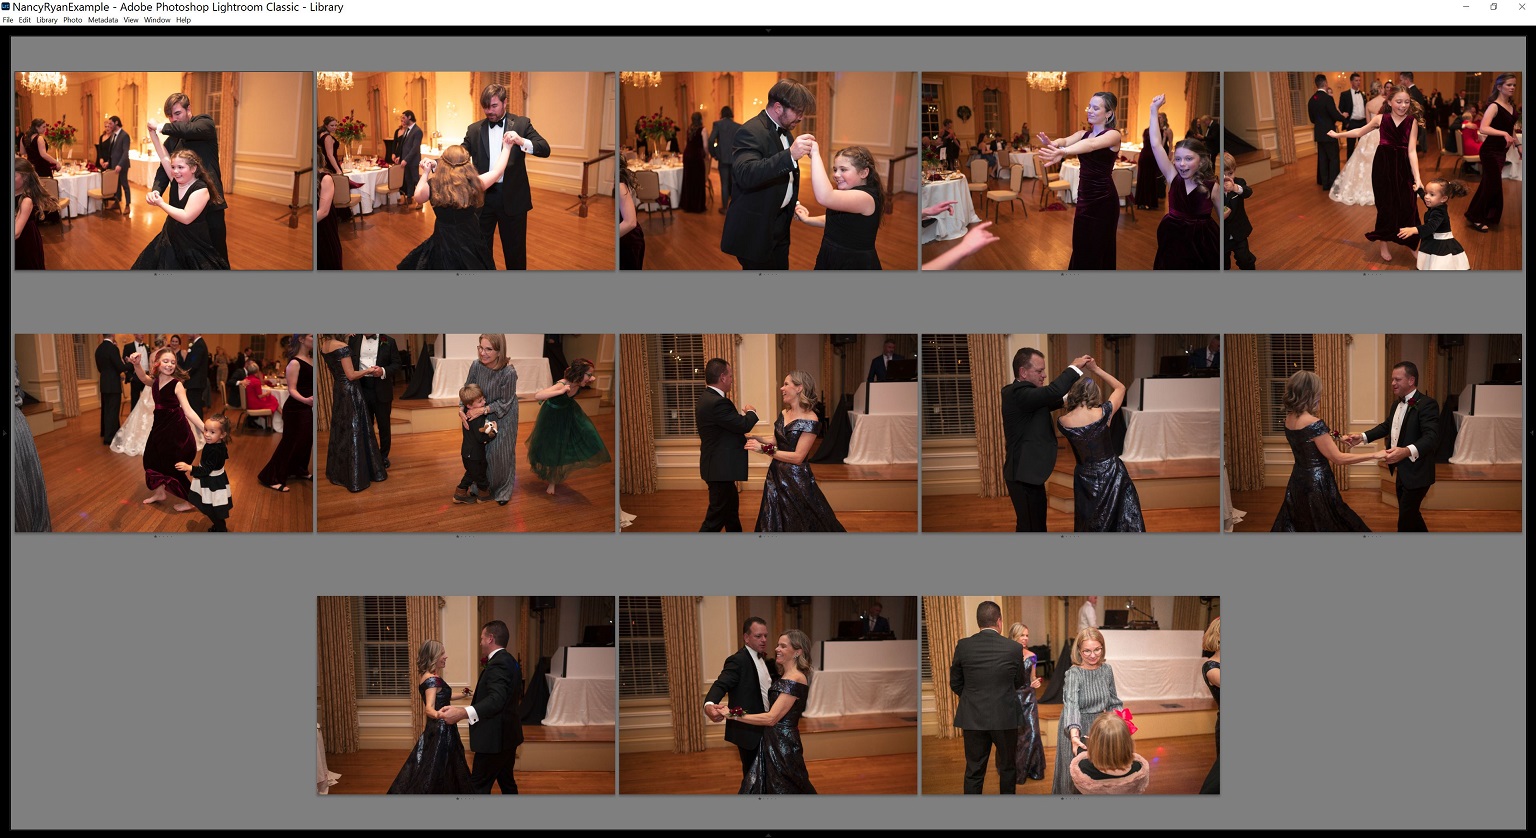
After the first round cull, all 13 of these images are 1-starred. But keep in mind, these are just images from one lens!
The Second Round Cull
Now that you’ve separated the “definitely nots” from the “maybes”, category by category and lens by lens, it’s time to take things one step further. For the second round cull, we still recommend going category by category to break the cull up into manageable sections. However, you DON’T want to separate by lens for the second round.
The whole point of the second round cull is — rather than sifting through misfires or people blinking — you’re selecting your very best images from among your “maybes” of any lens, and assigning them a special marker, like a 2-star status. You’re purposefully comparing apples to oranges in the second round, so only the VERY best images pass through the cull. For example, while doing the second-round cull for the sunset photos, we’re comparing portraits that Sarah took with her 50 mm vs portraits I took with my 85 mm. We’ll deliver many images from both lenses, but not every usable image from both lenses. We only want to deliver the very best to our couples. Trust us, they don’t want duplicates or misfires, but they also don’t want 4 copies of the same image!
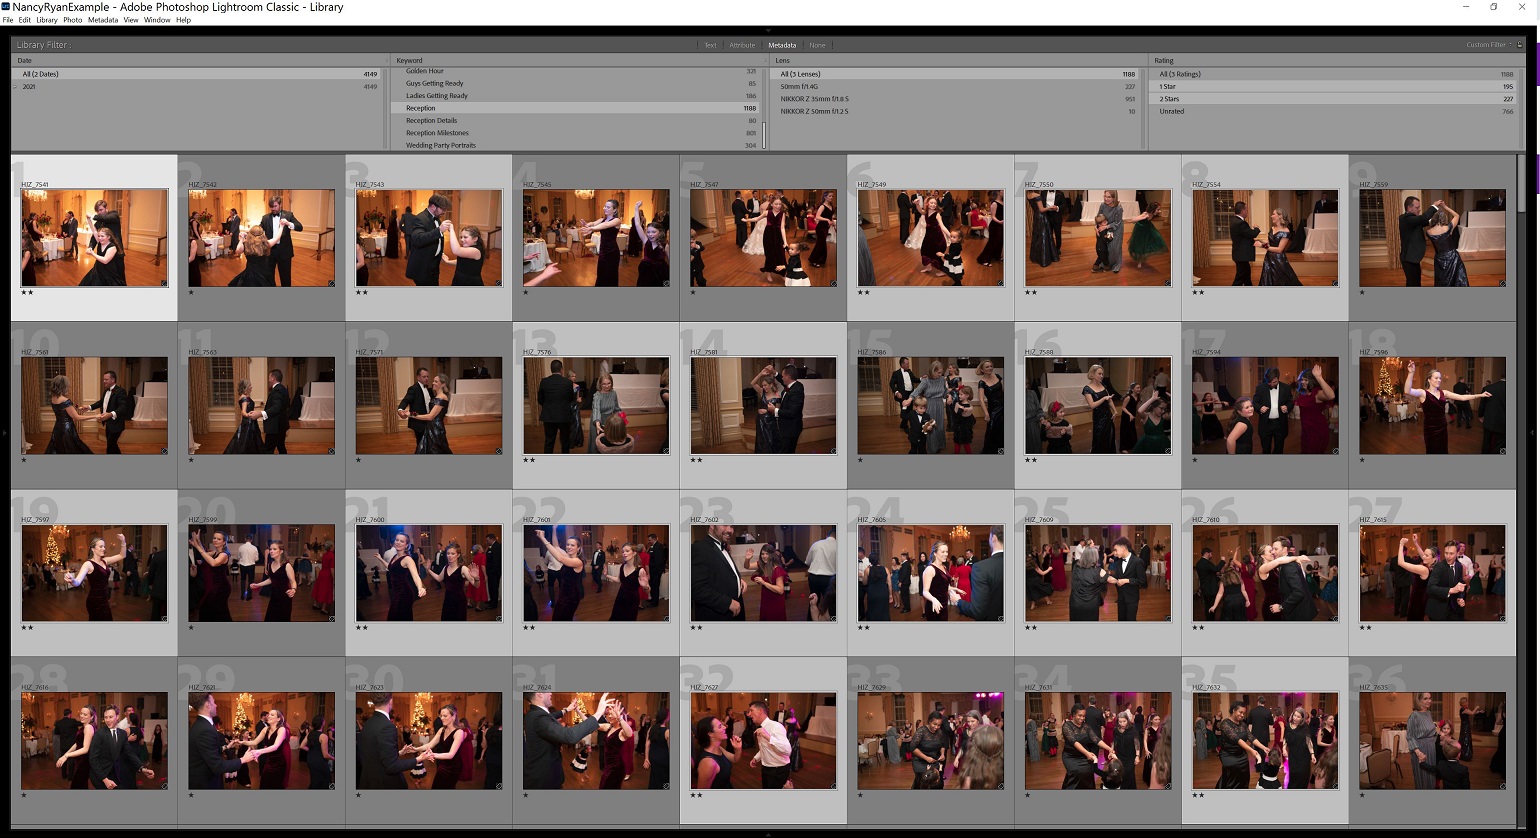
When the time comes for the second round cull, we’re going to consider ALL of the 1-star images from ALL of our lenses, and only select the BEST of the photos from this category! In this example, the 18 images that were passed through to be edited came from an original selection of almost 100 images from 3 different lenses.
This is why we like to separate the cull into two rounds. The intentionality of the second round is very different from the first round’s sifting-through-the-meh-stuff, and your brain will thank you for not trying to do so many things at once. Keep in mind as you cull that everything you select in the second round (all the 2-star images you’re left with at the end of the second round cull) will go on to be edited and delivered to your clients!
If culling a wedding were like mining for gold, the first round cull would be panning out in the riverbed: it doesn’t take a specialist to tell the difference between a nugget of pure metal and a piece of brown dirt, just someone who knows what to look for. However, the second round cull would be like an experienced jeweler examining the nuggets with a magnifying glass, in order to separate the best and purest gold from the shiny rocks. This takes a specialized hand, and lots of concentration. You wouldn’t want the experienced jeweler looking at every single piece of dirt in the riverbed with high-levels of concentration and expertise — it would take forever! But you also don’t want to just accept every single shiny rock that isn’t dirt, because that would lower the overall quality of your final product! Sarah and I would rather deliver a wedding gallery of 750 incredible images, than a gallery of 1,500 photos that includes 50% great photos and 50% photos that are just okay.
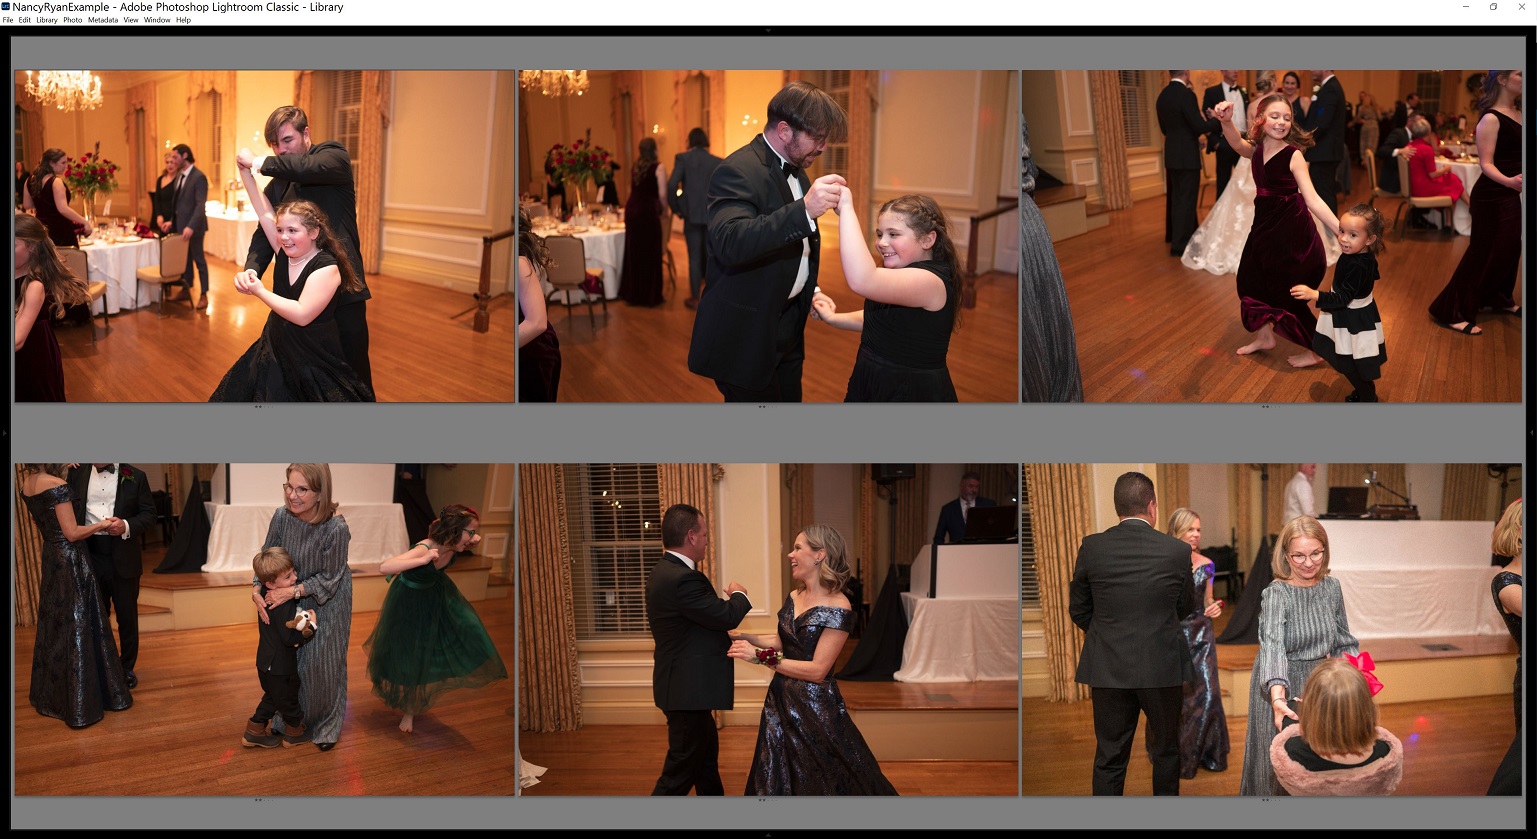
After the second round cull, only these SIX images are left from the first 36 images we looked at (those taken with the 35 mm)!
Final Tips for Culling a Wedding
For the entire post-production process, efficiency is so important. If you waste just two hours per wedding, when you’re shooting 20 weddings per year, that’s like throwing away an entire week of work! If you wasted 4 hours per wedding while shooting 40 weddings per year, you just gave up an entire month of your life to inefficiency! This is why the environment that you work in is as crucial as your systems. Because the first round cull is relatively mindless, we’ll often listen to music, a podcast, or an audiobook while we do it. Bonus points if the podcast or audiobook is about business or photography! But during the second-round cull, we recommend turning off any distractions, save for maybe some instrumental music that’ll help you concentrate.
We know that listening to stimulating (or entertaining) content can actually help you stay focused and get you through a cull more quickly. After all, if you’re super bored while you cull or edit in silence, you’re more likely to take a “quick break” that ends up wasting 45 minutes scrolling through social media. However, throughout the entire process, watching TV, YouTube, and Netflix are 100% off-limits. If your eyes are darting from your laptop screen to the TV even just once every few seconds, these breaks in concentration can add up quickly to turn a 5-hour cull into a full 8-hour day. You’d be better off just knocking out that cull, then doing something you enjoy (whether it be TV or otherwise) with all that time you saved!
There’s another way to improve this process if you work on a team, like Sarah and I do. Consider separating the two rounds, so two different people have eyes on the wedding day. So Sarah might do one round, and I’ll do the other. This not only breaks up the work, but gives an additional set of eyes — and a fresh perspective — on your shooting. If you have an assistant or are beginning to outsource your work, because a first round cull can be more easily taught than the second, the more experienced photographer (you) should do the second round cull. Leave the first round cull to them, and keep the skilled, brand-conscious second round cull for yourself!
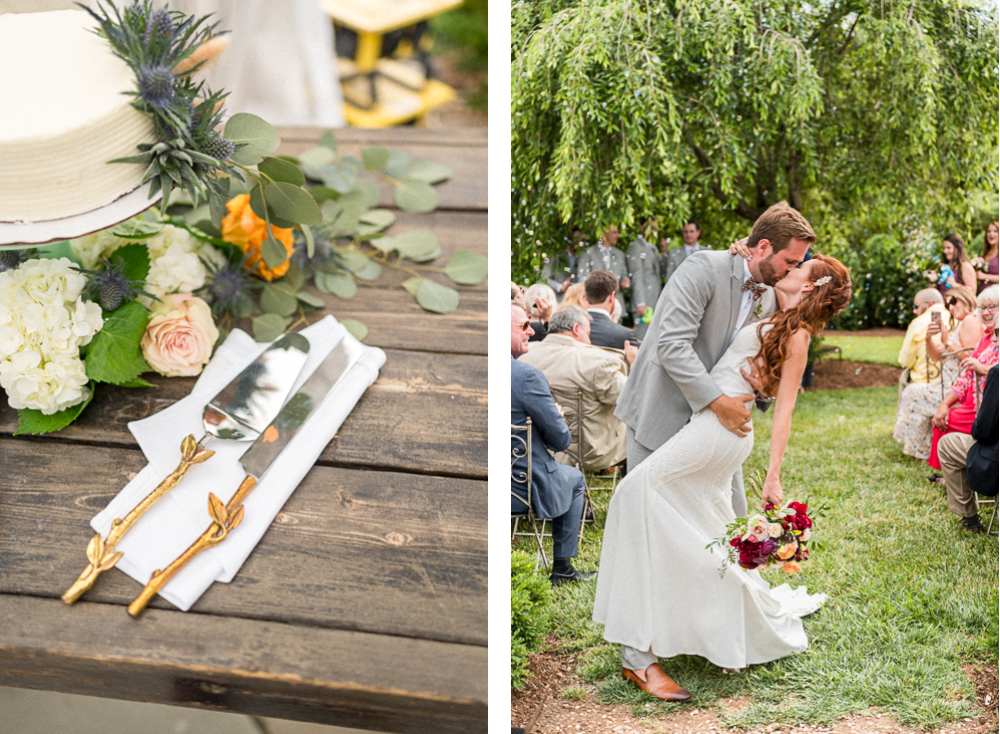
Boom! Before you know it, your cull will be finished. That wasn’t so bad, was it? In the next segment, we’ll talk about a very important step that comes before the editing begins. But until then, happy culling!
Want More?
Click HERE to get your free copy of our eBook: “5 Essential Tips for Turning your Side-Hustle into a Full-Time Photography Business.” You’ll also be subscribed to our newsletter, so our newest content, weekly encouragement, and exclusive offers will be delivered right to your inbox!
—
Check out the other segments in this blog series!
-
- Post Production Secrets Step 1: Best Backup System for Wedding and Portrait Photographers
- Post Production Secrets Step 2: How Keyword Sorting in Lightroom Will Change Your Life
- Post Production Secrets Part 3: Have You Been Culling/Selecting Wedding Images WRONG this Whole Time?!
- Post Production Secrets Step 4: Maximize Your Client Experience with Sneak Peeks And Blogging
- Post Production Secrets Step 5: How We Quickly Edit 1,000s of Wedding Photos in Adobe Lightroom
- Post Production Secrets Step 6: Best Photo Delivery Service for Wedding Photographers
Filed in:
Wedding Photography & Photography Education
Charlottesville, Virginia and Beyond
HOME
ABOUT US
WEDDINGS
JOURNAL
FOR PHOTOGRAPHERS
PRESS & PRAISE
BLOG
CONTACT
e. hunter@hunterandsarahphotography.com
p. (434) 260-0902
