VIEW BY CATEGORY:
Hi, we're Hunter and Sarah, a husband-and-wife, luxury wedding photography team. We’re also educators, helping other photographers build profitable and sustainable photography businesses.
MEET US
LOOKING FOR SOMETHING?
Best Aperture for Portrait and Wedding Photography (Shooting in Manual Part 2)
December 22, 2022
—
If you want to understand how to use your DSLR or mirrorless camera, and take better images, then learning to shoot in manual is a great place to start! In today’s blog, we’re teaching all about aperture, one of the three fundamental controls you have over your camera, and how you can use it to get images with those dreamy, blurry backgrounds.
Last week, Sarah and I introduced you guys to aperture. We talked about what it is, why it’s important, and how it affects both the light and the depth-of-field of the images you take. Now, this whole blog series about shooting in manual is going to really build on itself with each post, so if you missed last week’s introduction to aperture, we’d recommend going back and checking that one out here!
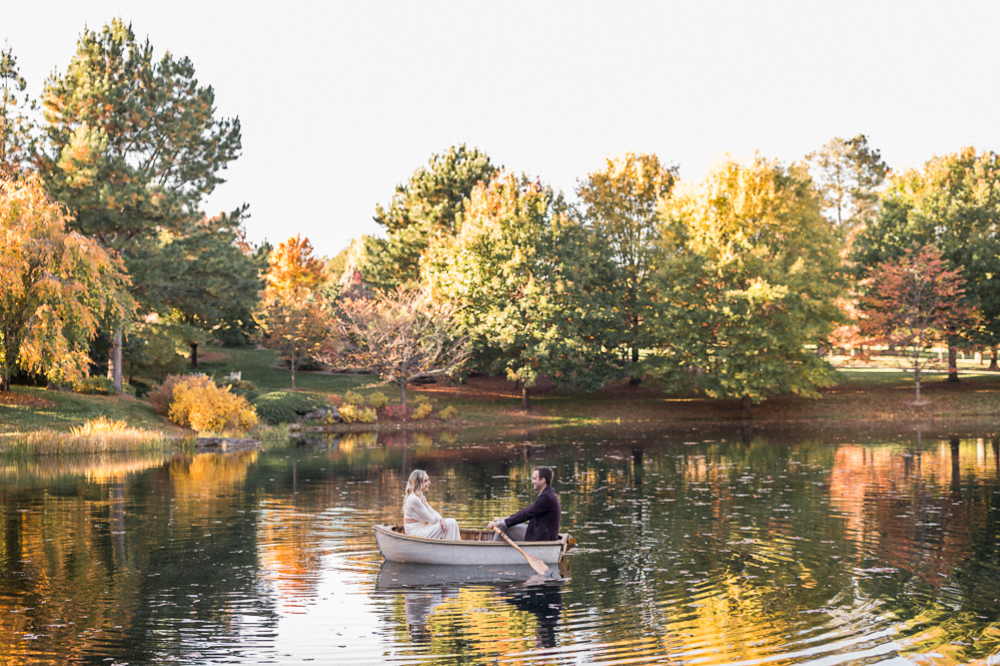
Low Aperture —> Blurry Backgrounds and Subjects that POP!
Speaking of old posts, almost a year ago, Sarah and I shared a blog series with you all called Camera Bag Essentials, where we talked all about the gear that a newer photographer may need as they grow their portrait business and expand into weddings. If you saw Part 1 of that series, you know that, as we talked about prime lenses — which have the ability to capture images with a wider aperture than zoom lenses — we made a pretty bold claim.
We said that one of the best ways to make your images look more professional than what people can take with their iPhones is by taking images with a more shallow depth-of-field. This is what portrait mode tries (and honestly fails) to emulate digitally. We even showed this exact example below, where the image on the left was taken by one of our Apprentices at f/5.6, and the image on the right was taken at f/1.8. Even though both of these were taken with a focal length of 85 mm, the couple really POPS more in the image on the right.
That is the power of understanding depth of field, and how you can use lower apertures to achieve this look. And by the way, if the lens that you’re using doesn’t go any lower than f/2.8 or even f/3.5, then it might be time to invest in a prime lens, which you can learn all about by checking out that video we just mentioned — Part 1 of our Camera Bag Essentials Series!
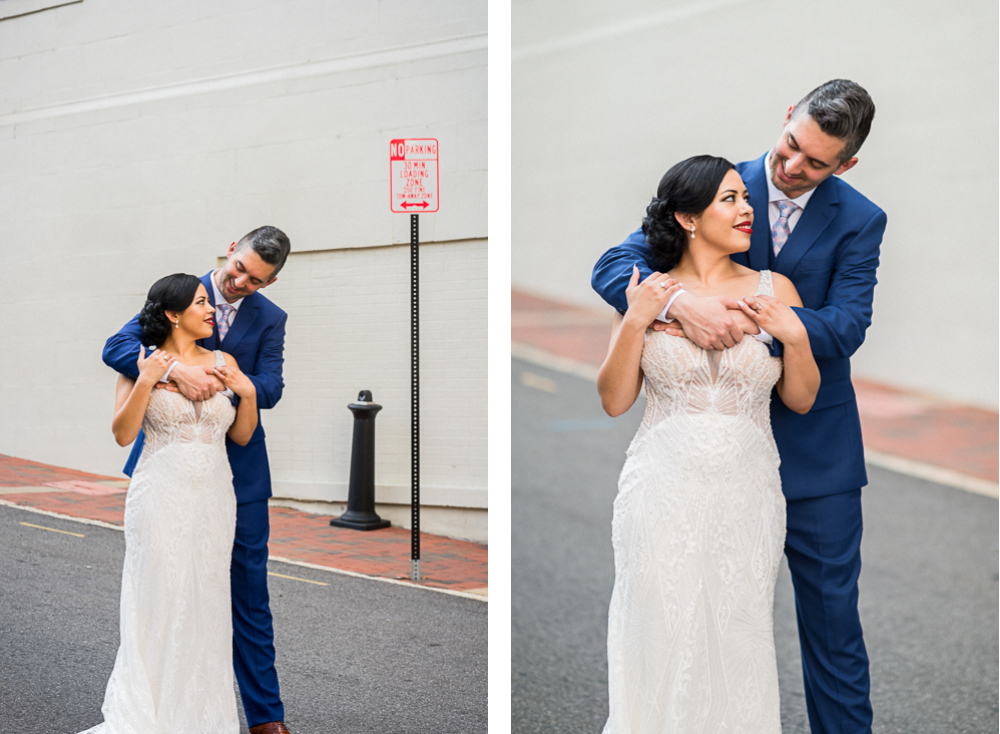
In the comparison above, the photo on the left was taken by one of our apprentices at f/5.6. Notice how the sidewalk and the no-parking sign are in pretty clear focus? Now look at the photo on the right, taken at f/1.8. Notice how blurry the sidewalk is, even though both of these images were taken with 85 mm lenses?
Best Aperture for Portrait Photography
Now, right at the start, there are NO perfect camera settings for every situation. There is no right answer to the question, “How should I set my settings for a portrait session”, because it’s going to depend on how many people are in the image, how much ambient light there is while you’re shooting, and a ton of other factors. Knowing how to interpret a scenario and set your settings accordingly is what learning to shoot in manual is all about! It’s definitely a challenge and can feel overwhelming when you’re just getting started, but trust us, over time, it becomes like second nature.
And just because there’s no one-size-fits-all approach to setting your aperture, shutter speed, and ISO doesn’t mean we can’t give any guidance. Especially when it comes to aperture, where our goal is to keep the depth-of-field as shallow as possible, while still getting our subjects in focus.
So if we’re shooting portraits — whether it be an engagement session or golden hour portraits on a wedding day or even a senior session or headshot with just a single subject — Sarah and I are almost certainly going to be shooting with a prime lens, a 35 or 50 or 85mm lens, and will be somewhere around f/1.8 or f/2. That ensures we have that shallow depth of field that will make our subjects pop. And if your image only has two subjects and they’re right next to each other, both the same distance from your camera, you can usually keep both of your subjects in focus, even at a low aperture like f/1.8.
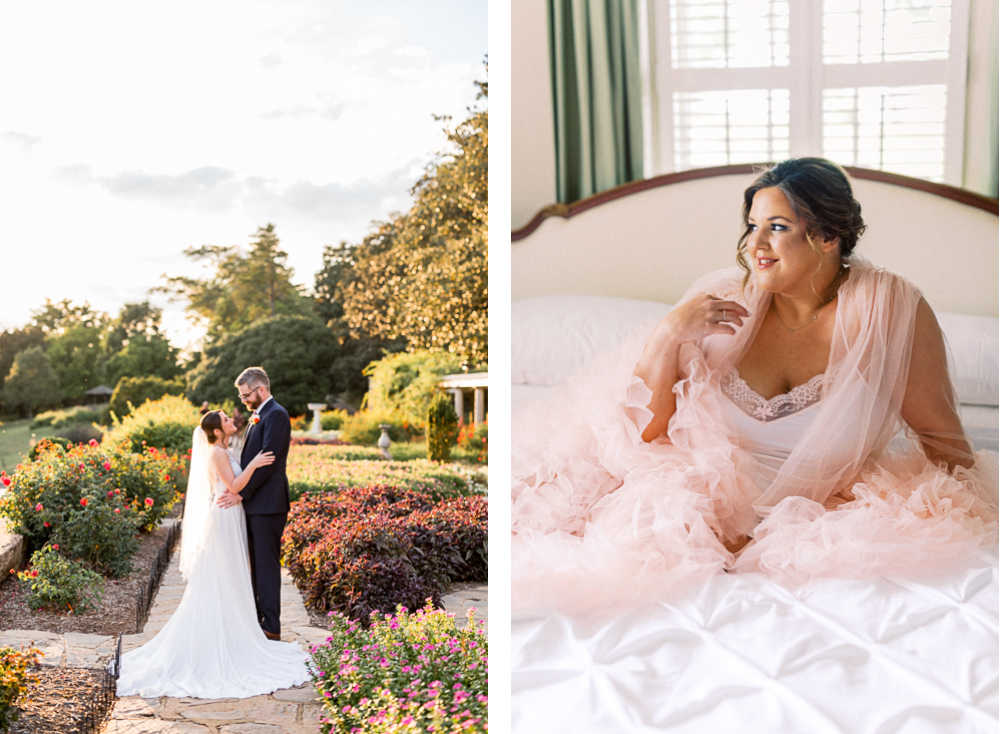
Both of these images were shot at f/1.8 so since our subjects were in a single focal plane; they were the same distance from our camera!
However, if our subjects are no longer right next to each other, like if we’re doing a a come-from-behind or something with some movement, we’re going to bring our aperture down a bit, maybe to f/2.8 or f/4 because what we DON’T want is for one subject to be in focus, and the other to be blurry.
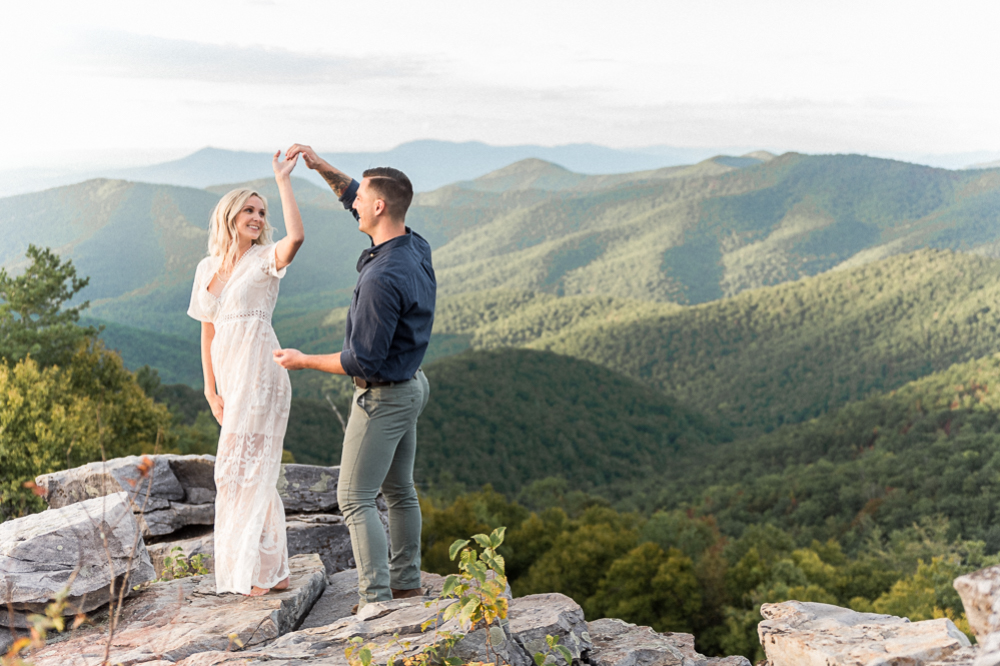
Since our bride in this image was moving, we brought our aperture from f/1.8 to f/2.8 to make sure her face would still be in focus, even as she twirled.
Best Aperture for Group Photos
Now, if were shooting a family session or anything else that has more than two subjects, right away we’re going to bring our f-stop number a bit higher, maybe to f/2.8 if it’s just three or four people who all standing next to each other. But if it’s a larger group, or if they’re all relatively far apart, we may bring our f-stop number even higher.
And here’s the thing, we’ve seen these charts before that say something like f/2.8 for one row, f/4.0 for two rows, f/5.6 for three rows, f/8 for four or more rows, etc. And these sorts of things might be helpful as a quick reference, but the most important thing is that when you’re still learning to work with low apertures, you’re constantly checking your LCD screen to make sure everyone is in focus.
If you were to stand over our shoulder while we set up big group portraits on wedding days, you’d notice that we’ll often close our aperture down, take a test shot, then do the old “Okay everyone, look right here! One, two three! Okay stay right there!” Then, we’d really zoom in on the faces of people in the middle, then someone on the far left and far right, someone in the front row and someone in the back row. If ANY of them look blurry, we take our f-stop number higher and take another one.
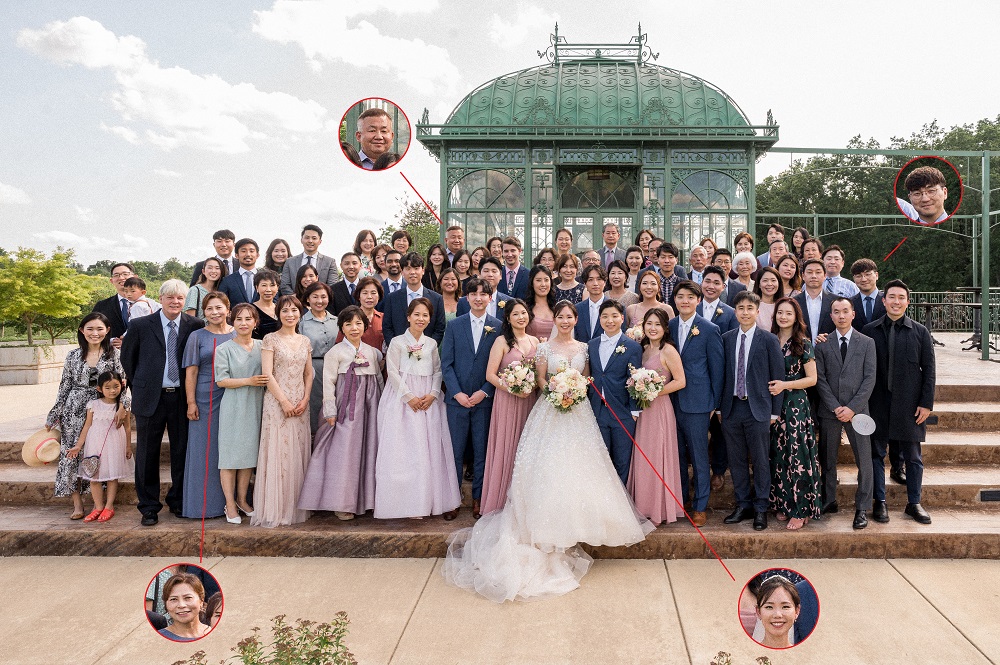
Once we took this image (at f/8.0), we zoomed in on a handful of people all over the image to make sure every face was in focus!
When we’re taking large group photos at a wedding day or during a graduation photoshoot or family session, we suddenly care waaay less about dreamy smooth backgrounds, and way more about making sure everyone’s faces are in focus. Obviously, we’d rather air on the side of caution and have a more closed aperture than necessary, than realize in editing that grandpa on the end of a family reunion photo is totally blurry because we kept the aperture too open!
Best Aperture for Wedding Photographers
Finally, let’s chat about on wedding days. If you’ve ever photographed a wedding, you know that at parts of the day, you’re a portrait photographer just like during an engagement shoot, so you can follow the guidance we talked about in the first part of this video. And at other parts of the day, you’re photographing family or wedding party, and you’ll follow those same rules we just talked about a second ago, for larger groups.
But what about in the getting ready suite or the ceremony? And what about when we’re photographing the best man’s toast or when all the guests hit the dance floor? In all of these situations, we think about our aperture first. In a getting ready suite, are we trying to really isolate our subject and make them pop from a messy background?
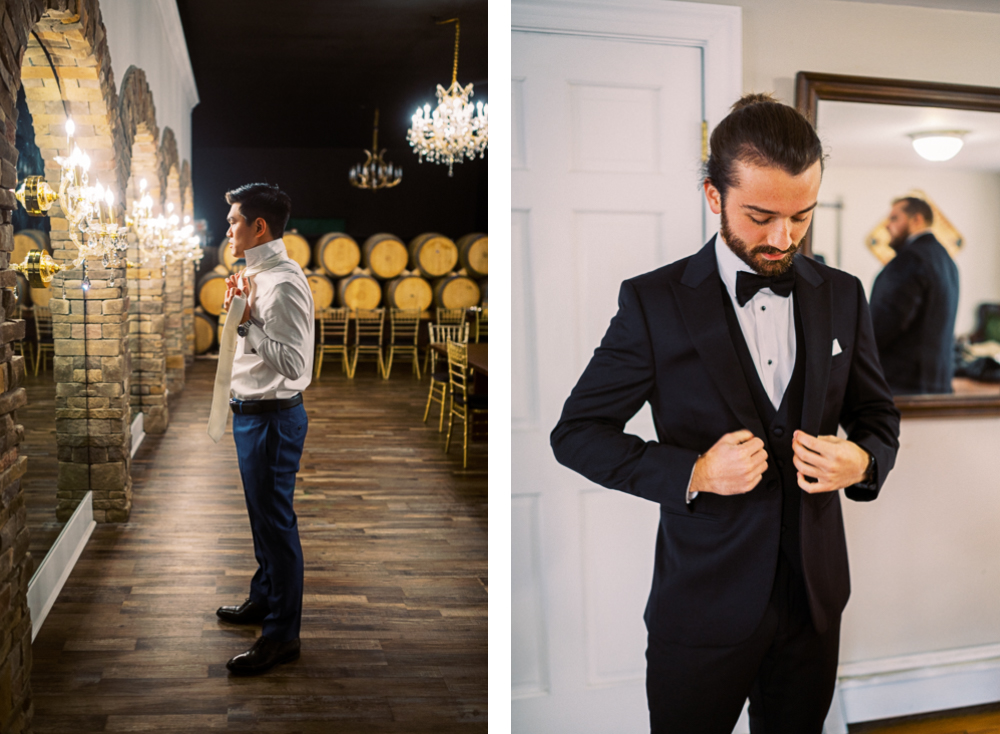
Both of these image were taken at f/1.8!
If so, maybe we’ll stick with a lower f-stop number like f/1.8, even though this isn’t technically a portrait.
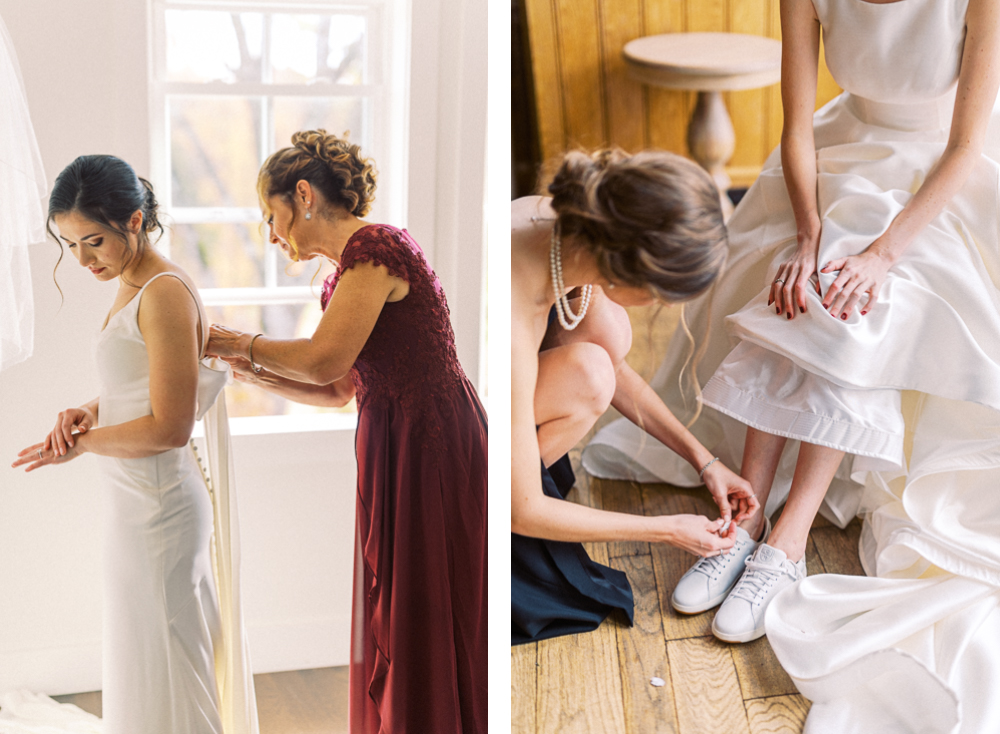
These images were taken at f/1.8 and f/1.4.
But if there’s a whole scene we’re trying to capture, we may close down that aperture toward f/2.8 or even f/4 in order to have multiple people in focus.
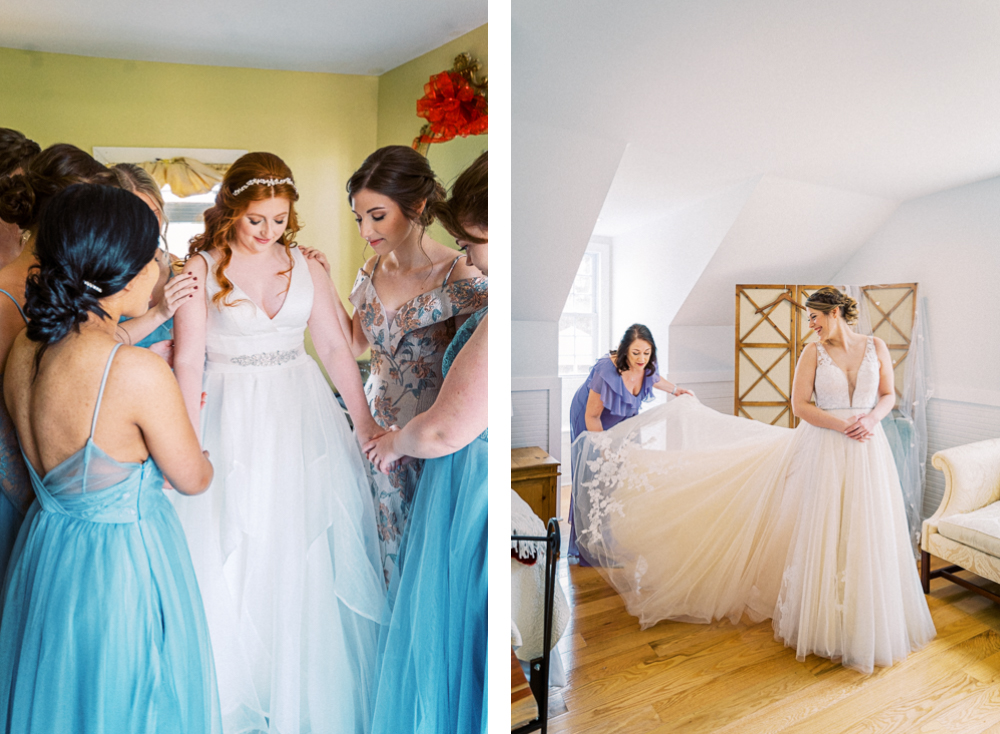
Because we wanted to capture the emotion of multiple subjects who weren’t right next to each other, these images were captured at f/3.5.
When it comes to the ceremony, we still want whatever it is we’re focusing on to really pop from the background. So whether we’re using a prime lens with a minimum aperture around f/1.4…
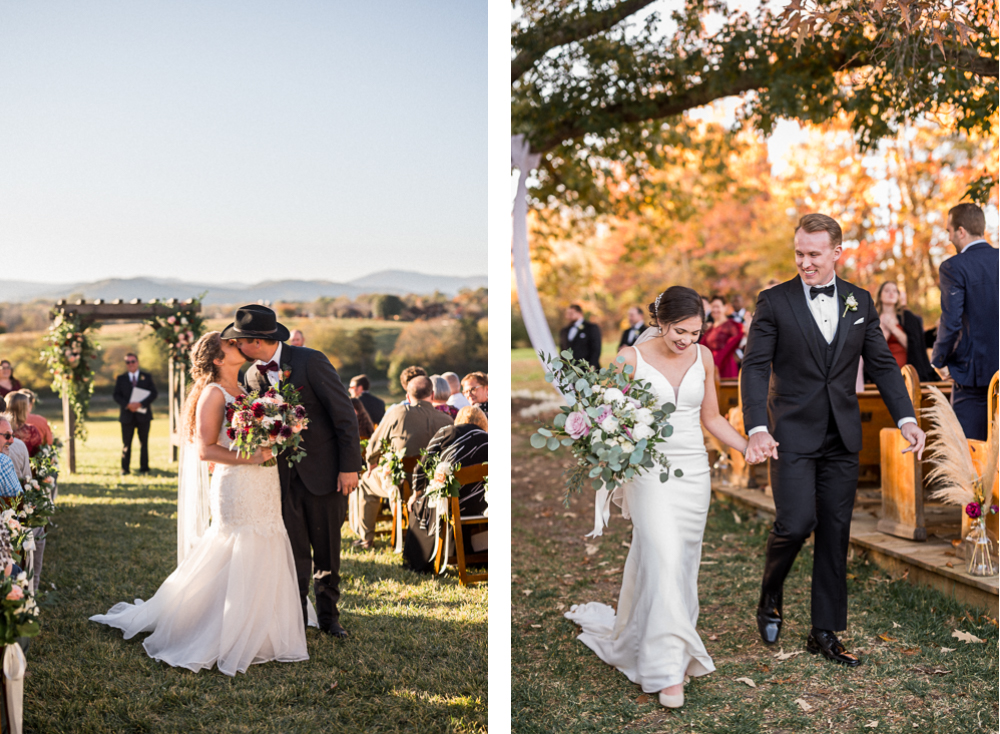
These images were both taken with a prime lens at f/1.8.
Or a zoom lens with a minimum aperture around f/2.8, we typically keep our aperture at or near the lowest f-stop number possible.
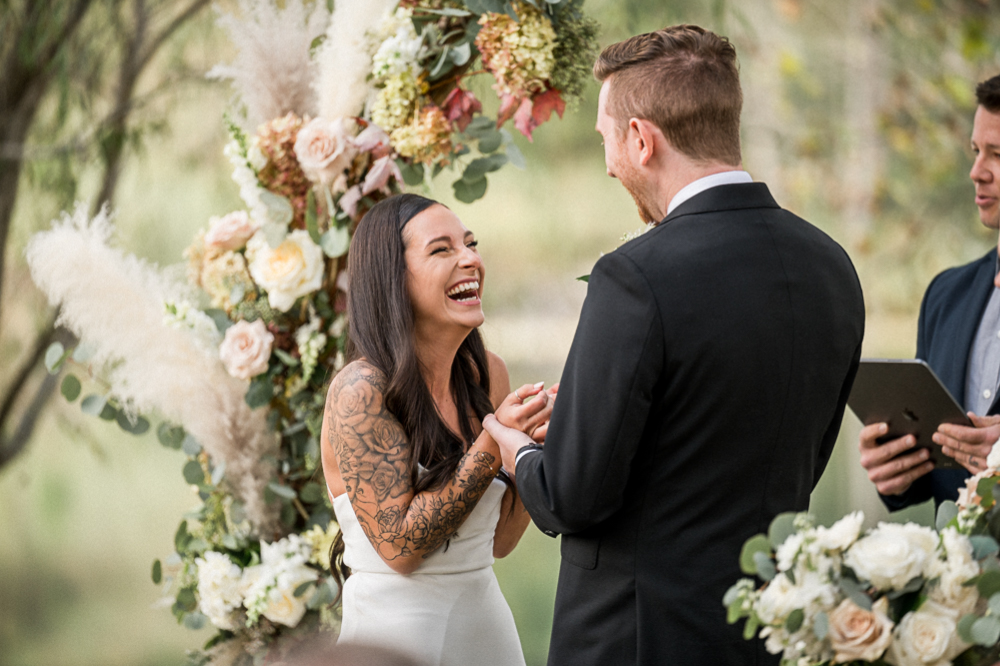
This image was taken with a zoom lens at f/2.8.
And the same goes for dance floors or toasts and speeches: we typically aim for a lower aperture, which also comes in handy with dark reception spaces, whether we’re photographing a first dance in ambient light, or shooting dancing photos using on-camera flash.
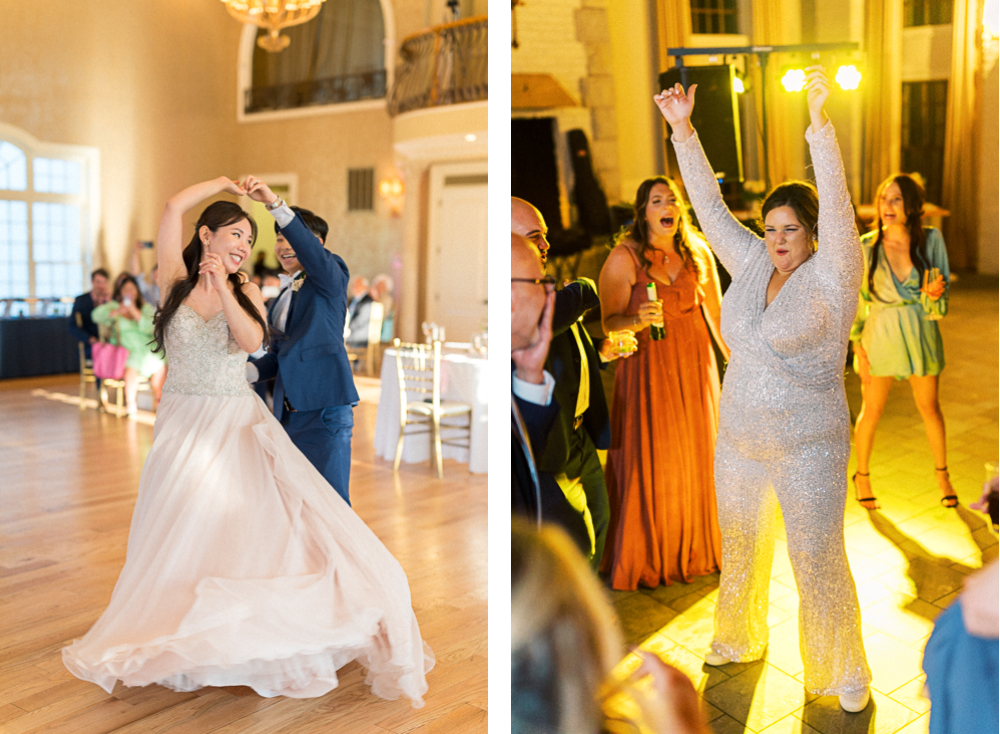
While the image on the left was taken with only the ambient light and the image on the right was taken with a flash, both were taken at f/1.8!
In fact, we went back and looked at the 26,000 wedding images we delivered to our clients this year, we found that 91% had apertures between f/1.2 and f/2.8, and another 8% were between f/3 and f/4. So only 1% of the images we delivered from wedding days were taken with an aperture more closed down than f/4, and most of them were big wide group shots like this one below.
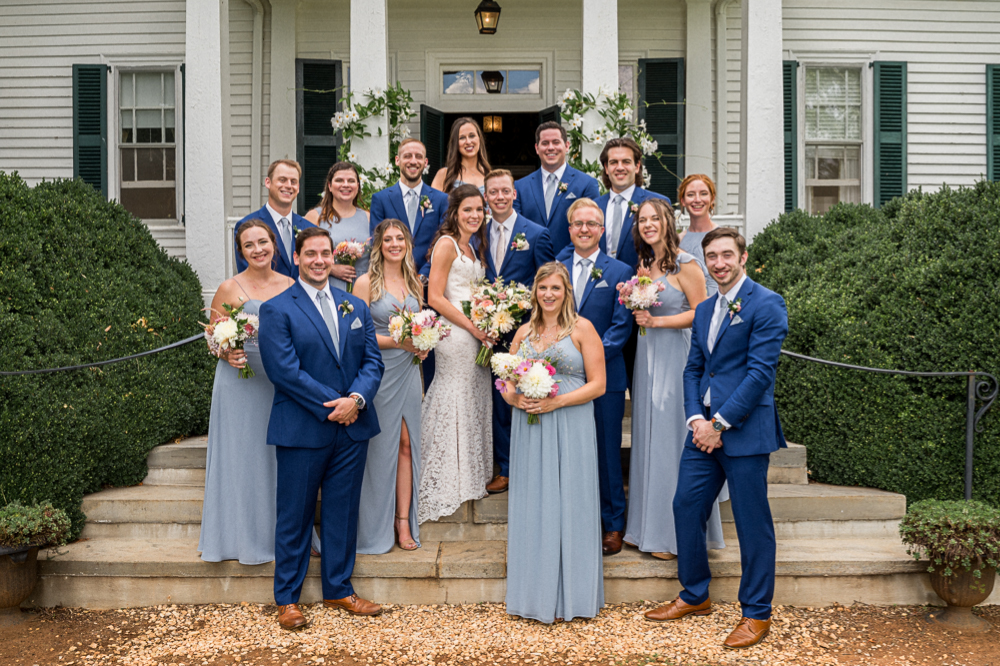
Because there were several rows of people, we cranked our aperture down to f/8.0 for this image.
How Does Aperture Interact with Shutter Speed and ISO?
So, I mentioned just a moment ago that when we’re setting our settings at the start of a portrait session or throughout a wedding day, we often consider aperture first. But you probably know that if you’ve exposed an image well, then suddenly crank down your aperture, it’s going to be waaay too dark. And that’s where your shutter speed and ISO come in. Now, we aren’t going to get into all this in this video, because we’re going to cover shutter speed and ISO equally in-depth in their own videos as part of this series, then finish up with one or two videos on how to put them all together!
But the one important thing to realize is that, no matter what, you WILL need to make adjustments to all of your settings in tandem. When you give up a little bit of light in order to get a deeper depth of field, you need to get that light back from somewhere else — your shutter speed or your ISO. Or if you add a bunch of light in order to achieve a more shallow depth of field, you’ll have to compensate by darkening your image with your shutter speed or your ISO. But more on that in future videos!
Want More?
Click HERE to get your free copy of our eBook: “5 Essential Tips for Turning your Side-Hustle into a Full-Time Photography Business.” You’ll also be subscribed to our newsletter, so our newest content, weekly encouragement, and exclusive offers will be delivered right to your inbox!
—
Check out the other segments in this blog series!
- Part 1: Intro to Aperture and Depth of Field
- Part 2: Best Aperture for Portrait and Wedding Photography
- Part 3: Intro to Shutter Speed and Motion Blur
- Part 4: Best Shutter Speed for Portrait and Wedding Photography
- Part 5: Intro to ISO and Grain/Noise
- Part 6: Best ISO for Portrait and Wedding Photography (Indoor & Outdoor)
- Part 7: No More Confusing “Exposure Triangle”! The EASY Way to Set Your ISO, Aperture and Shutter Speed
Filed in:
Wedding Photography & Photography Education
Charlottesville, Virginia and Beyond
HOME
ABOUT US
WEDDINGS
JOURNAL
FOR PHOTOGRAPHERS
PRESS & PRAISE
BLOG
CONTACT
e. hunter@hunterandsarahphotography.com
p. (434) 260-0902
