VIEW BY CATEGORY:
Hi, we're Hunter and Sarah, a husband-and-wife, luxury wedding photography team. We’re also educators, helping other photographers build profitable and sustainable photography businesses.
MEET US
LOOKING FOR SOMETHING?
Intro to ISO and Image Grain/Noise for Photographers (Shooting in Manual Part 5)
January 26, 2023
—
If you want to understand how to use your DSLR or mirrorless camera, and take better images, then learning to shoot in manual is a great place to start! In today’s blog, we’re teaching all about ISO, one of the three fundamental controls you have over your camera, and how your ISO affects the images you take in a really fundamental way. After all, “How does ISO work?” is an essential question for any new photographer!
Why Manual Mode?
So, just in case this is the first blog that you’ve read from this series, we just want to give you a brief intro as to why you might want to shoot in manual mode in the first place. If you’ve owned a DSLR or mirrorless camera for a little while now, you may have noticed that shooting with your camera in fully-automatic mode is a lot like taking pictures with an iPhone. You just point it at whatever you want to take a picture of, your camera does all the work, and you snap the picture.
When you’re first starting out and don’t know much about photography, this is obviously the best place to start. At the beginning, your camera is smarter than you when it comes to determining how much light should reach the sensor and make up an image. This is called setting the exposure or exposing an image, and your camera is going to do a pretty decent job of this in auto. But over time, if you want to take better images — and especially if you want to become a professional photographer one day — you’ll need to learn how to take the reigns away from your camera, and start to control some or all of your exposure settings on your own. That’s where shooting in manual mode comes in, and that’s what this series is all about!
Speaking of series, last month we started this series by first introducing you to aperture, then by teaching you how to actually use your aperture for portrait sessions and wedding days. Then, earlier this month, we introduced you to shutter speed, then taught you how to use your shutter speed. So if you missed any of these videos, check out those links!
What is ISO?
But for now, let’s dive into ISO and what it actually is. Very simply, ISO is how sensitive your image sensor is to light, or how much of the available ambient light it will actually pick up. Back in the days of film, you would buy a roll of film with a specific ISO sometimes called “speed”. So, “ISO 400 film” or “400-speed film”. Then, if you wanted to increase or decrease your ISO, making your cameras more sensitive or less-sensitive to light, you’d have to shoot the entire roll of film with that specific ISO, then put a new roll of film into your camera that had a different ISO.
Luckily, in the age of digital photography, we can adjust our camera’s sensitivity to light by just changing ISO with the simple click of a button or the turn of a dial. Whether you have a DSLR or a mirrorless camera, making your camera more sensitive to light or less sensitive to light is just a matter of spinning a dial, or if you have a more beginner camera, navigating to your camera’s menu.
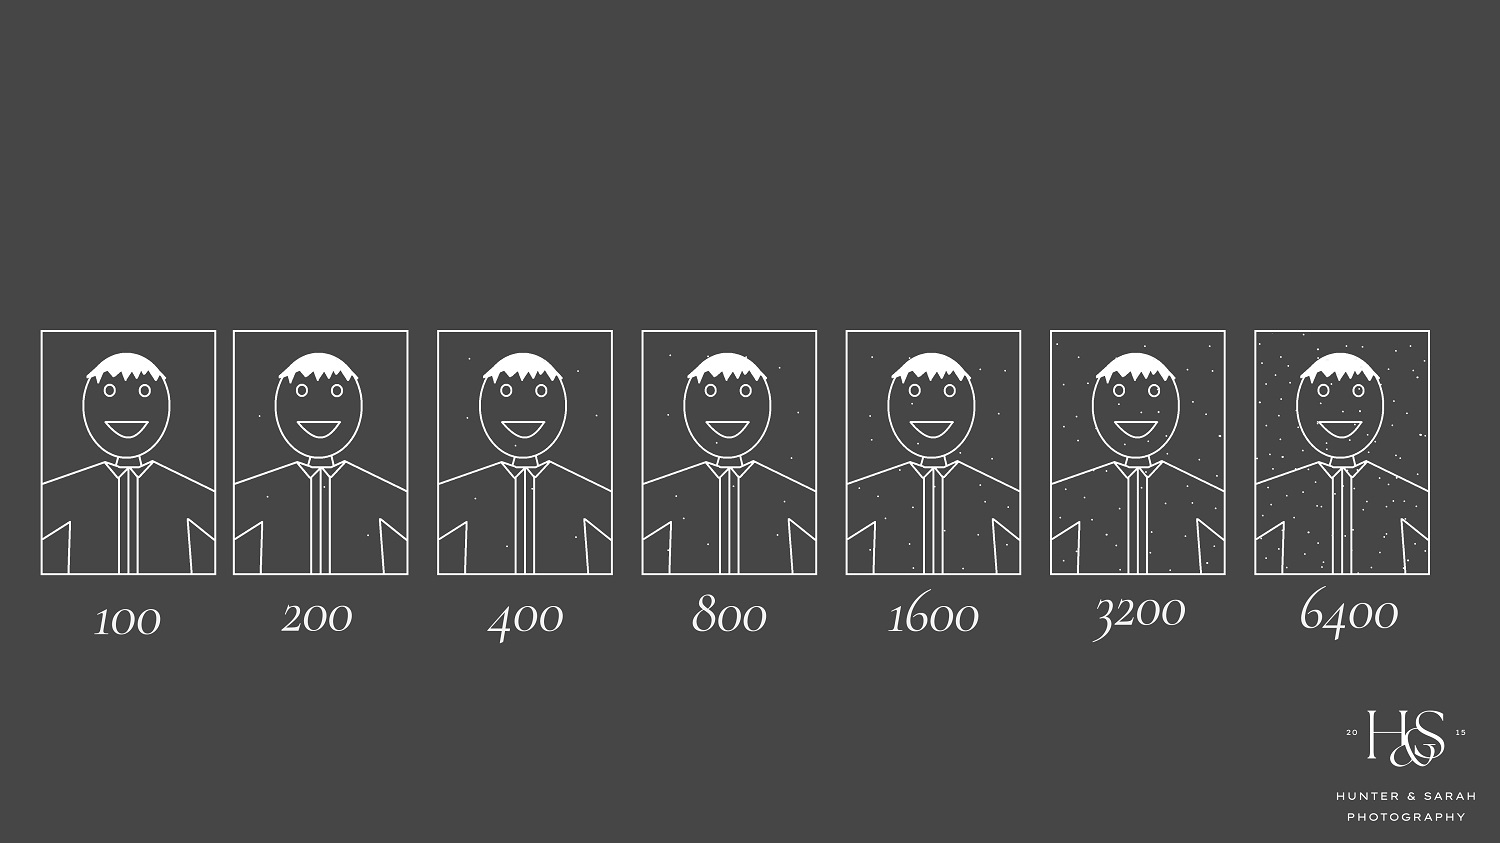
In case this is helpful, here’s a chart with a handful of common ISOs. Just like with aperture and with shutter speed, you don’t need to memorize these numbers, but just understand that low ISOs are usually measured in the hundreds, and higher ISOs are usually measured in the thousands or even 10s of thousands
Why is ISO Important for photography?
So, now that you know very basically what ISO is, let’s talk about what it actually does. Just like with aperture and shutter speed in our other intro videos, ISO has TWO main effects, and the first is light.
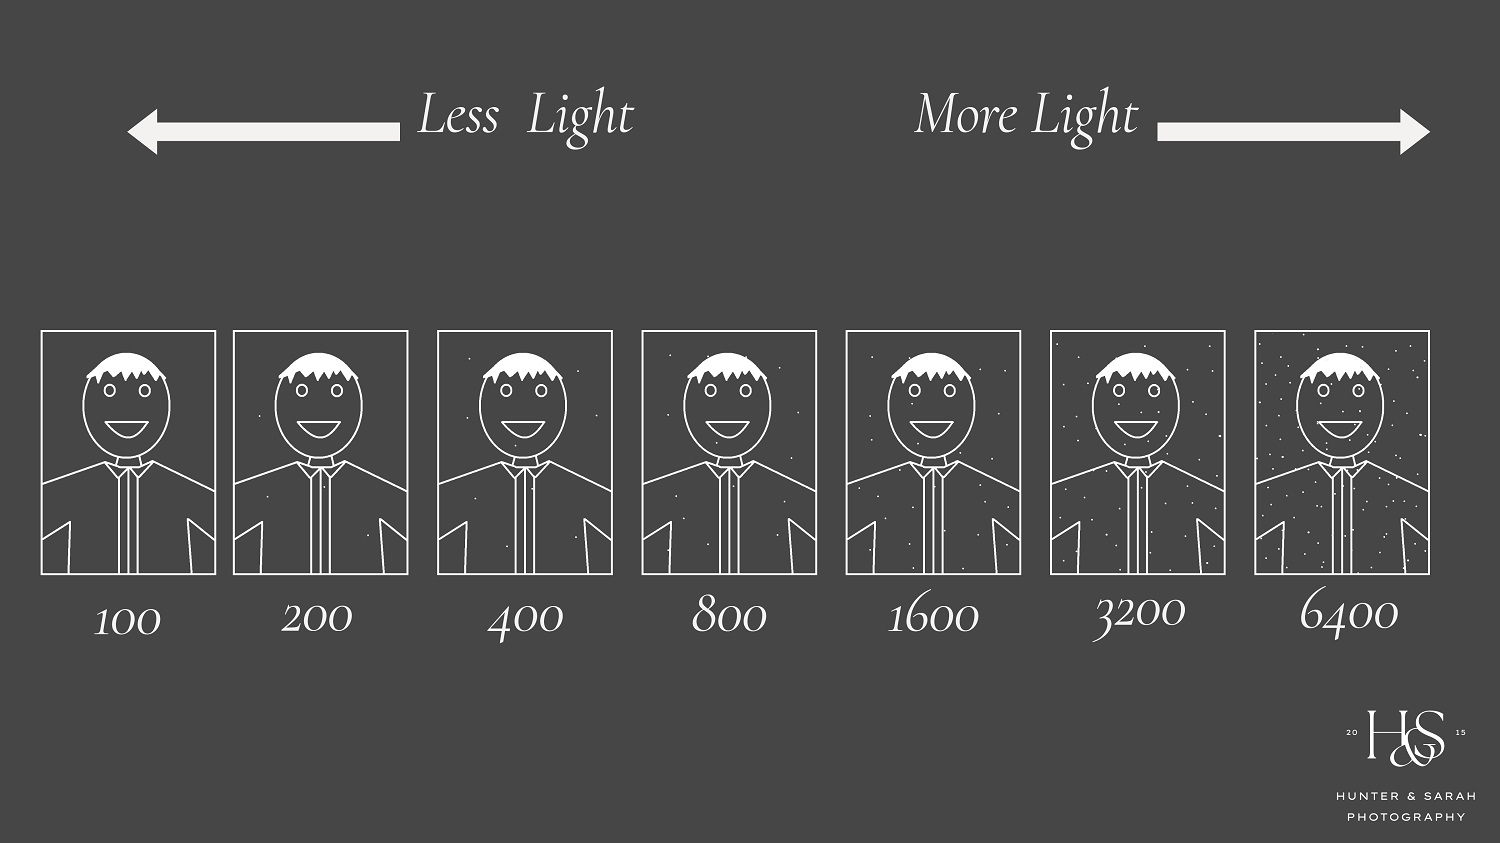
As you increase your ISO (so as you go from ISO 200 to ISO 400 to ISO 800), your camera will become more sensitive to light. That means that without changing your aperture or your shutter speed, your images will get brighter. On the other hand, as you decrease your ISO (like taking your ISO from 400 to 200 to 100), your camera sensor will become less sensitive to light, which will make your images darker, again without affecting any other settings. So here’s that same diagram we just showed a moment ago, but this time, with ISO’s affect on the exposure of your image taken into account.
For all the visual learners out there, we’re going to pick up the same analogy we’ve been using throughout this series to give you an intuitive sense of how ISO works. As a reminder, in this analogy, light is represented by water that’s falling from the sky, your lens is a hose that brings that light toward your camera’s image sensor, which is represented by the bucket in the lower right corner of your screen. Any water that reaches these buckets is like the light that reaches your image sensor.
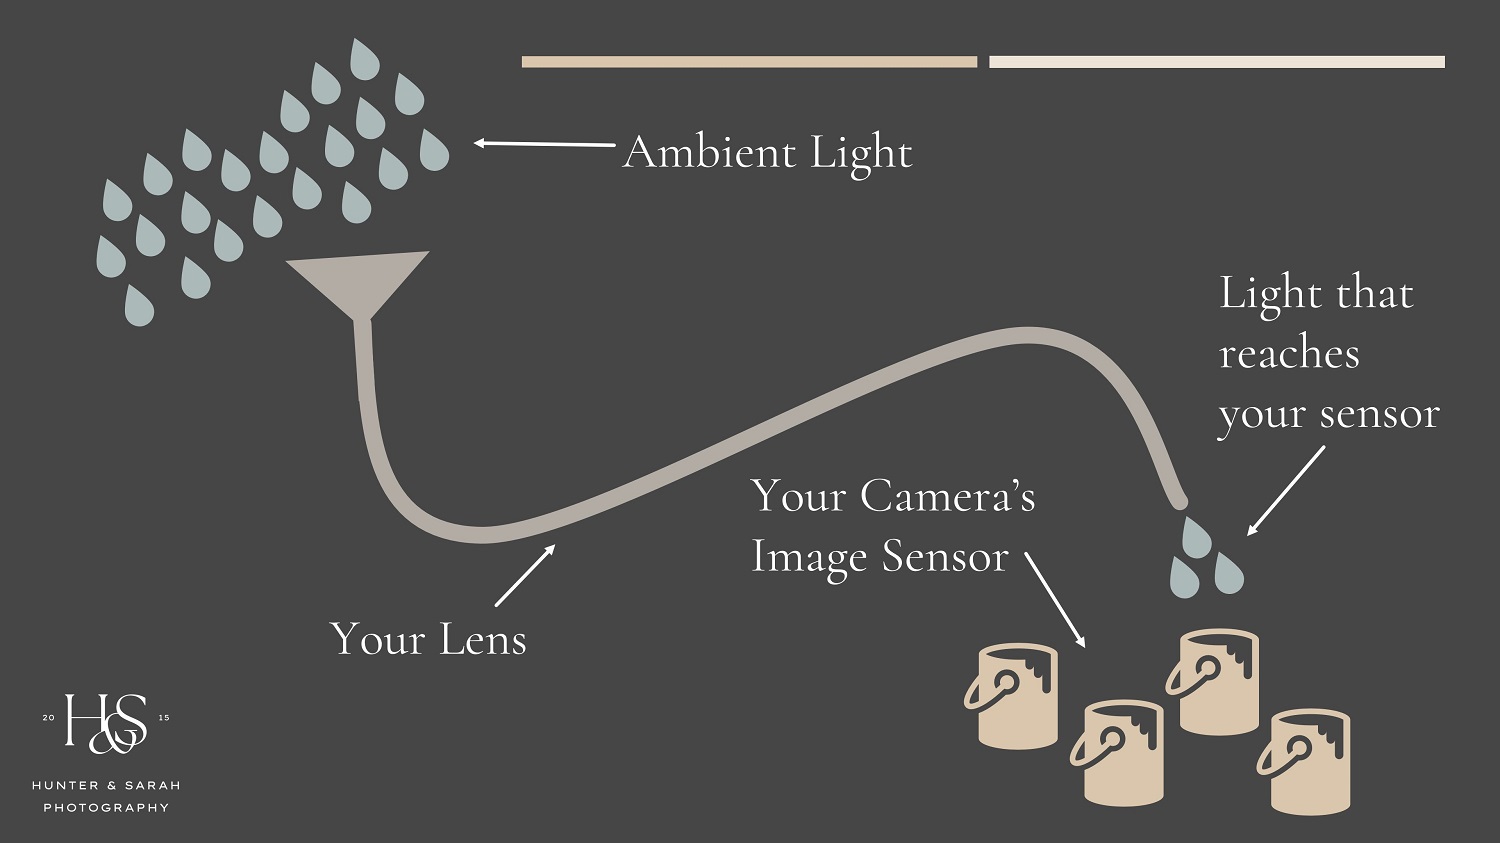
When we were talking about aperture, we asked you to think about it as increasing the size of the opening at the front of the house. And when we talked about shutter speed, we told you to think about it as how long the hose is open vs how long it’s closed.
Now, with ISO, it’s the buckets themselves that are changing. When you increase the ISO on your camera, it’s like making the buckets larger. The same amount of water is flowing through the hose during the same amount of time, but suddenly the buckets can hold more of that water. With your camera, increasing the ISO means that even though the same amount of light is coming through your lens and hitting your image sensor, your sensor can capture more of it.
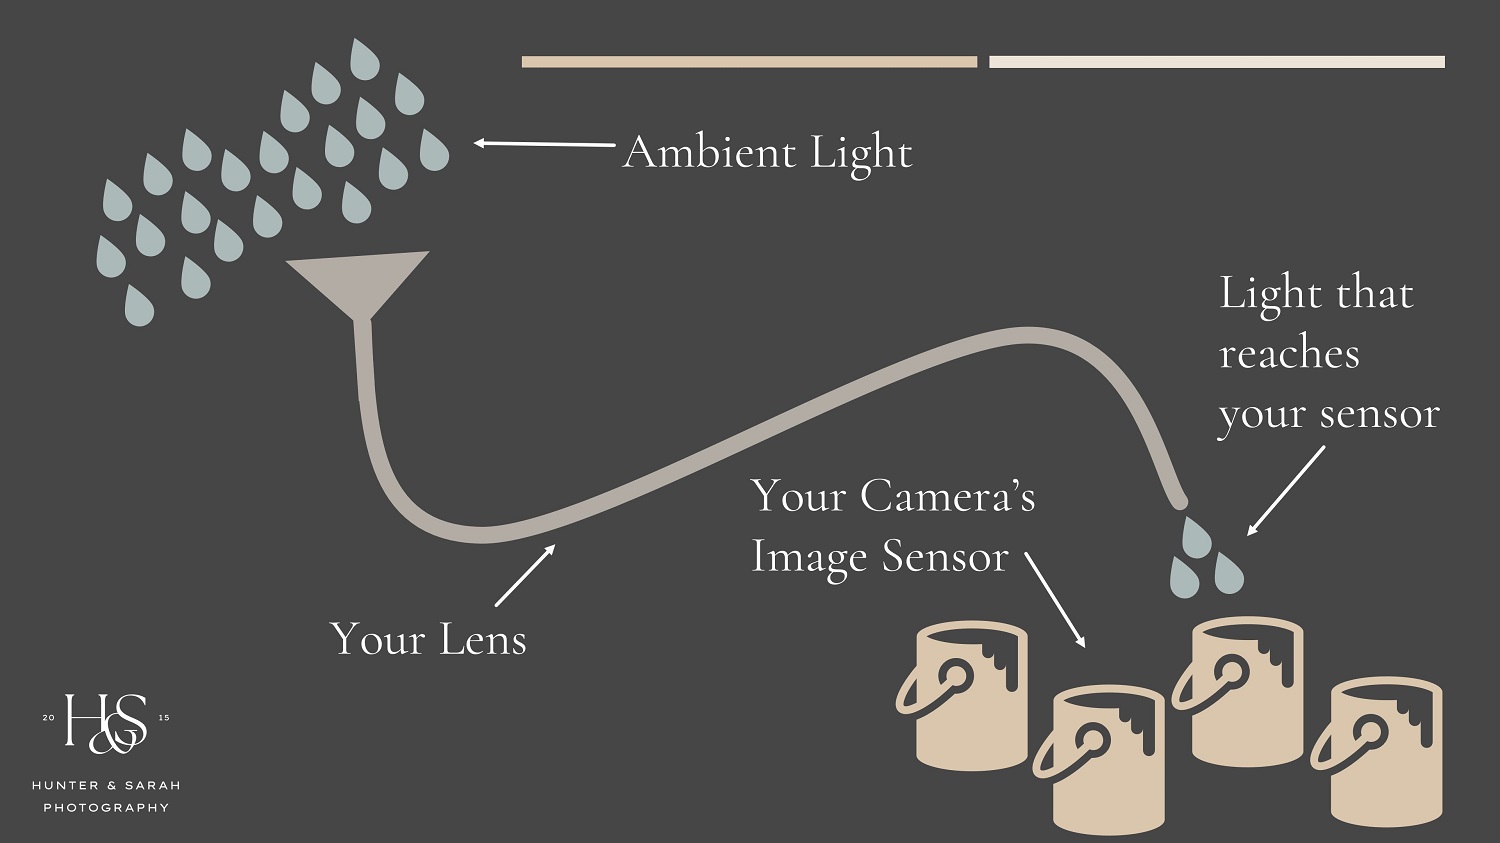
Increasing your ISO is like making the buckets larger: even though the same light flows through, more of it will be captured!
On the other hand, when you decrease the ISO on your camera, it’s like making the buckets smaller. Even if the hose and how long it’s open stays the same, the buckets just won’t be able to hold as much light. Likewise, decreasing your ISO means that even if the same amount of light is reaching your image sensor, less of it will be picked up by your camera.
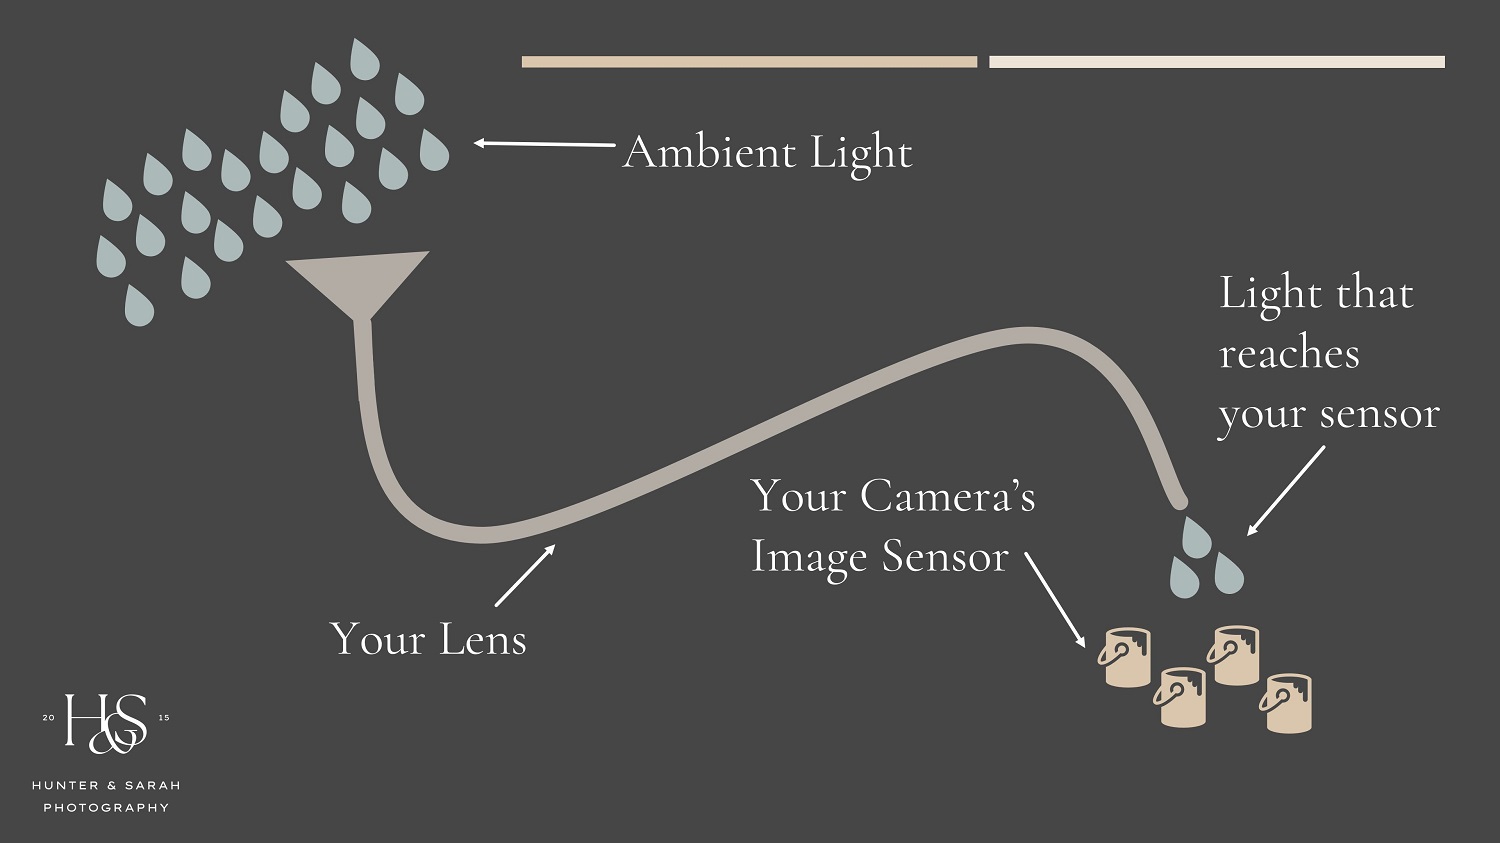
Decreasing your ISO is like making the buckets smaller: even though the same light flows through, less of it will be captured!
And finally, here’s an example with actual imagery so you can get an real visual sense of what we’re talking about. The image on the left was taken with an ISO of 500, and the image on the right was taken at 2,000, with all the other settings the same. Hopefully it’s pretty obvious that the image on the left is much darker than the image on the right!
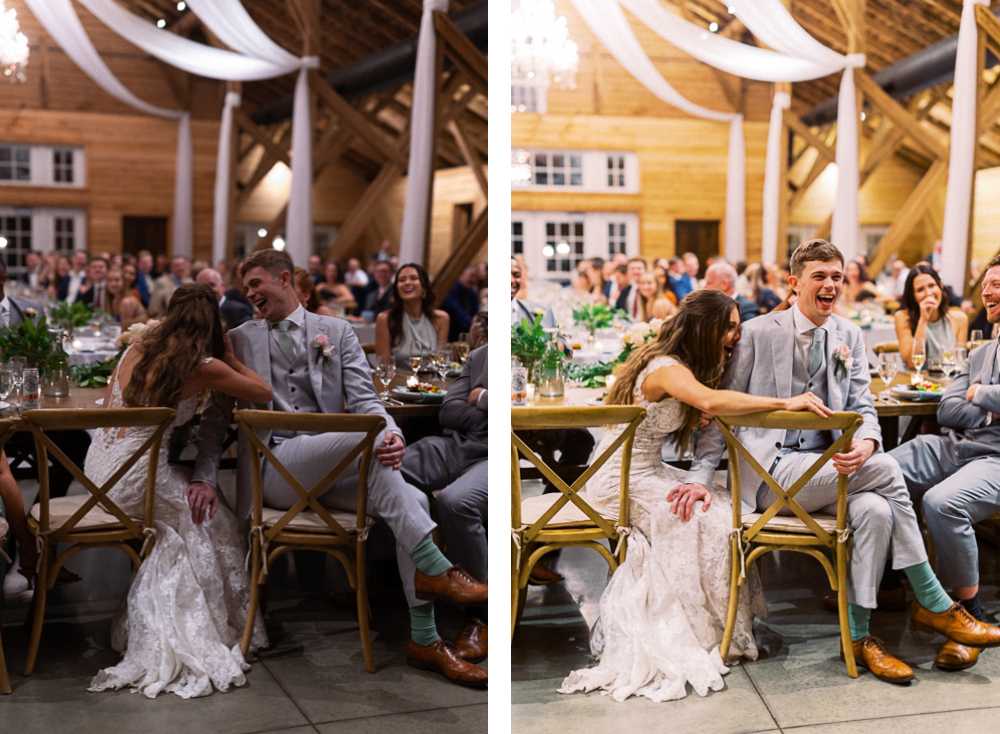
The image on the left was taken at ISO 500, and the image on the right at ISO 2000!
How Else Does ISO Affect Your Images?
Just like with aperture and shutter speed, ISO not only affects your light, but it also affects one other aspect of your final images. And in this case, it’s the graininess or “noise” of your images. If it sounded almost too-good-to-be-true that you could just turn a dial and your images could get brighter or darker without affecting either your aperture or your shutter speed, it sort of is. As you increase your ISO and your camera becomes more and more sensitive to light, it also begins to introduce graininess to the image. That’s the trade-off.
It’s sorta difficult to explain graininess (which is often also referred to as noise), so we’re just going to show you two images below. The image on the left was taken outdoors and in natural light at ISO 50, which is about as low and as grain-free as our professional cameras will go. On the other hand, the image on the right was taken indoors, at night, in a much darker environment and without flash, so our ISO was at 4,000, a significantly higher ISO.
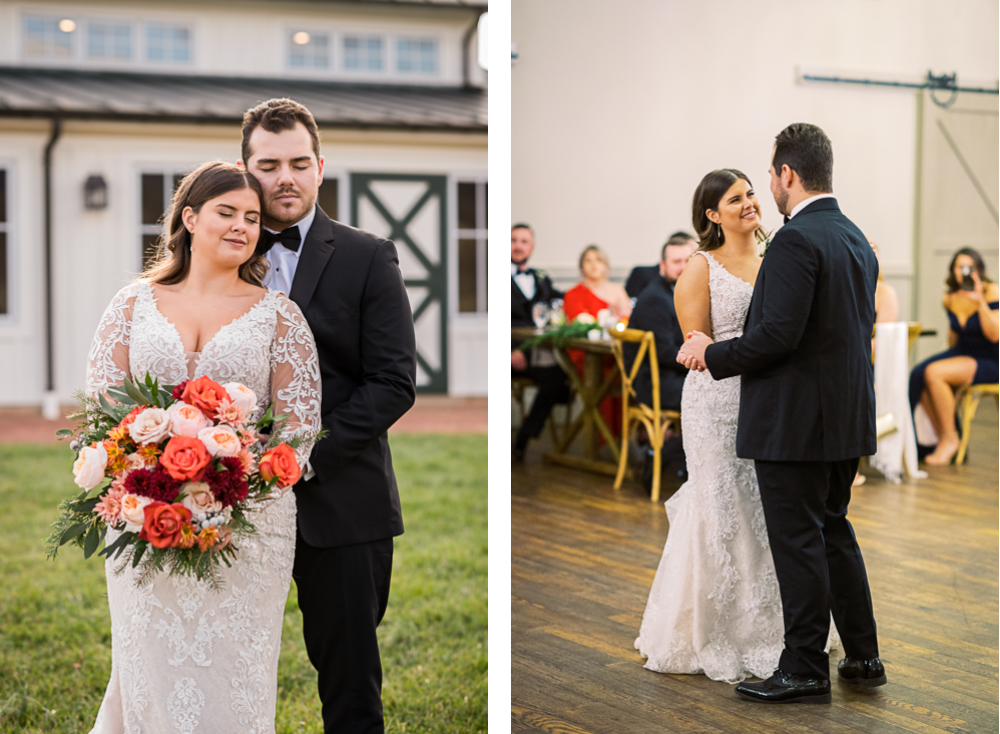
The image on the left was taken at ISO 50, and the image on the right at ISO 4000.
While this might not look like much at first, if we zoom in on these two images, you can see really quickly how the image with the higher ISO feels gritty and grainy and less sharp and clear. It’s almost like someone spilled clear grains of sand all over the image.
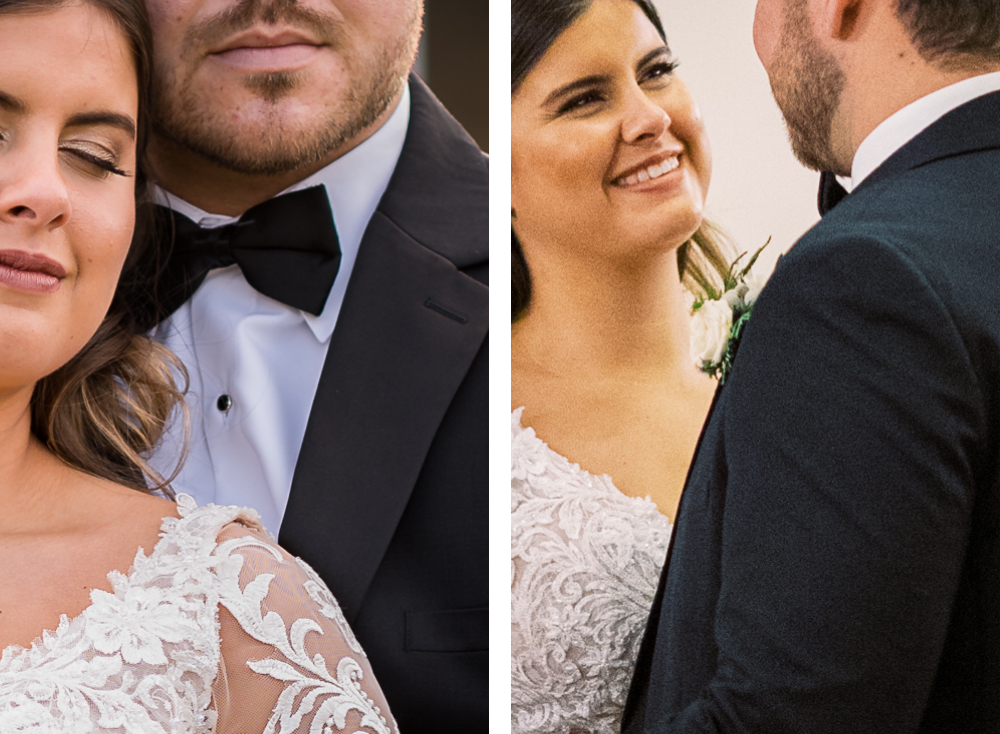
And that’s what we mean by the “trade-off” you get with ISO. Without a flash or slowing down our shutter speed to the point that the entire image was a blurry mess, we never would have been able to capture this indoor dancing photo without a higher ISO. But as you can see, in exchange for all of that extra light, the trade-off is lots of grain. On the other hand, when we were shooting outside and didn’t need all of that extra light, we were able to keep our ISO low to avoid noise altogether.
Finally, in order to help you tie these things together, here’s that chart one final time, with graininess taken into account.
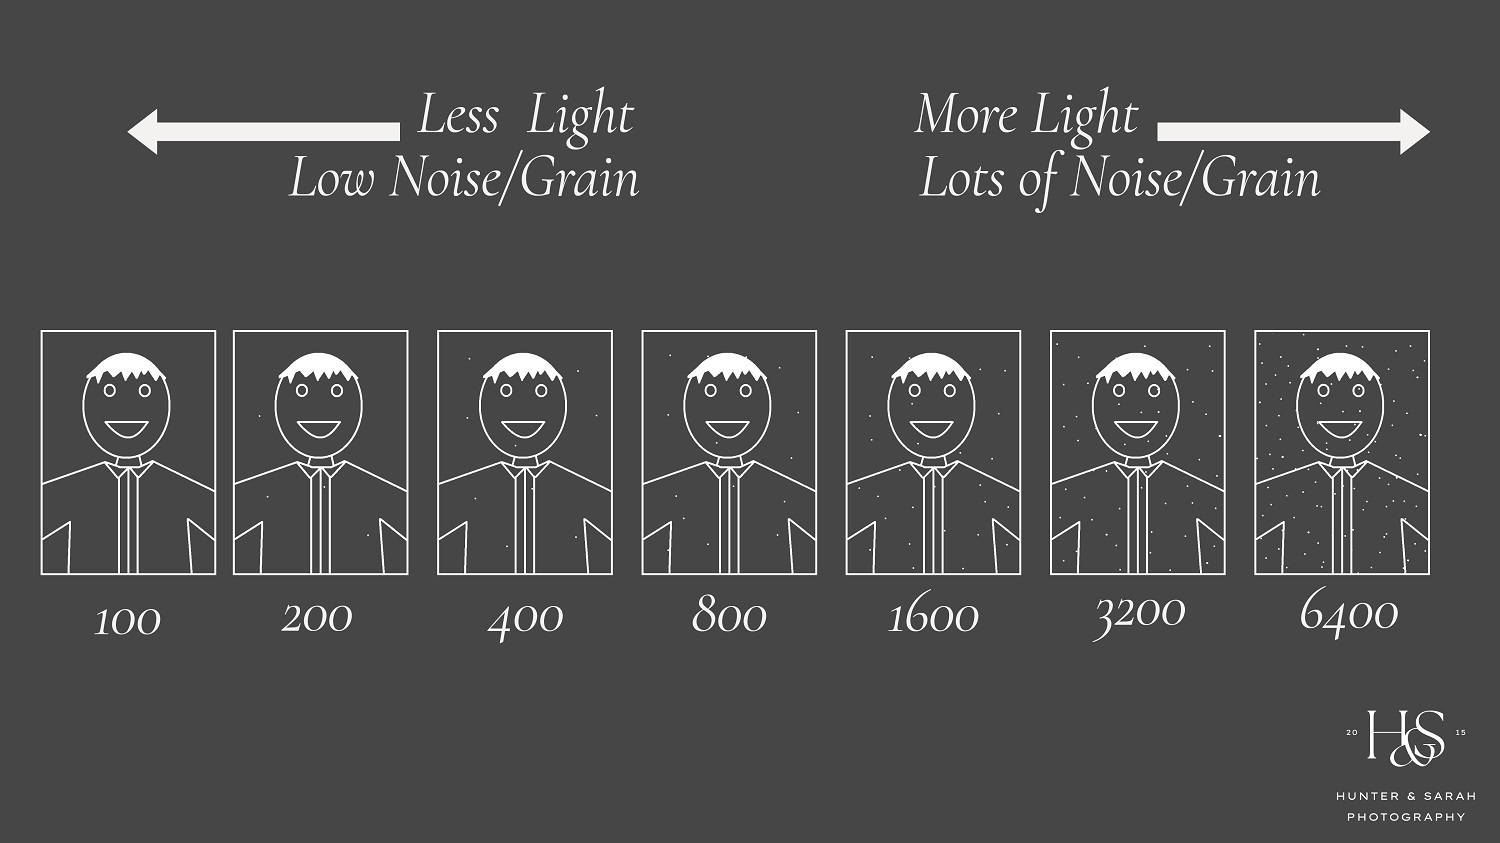
We hope you’ll screenshot this if you think it may be helpful for you!
If this all felt a little theoretical to you, that’s okay. This video was all about helping you understand what ISO is and how it affects your imagery. But next week, we’re going to dive into ISO Part 2, and give a few more real world examples as we share how WE think about setting our ISO on portrait sessions and on wedding days.
Want More?
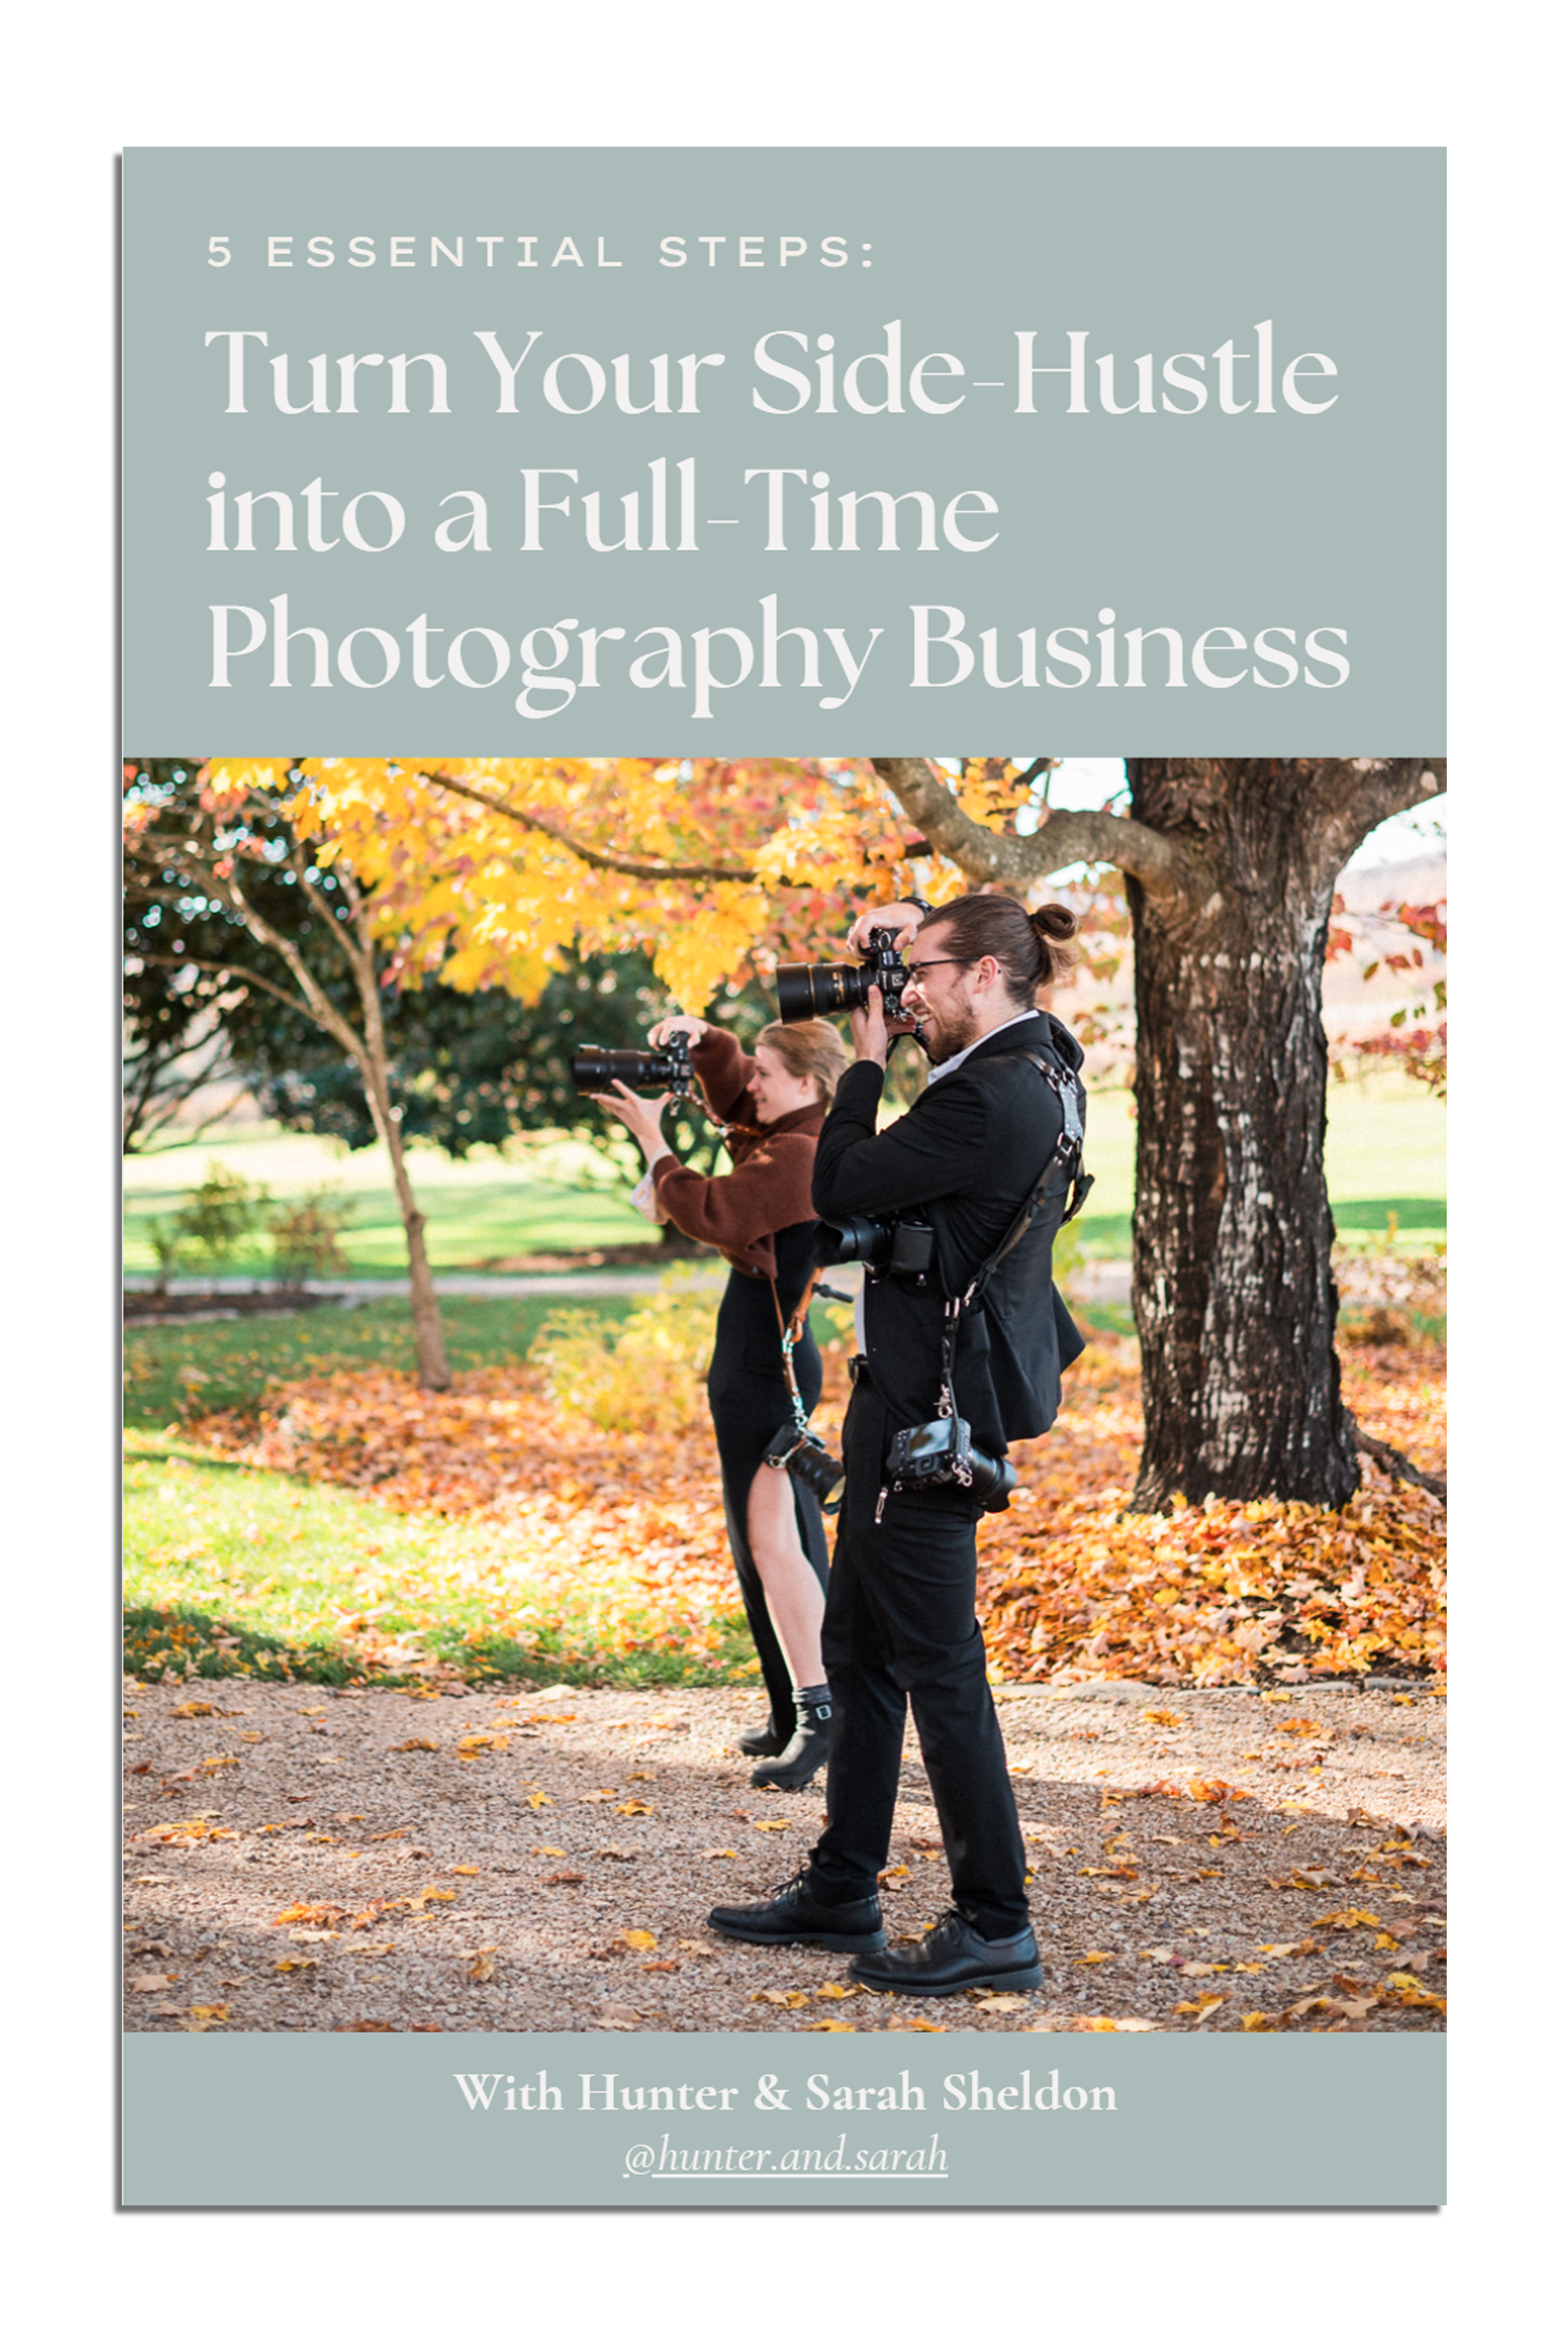
Click HERE to get your free copy of our eBook: “5 Essential Tips for Turning your Side-Hustle into a Full-Time Photography Business.” You’ll also be subscribed to our newsletter, so our newest content, weekly encouragement, and exclusive offers will be delivered right to your inbox!
—
Check out the other segments in this blog series!
- Part 1: Intro to Aperture and Depth of Field
- Part 2: Best Aperture for Portrait and Wedding Photography
- Part 3: Intro to Shutter Speed and Motion Blur
- Part 4: Best Shutter Speed for Portrait and Wedding Photography
- Part 5: Intro to ISO and Grain/Noise
- Part 6: Best ISO for Portrait and Wedding Photography (Indoor & Outdoor)
- Part 7: No More Confusing “Exposure Triangle”! The EASY Way to Set Your ISO, Aperture and Shutter Speed
Filed in:
Wedding Photography & Photography Education
Charlottesville, Virginia and Beyond
HOME
ABOUT US
WEDDINGS
JOURNAL
FOR PHOTOGRAPHERS
PRESS & PRAISE
BLOG
CONTACT
e. hunter@hunterandsarahphotography.com
p. (434) 260-0902
