VIEW BY CATEGORY:
Hi, we're Hunter and Sarah, a husband-and-wife, luxury wedding photography team. We’re also educators, helping other photographers build profitable and sustainable photography businesses.
MEET US
LOOKING FOR SOMETHING?
Best ISO for Portrait and Wedding Photography, Indoor & Outdoor (Shooting in Manual Part 6)
February 2, 2023
—
In today’s blog post/video, we’re teaching all about ISO, one of the three fundamental controls you have over your camera, and how we set our ISO both indoors and outdoors, on portrait session and on wedding days. If you want to understand how to use your DSLR or mirrorless camera, and take better images, then learning to shoot in manual is a great place to start!
Last week, we introduced you guys to ISO. We talked about what it is, why it’s important, and how it affects both the light and the graininess of the images you take. And if this is the first post you’ve seen from us in this series, we want to make sure you’re aware that this is the 6th video in a series all about shooting in manual. So if you want to check out the rest of that playlist, check out the links to the rest of the series at the bottom of this post!
How to Set Your ISO Outside (in Natural Light)
So, as a quick refresher from our introduction to ISO last week, in addition to making your images brighter, increasing your ISO also adds “grain” or “noise” to an image. Below is the same example we used last week, where the image on the left was taken outdoors in natural light with a low ISO, and the image on the right was taken indoors at night with a high ISO. Hopefully the graininess in the image on the right is obvious!
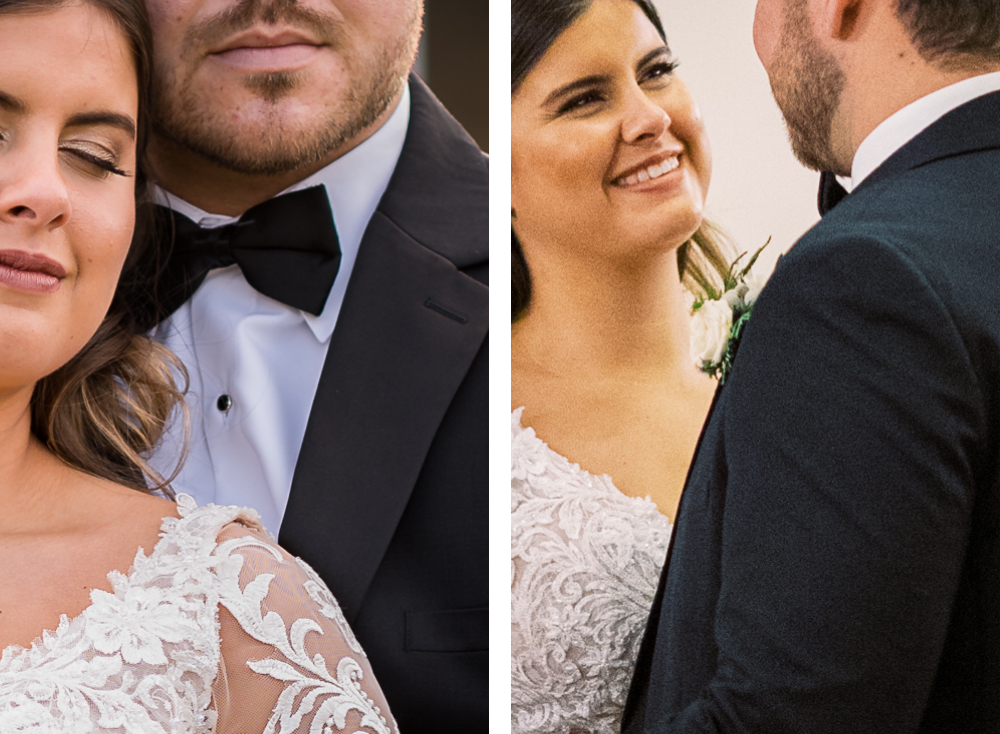
Left image: outdoors, natural light, ISO 50… no grain! Right image: indoors, low light, ISO 4000… grainy!
But rather than just discussing how ISO affects your images, let’s chat about how we set our ISO in the first place, starting with shooting outside in natural light. And this really gets into our philosophy of how we set our setting in general, which we’re going to dive even deeper into in the 7th and final part of this series. But generally speaking, whenever you’re setting your ISO, you want it to be as low as possible — in order to avoid unnecessary grain — while still giving you a properly exposed image. And when shooting outside in natural light, the problem is usually that we have too much light, so our ISO is often as low as it can go.
Here’s an example: if we’re outside shooting in natural light, let’s say we turn on our camera, and this is where our settings are at: aperture at f/1.8, shutter speed at 1/500, and ISO at 800. It’s the middle of the afternoon and it’s a pretty sunny day, so the image is WAY overexposed.
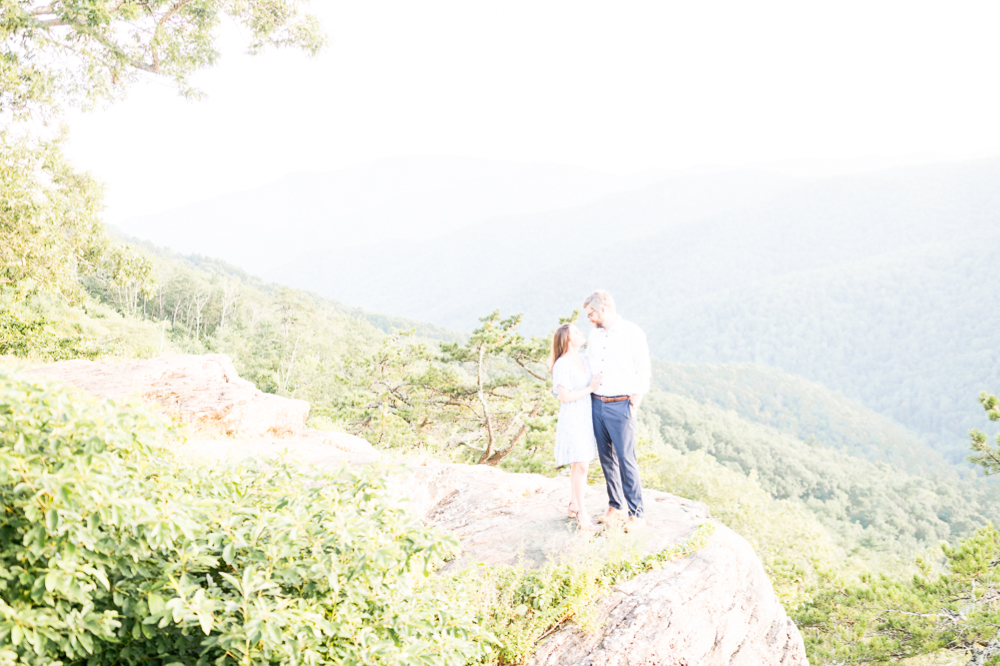
At f/1.8, 1/500, and ISO 800, this image was WAY overexposed!
At this point, we have three options to make the image darker so it’s properly exposed: 1) make the aperture more narrow, 2) make our shutter speed faster, or 2) make our ISO lower. If you remember the general rule we just introduced you to: all else equal, lower ISO is better, then what you do next should be obvious.
While you could close down your aperture and go from f1/.8 to f/4 or f/5.6 to make the image darker, that would ruin this dreamy, shallow depth-of-field that you’re aiming for in this portrait, so we won’t do that. And you could speed up your shutter speed to make the image darker, but you don’t really need the shutter any faster for these stationary subjects, and an ISO of 800 could introduce a little bit of unnecessary grain into an image, even though you have plenty of light. Since you don’t need your ISO high in this situation, what would make the most sense is to leave your aperture and your shutter speed where they is, and crank down your ISO until your image is properly exposed
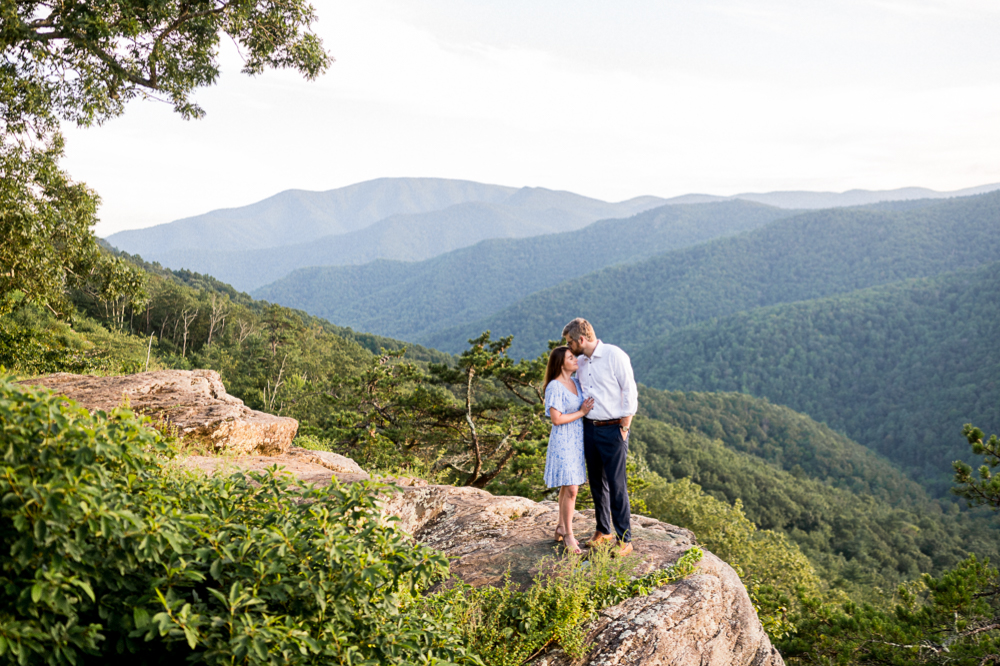
At f/1.8, 1/500, and ISO 160, this image is in MUCH better shape.
What we’ve found is that even if you’re shooting in golden hour and the sun is getting pretty low, you can usually get away with your ISO at or near its lowest possible setting, while still keeping your shutter speed fast enough to capture most human movement. But of course, if you’ve set your aperture and your shutter speed where you need them, and the image is a bit dark, then you could start bringing that ISO back up.
How to Set Your ISO Inside (In Low Light)
So, that’s shooting outside, but what about inside? This time, it’s not having enough light that we’re worried about. So when shooting inside, the name of the game is still about keeping your ISO as low as possible, but knowing that it’s going to be much higher in some cases.
So let’s throw out another example. Let’s say we step inside to a reception space and are getting ready for our couple to have their first dance. Since we were just outside a moment ago capturing sunset portraits, our aperture is at f/1.8, our shutter speed is at 1/400, and our ISO is at 50. You take a test shot or look through your mirrorless viewfinder, and realize that it is WAY too dark.
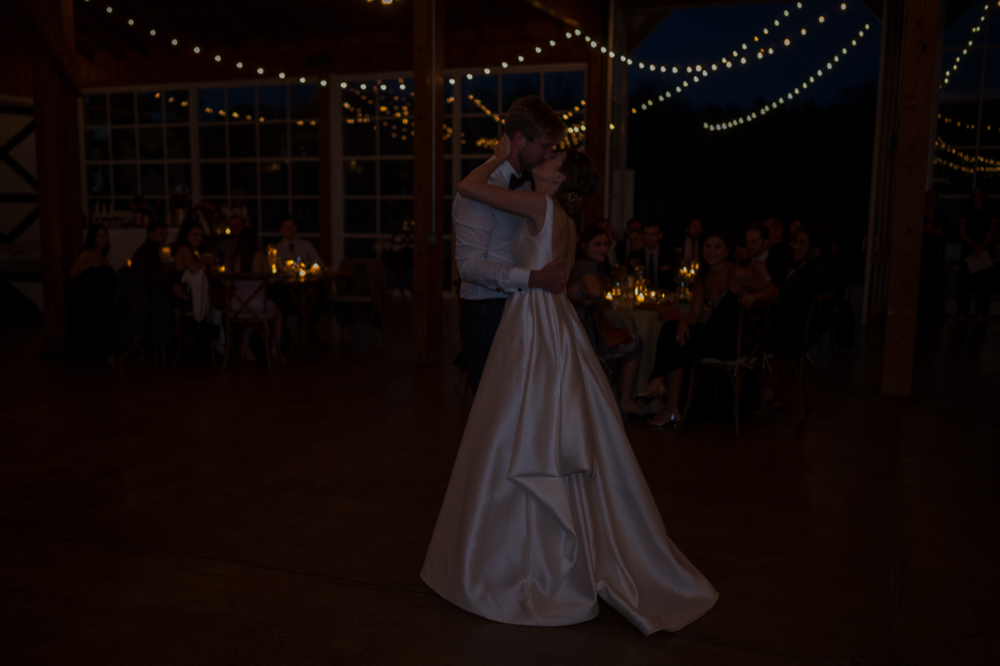
At f/1.8, 1/400, and ISO 50, this image was WAY underexposed.
So from here, you have two options to get more light. Our aperture is already as wide as we are comfortable using for this shot, so we won’t change that. So our options are to either decrease our shutter speed, or increase our ISO. Since our subjects will be moving but aren’t sprinting at top speed, we might decrease our shutter speed by a few clicks, say from 1/400th to 1/250th. But the image is still going to be too dark!
So the next thing we do is slowly increase our ISO until the image is properly exposed again. Sure, this is going to introduce some grain, but this is necessary grain, because the alternative is to miss the shot entirely.
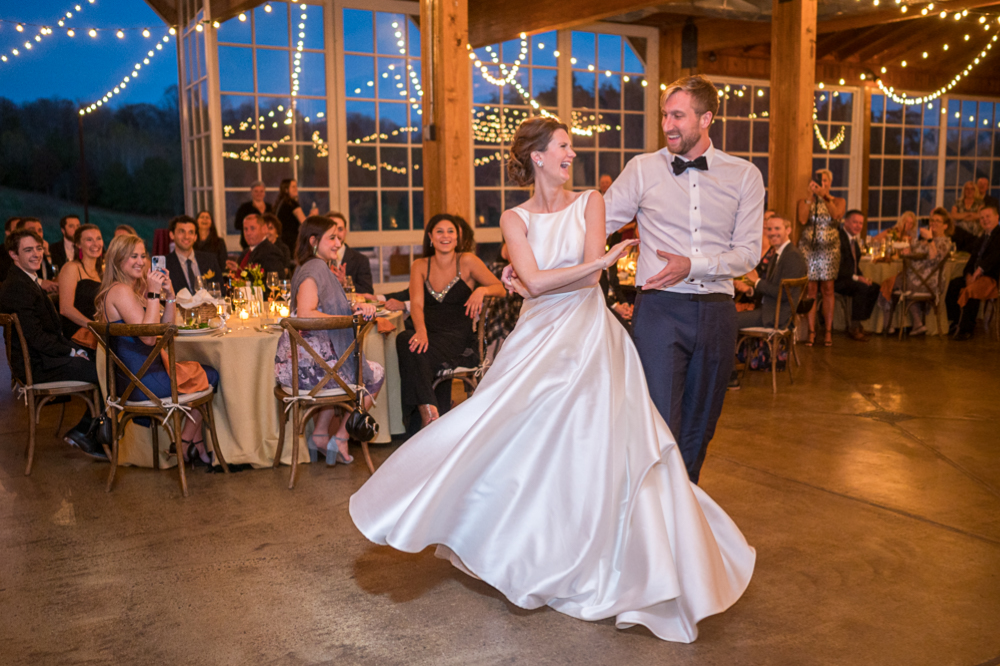
At f/1.8, 1/200, and ISO 2000, this image is in much better condition!
By the way, a very quick side-note to new photographers out there: grain isn’t as big of a deal as you probably think it is. Yes, there is absolutely such a thing as TOO much grain, and an image that’s been ruined by grain is very hard to recover in post. And of course, if you don’t need to make an image grainy, you might as well keep the grain down.
But as wedding photographers, we firmly believe that it’s better to capture the moment with a bit more grain than is ideal, than miss that moment altogether. And I can almost guarantee that your clients would agree. So absolutely learn to set your settings properly! There’s no need for an ISO of 8000 when your shooting a stationary subject with a shutter speed of 1/800th. That’s just wasted light. But if you’re setting your settings correctly and can’t use a flash for whatever reason, so you need to use a high ISO and incorporate some grain — so be it.
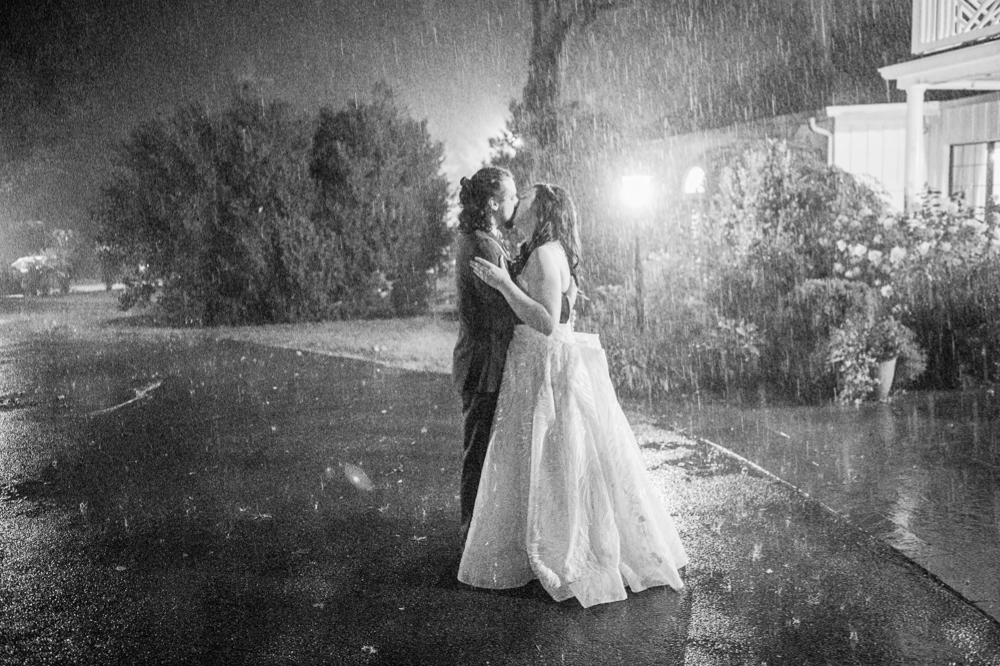
f/1.8, 1/125 and ISO 51,200 were the settings we determined were best for this kissing-in-the-rain shot!
This image above was taken outside, at night, with only a tiny bit of ambient light. As you can see, it was POURING down rain, so the light from a flash would have bounced off hundreds of rain drops before it hit our subjects. So when our couple asked if they could jump out into the rain at the end of their wedding night, we said yes, cranked our ISO up to 51,200 and took the image anyway.
Would this image be better if it were less grainy? Probably! But is it so grainy that our couple hates it and wishes we never captured it? Absolutely not — we know that they loved this image as the final photo from their wedding day!
Best ISO for Portrait & Wedding Photography
So, a really important thing about the examples we just gave was that they were just that: examples. Do not take those hypothetical situations and walk away with “okay ISO 50 for outdoors and ISO 2000 for indoors”, or something like that. While we really do have favorite apertures for solo portraits, couple portraits, and group portraits, and favorite shutter speeds depending on how fast our subjects are moving (and if you’re wondering what those are, click those links to learn more) ISO is one thing that changes the most for us from day to day.
That being said, since we shoot something like 95% of our portraits outdoors in natural light, where there’s usually abundant sunlight, even on cloudy days, our favorite ISO for outdoor photography — whether on portrait session or wedding days — is as low as our cameras can go. On the other hand, the minute you step inside, your ISO could be anywhere, and it’ll depend a ton on what you’re shooting, how fast it’s moving, and how much light is available to you, whether from an open window, some overhead lighting, or a flash on top of your camera.
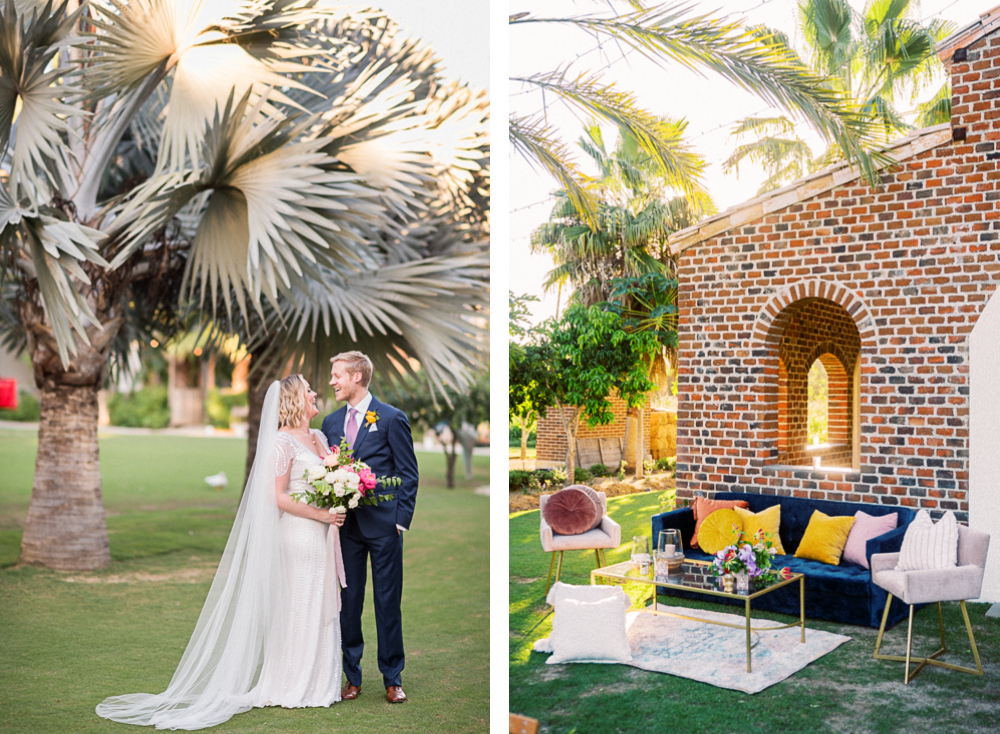
But one final word of caution to all the newer photographers out there: generally speaking, the nicer the camera you have, the better it’s going to handle grain at higher ISOs. If you saw our video from last year called Best Starter Camera for New Photographers (Nikon vs. Canon vs. Sony), you may remember that a beginner, crop-sensor DSLR might have a maximum ISO of around 12,000, while most high-end professional cameras have a maximum ISO of more than 100,000.
And even though we’ve never taken an image on a wedding day at ISO 102,000, an entry level camera whose max ISO is 12,000 shooting at ISO 10,000 will be WAY grainier than if you were shooting at 10,000 on a high-end camera whose max ISO is 100,000. So if you have a beginner camera, be VERY careful about approaching your MAX ISO in a low-light environment. Like we mentioned before, there IS such a thing as too much grain.
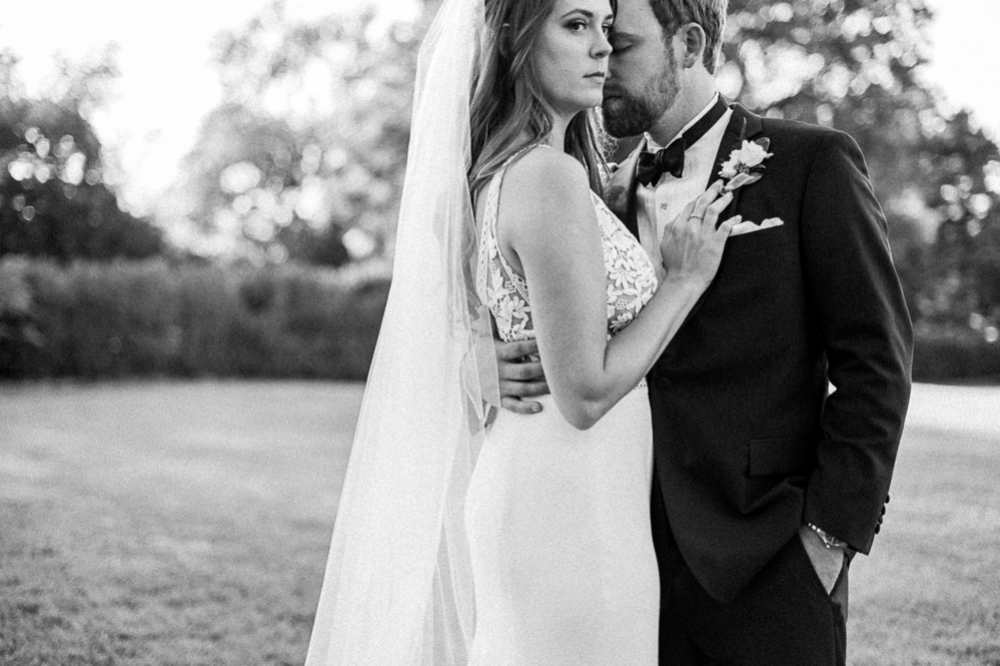
How Does ISO Interact with Aperture and Shutter Speed?
Hopefully the two examples that we walked through earlier in this video gave you a pretty good sense of how the three exposure controls you have over your camera affect each other. But understanding what aperture and shutter speed and ISO do… and actually being able to use them together on a portrait session or a wedding day is another thing entirely.
That’s why the final video in this series is going to be ALL about shooting in manual using the three settings together, and without having to memorize any confusing “exposure triangle”, which we don’t find particularly helpful, especially for folks who don’t learn well with numbers and charts and graphs. So be sure to tune in to Part 7 in this series so you can learn how to finally put all these settings together!
Want More?
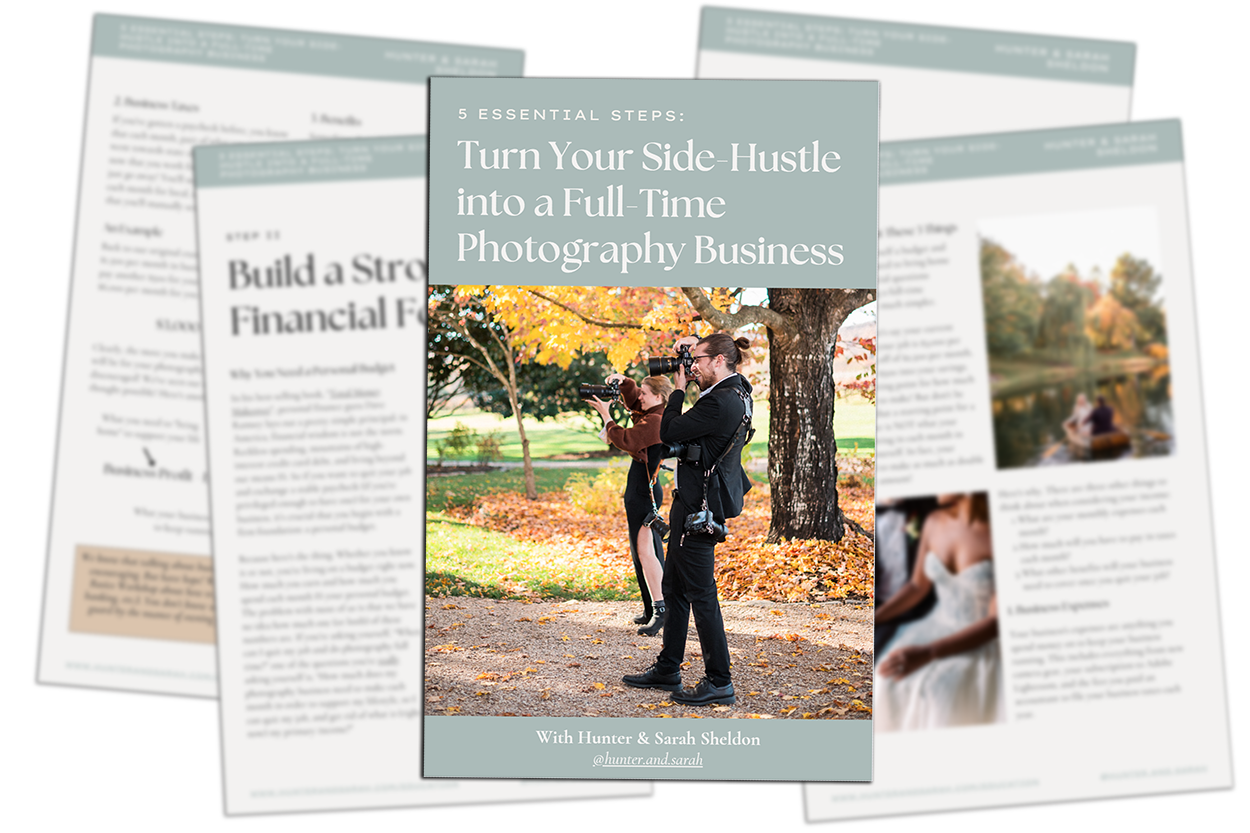
Click HERE to get your free copy of our eBook: “5 Essential Tips for Turning your Side-Hustle into a Full-Time Photography Business.” You’ll also be subscribed to our newsletter, so our newest content, weekly encouragement, and exclusive offers will be delivered right to your inbox!
—
Check out the other segments in this blog series!
- Part 1: Intro to Aperture and Depth of Field
- Part 2: Best Aperture for Portrait and Wedding Photography
- Part 3: Intro to Shutter Speed and Motion Blur
- Part 4: Best Shutter Speed for Portrait and Wedding Photography
- Part 5: Intro to ISO and Grain/Noise
- Part 6: Best ISO for Portrait and Wedding Photography (Indoor & Outdoor)
- Part 7: No More Confusing “Exposure Triangle”! The EASY Way to Set Your ISO, Aperture and Shutter Speed
Filed in:
Wedding Photography & Photography Education
Charlottesville, Virginia and Beyond
HOME
ABOUT US
WEDDINGS
JOURNAL
FOR PHOTOGRAPHERS
PRESS & PRAISE
BLOG
CONTACT
e. hunter@hunterandsarahphotography.com
p. (434) 260-0902
