VIEW BY CATEGORY:
Hi, we're Hunter and Sarah, a husband-and-wife, luxury wedding photography team. We’re also educators, helping other photographers build profitable and sustainable photography businesses.
MEET US
LOOKING FOR SOMETHING?
Shooting in Manual: the EASY Way to Set Your ISO, Aperture and Shutter Speed (NO More Exposure Triangle!)
February 23, 2023
—
In today’s blog post/video, we’re finishing up our “Shooting in Manual” video series by putting it all together and teaching you how to shoot in manual! If you want to understand how to use your DSLR or mirrorless camera, and take better images, then learning how to shoot in manual is a great place to start! And learning how to use aperture, shutter speed, and ISO together is the essential final step to shooting in manual!
So in today’s video we’re going to teach you about how we set our camera’s settings during high-end wedding days and portrait sessions, without ever even thinking about the exposure triangle. And with a little bit of practice, it’s not as complex as you might think. So let’s jump in!

Throwback to Math Class
So, for starters, we’re going to ask you to do something that you probably didn’t expect… take a moment… and think back to your middle school math class. Now, don’t worry if you don’t think of yourself as being good at math. This actually doesn’t have anything to do with math, but is a really helpful example to understand why we set our settings the way we do.
So way back in the day, you probably learned something called the “order of operations”. Basically, it was the rule that said, ‘If you’re doing a math problem with multiple steps, there’s an objectively correct order to do things’. So, for example, if you have an equation that reads “3 + 4 X 5”, if you add the 3 + 4 first, then multiply that answer by 5, you get 35 as your final answer. But if you multiply the 4 times the 5 first, then add 3, you get 23. Obviously, they can’t both be right.
So at some point in time, some mathematician decided that multiplication comes before addition but after parenthesis. (This is PEMDAS, in case that term is still bouncing around inside your memory somewhere.) It’s because of this “order of operations” that even if you add and multiply correctly, if you do it in the wrong order, you can still end up with the wrong final answer.
“Order of Operations” >>> Exposure Triangle
Now if you don’t remember the order of operations or are bad at math — that’s fine! Forget everything we just said! The important takeaway from that example is that we think of setting our settings in our cameras as having an “order of operations”, too.
And here’s what we mean: if your image is too bright, you have 3 options: close down your aperture, speed up your shutter speed, or turn down your ISO. Any of those 3 things will technically make your image darker. But the order that you do them will determine whether your image turns out looking ~just okay~ or looking great!
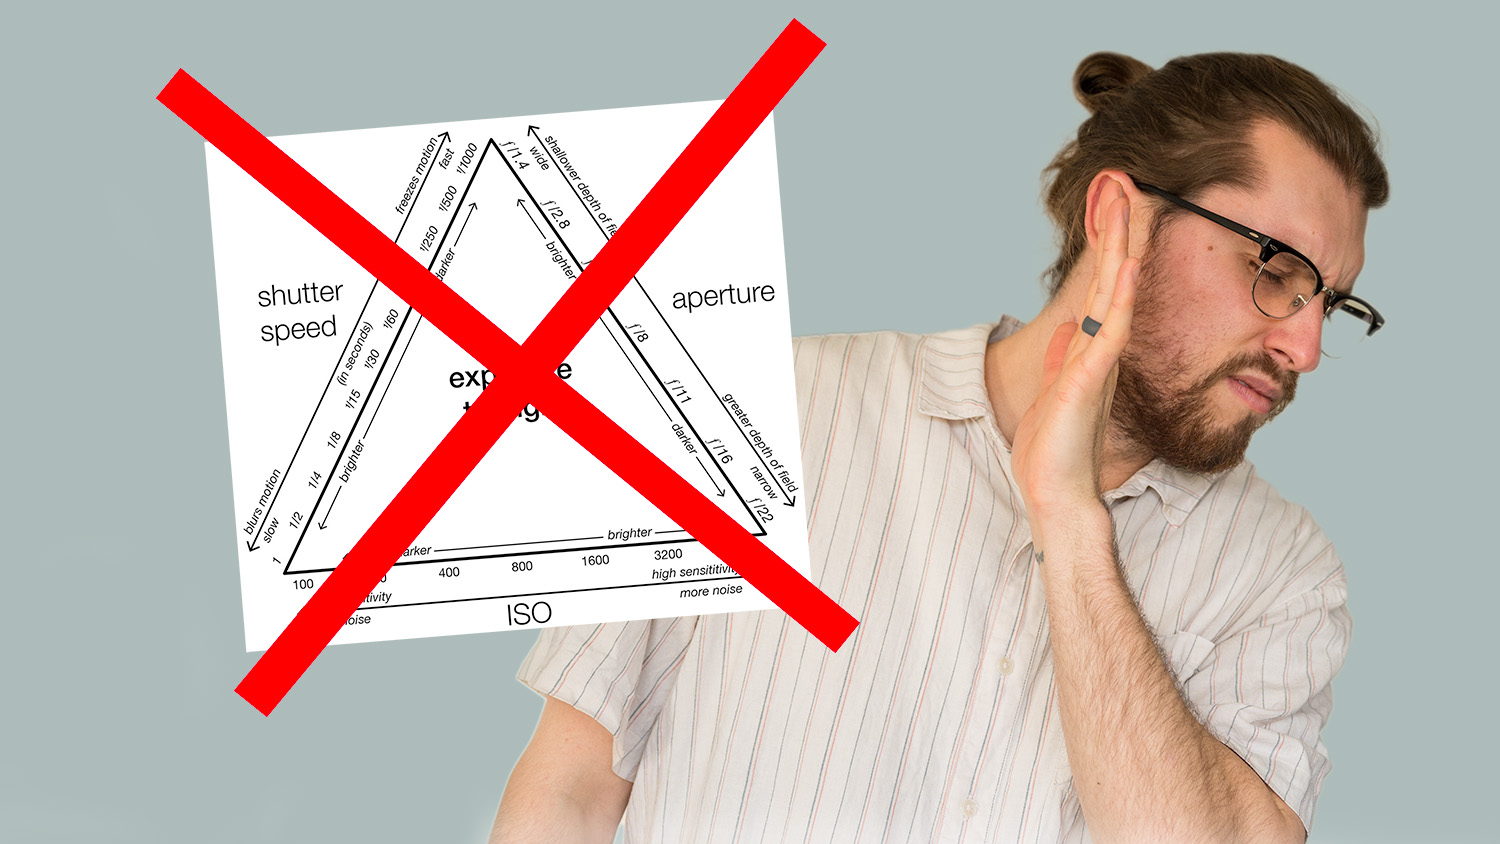
And why is this any better than the exposure triangle? Because the exposure triangle is about memorization, which is hard for a lot of people. And if you forget one thing, the entire diagram no longer makes any sense, especially if you don’t learn well from charts and graphics. Plus, it can just be super overwhelming to look at for the first time.
But thinking about your settings in terms of the right order is more about asking yourself questions, and answering them logically. If you can understand the why behind aperture, shutter speed, and ISO, then you can just ask yourself a few questions, and logically arrive at the best conclusion without having to memorize any complicated charts.
A Quick Recap on Aperture, Shutter Speed, and ISO
So, let’s pause right there and do a bit of review of aperture, shutter speed and ISO. Then, we’ll teach you our photography “order of operations”, and finally we’ll circle back to some real-world examples that should make setting your settings seem so much easier.
So for starters, if you’re totally new to the idea of setting your settings in manual and understanding your aperture, shutter speed, and ISO (i.e. if this is the first blog you’ve read in this series), then we’d recommend pausing right here and checking out some of the other videos/posts in this series. We have two entire blog/videos where all we do is explain what aperture is, how it affects your imagery, and how we use it aperture wedding days and on portrait sessions. And we have an introduction to shutter speed and a how-to guide for shutter speed, as well as an intro to ISO and our best-practices for ISO as well. So if you don’t feel like you have a strong understanding of any of these three settings individually, then check out some of those links above and brush up on these settings, one-by-one.
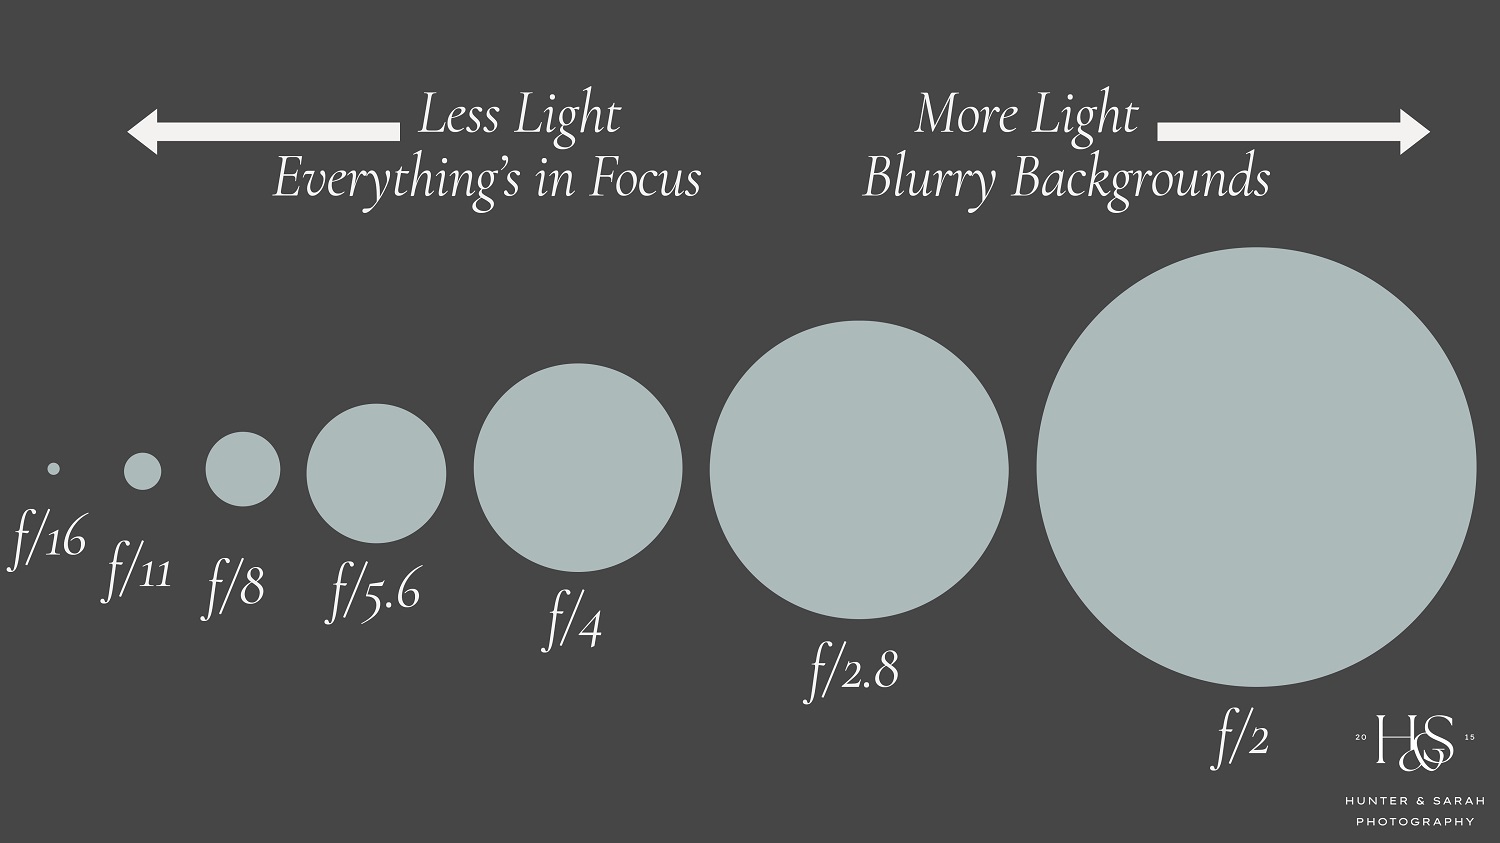
But for the rest of this video, we’re going to assume you have a basic grasp on the three settings. So here’s a very quick recap (but again, check out those other posts if you need a more in-depth explanation). Let’s start with aperture. A closed-down aperture, like f/16 isn’t going to let in very much light, but it will give your images a very wide depth of field, which is great for landscape photos or other images where you want your foreground, your midground, and your background all in focus. On the other hand a wide open aperture, like f/2, is going to let in a LOT of light, and also have a very shallow depth-of-field, perfect for portraits when you want to isolate your subject from a more blurry background.
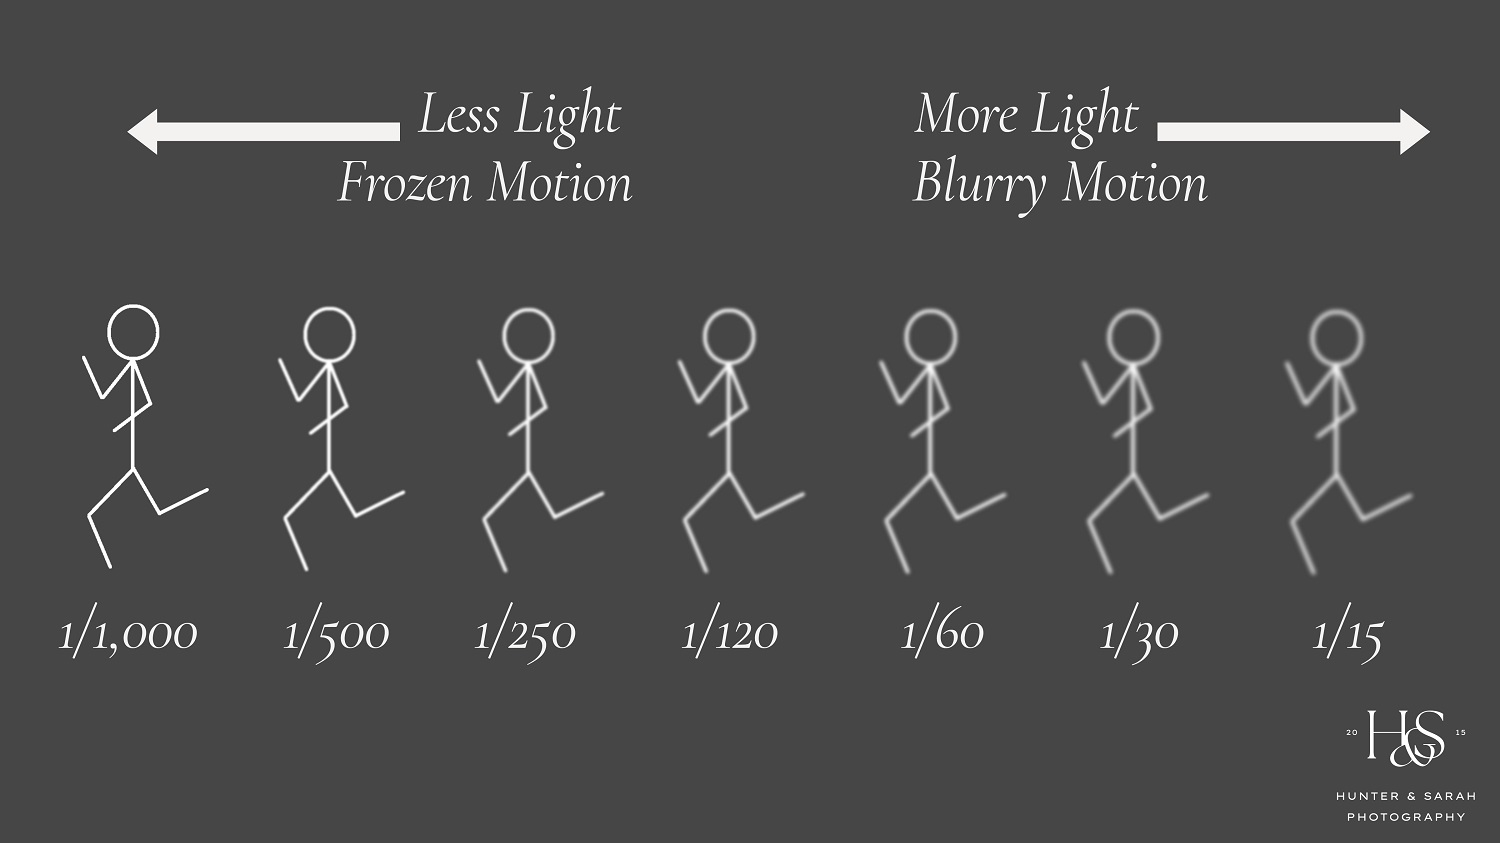
When it comes to shutter speed, it’s all about motion. (showing shutter diagram) A very fast shutter speed like 1/1000th of a second is going to perfectly freeze any motion that’s happening when you take the picture, but it doesn’t let in very much light. On the other hand, a slow shutter speed, like 1/15th of a second, is going to let in a lot more light, but any motion that was happening when you clicked your shutter is likely going to be blurry.
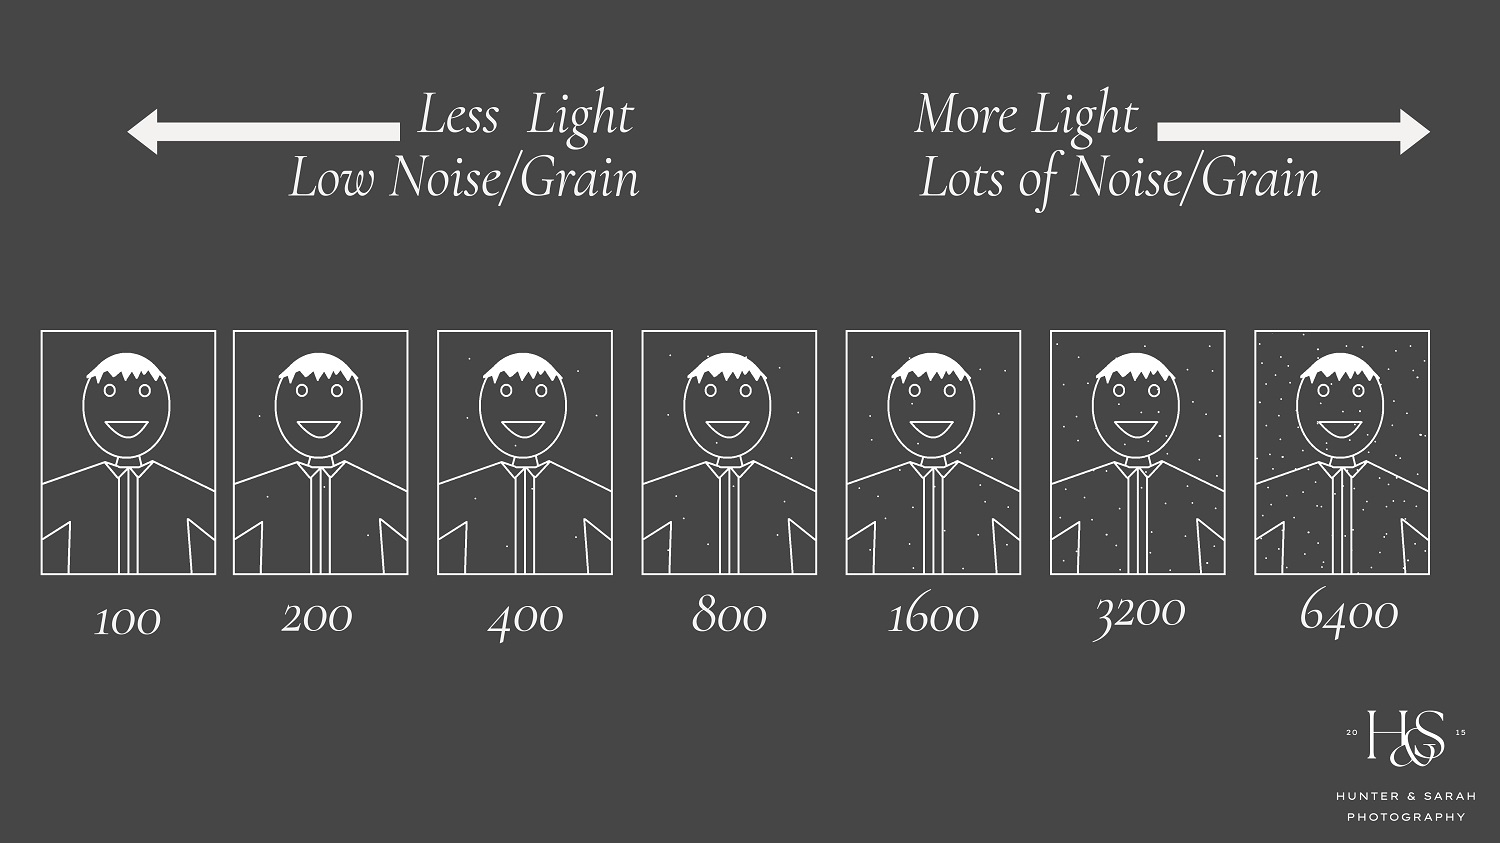
Finally, ISO. (showing ISO diagram) A low ISO like ISO 100 isn’t going to allow your image sensor to pick up much light, meaning your images will be darker. However, they’ll be free of graininess and noise. On the other end of the spectrum, a higher ISO like ISO 6,400 is going to pick up a lot more ambient light, which means a dark space will show up brighter in your images… but it’s going to produce a lot of graininess and noise in your imagery.
Don’t Forget the Trade-Offs
The most important thing to remember with ALL of these settings is that they ALL affect the brightness of your image, but have some sort of trade-off. With aperture it’s your depth-of-field, with shutter speed it’s motion blur, and with ISO it’s your graininess. So as you aim for an image that’s “properly exposed” (aka an image that isn’t too dark or too bright), you can adjust any of these 3 settings.
And why are those trade-off’s important? Because there’s no such thing as “perfect” settings for every situation, since it depends on the amount of light that’s available to you and what it is that you’re trying to capture. So what separates an amateur photographer from a photographer who understands shooting in manual is the ability to come into a lighting situation and set their settings to get a properly exposed image.
But here’s the thing: there are an infinite number of combinations that will technically yield a properly exposed image. But because of these trade-offs, not every combination of settings will yield the results that you actually want in that situation. So in our opinion, what separates a photographer who just understands shooting in manual and someone who has mastered shooting in manual, is finding the right combination of settings. So let’s jump in.
Our Photography “Order of Operations”: ASI
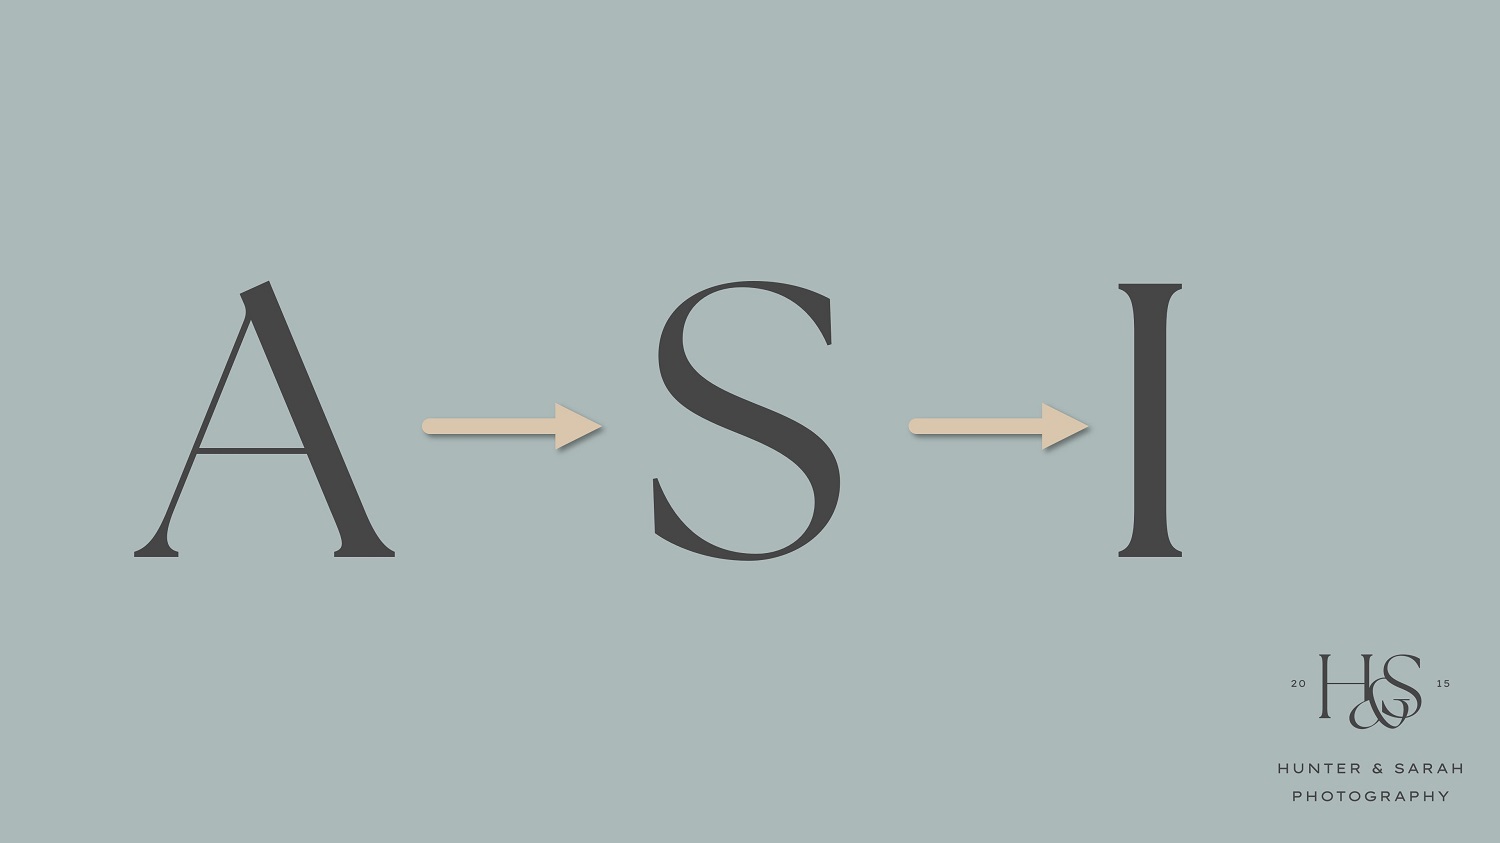
So we told you earlier that we were going to teach you our order of operations that is going to let you forget the exposure triangle altogether. This is the photographer’s version of PEMDAS from the math example. So here it is: aperture, shutter speed, ISO, abbreviated as ASI.
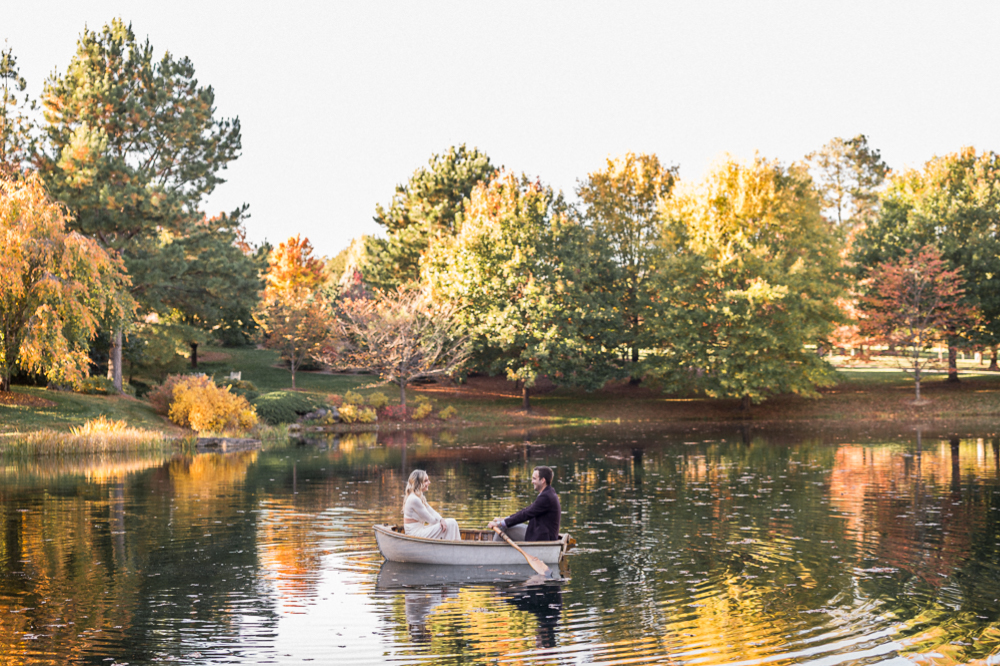
The reason that we shoot using this particular order is because, as high-end wedding and portrait photographers, we feel like one of the biggest differences that separates an image taken with a professional camera and lens and one that is taken with an iPhone or a point-and-shoot camera is the shallow depth of field that professional photography equipment allows. So our goal is always to keep our aperture as low as possible while still getting our subject in focus.
So the first thing we ask ourselves is: “What are we shooting? What’s the lowest possible aperture I can shoot at, while still getting my subjects in focus?” If you read our posts on aperture, you should know the answer right away! For detail photos, a solo portrait, or portraits of a couple that are close together, that’s somewhere around f/1.8 or f/2. If our couple is moving around or not quite right next to each other, we’re going to aim for closer to f/2.8 or even as high as f/4 to be safe. And if we’re shooting more than two people, we’ll start at at least f/2.8 for a very small group, then our aperture will continue to go up as needed, toward f/4 for a medium-sized group, and toward f/8 or higher for large groups of people with multiple rows.
But the key here is that we’re always keeping our aperture as low as possible, because no matter what we’re shooting, we want our subjects in-focus, and everything else should melt into the background. Now, these apertures above are good general rules, but when you’re first learning your aperture, be sure to check your LCD screen and zoom in on people’s faces to make sure that they really are in focus. But, now you’ve set your aperture! You’ve done the A in “ASI”.
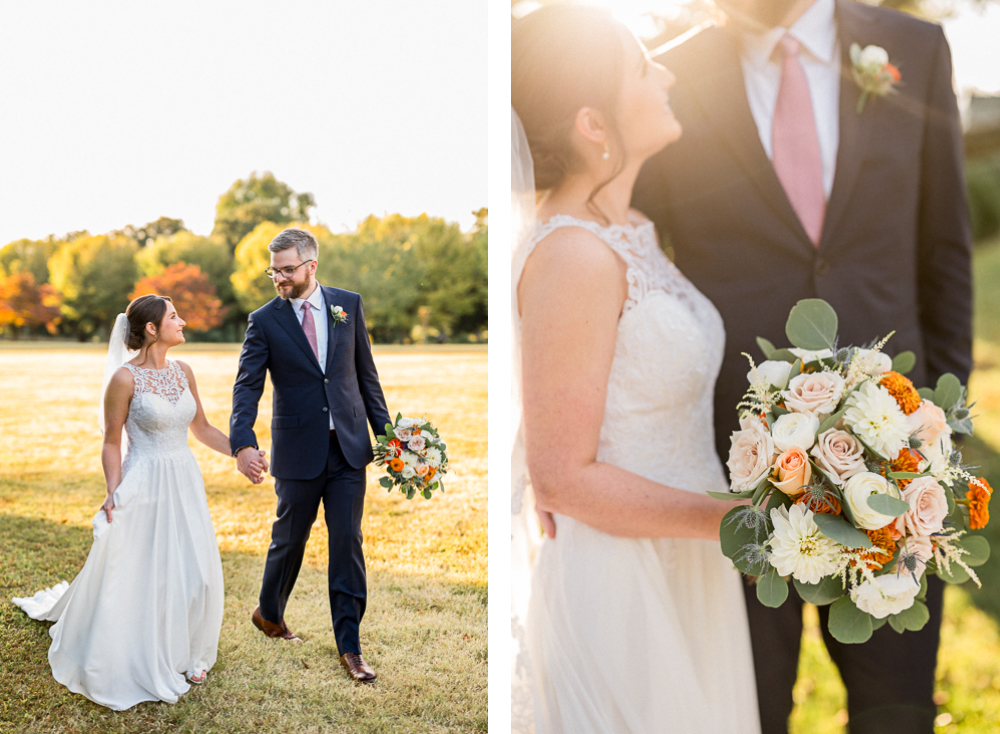
So once we’ve set our aperture, we move onto the S in ASI: our shutter speed. The question we ask ourselves here is: “How fast is our subject moving?” Again, if you saw our posts on shutter speed, you know we have a handful of minimum apertures that we use as a starting point. If our subject is standing very still or we’re shooting a stationary object, we can usually get away with 1/60 of a second, but no slower. If our subject is walking or dancing slowly, we want to aim for around 1/200 of a second, and if our subject is dancing quickly or at a jogging speed, we don’t want to set our shutter speed any lower than 1/500th of a second.
Remember: the key here is that 99.9% of the time, our main goal with shutter speed is to avoid motion blur. So those are some general rules, but you should always double-check your LCD to make sure that you aren’t accidentally incorporating any motion blur. But now, you’ve set your aperture and your shutter speed, so all that’s left is to set your ISO.

And here’s what we love about using our ASI “order of operations” instead of the exposure triangle. At this point, our aperture is set to get sharp subjects and a blurry background, our shutter speed is set to perfectly freeze whatever motion is happening in the image, and to set your ISO… just turn the dial until your image looks right. Yep. It’s THAT simple.
So if your image is too dark, turn the ISO up until your image looks bright enough. And if your image is too bright, turn your ISO down until your image looks dark enough. Boom. You’ve just found a properly exposed image with the perfect settings for your exact situation!
Finding the “Right” Exposure
Now, if you have a mirrorless camera, finding the “right” exposure this way should be pretty easy. After all, as you adjust your settings, the actual exposure of your image will show live on your LCD screen or through your electronic viewfinder. So finding the right exposure is super simple, you just turn the dial until your subjects’ faces don’t look too dark or too bright!
But don’t stress if you’re using a DSLR camera. Basically all modern cameras have a built-in light meter. It’s this small diagram at the bottom of your screen, which may even be visible inside your viewfinder and it looks something like this:
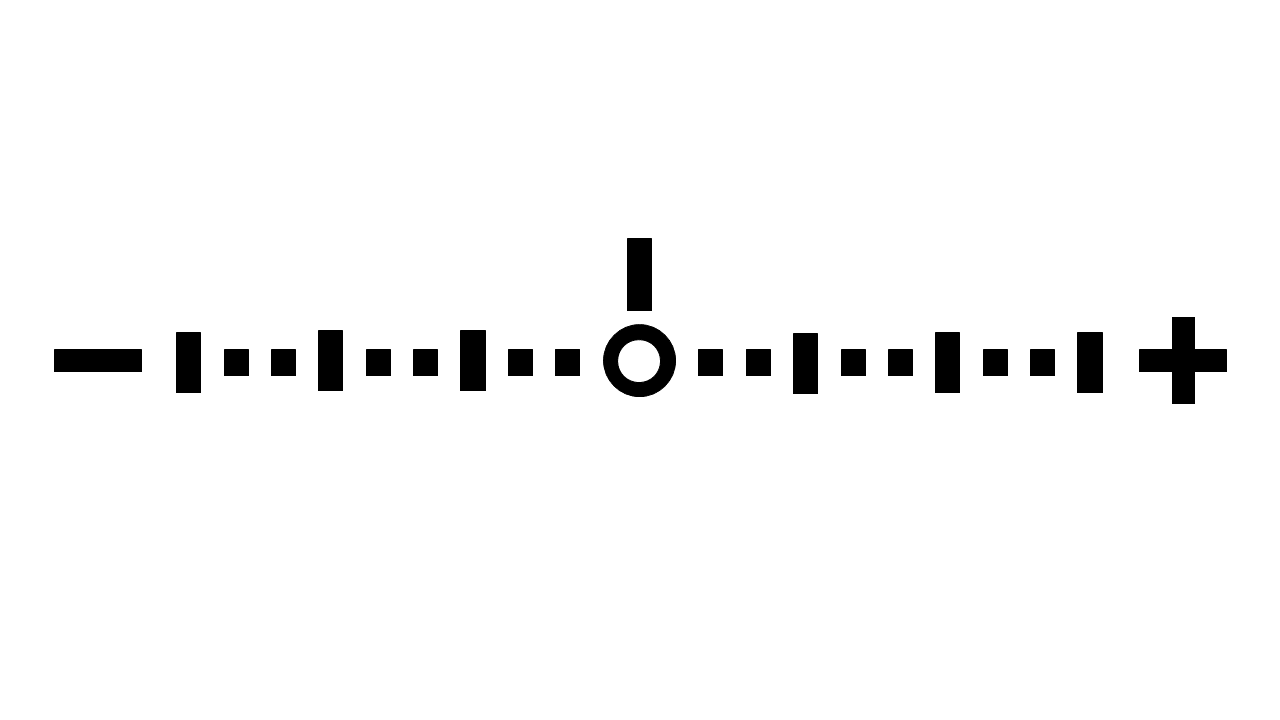
Your camera’s light meter is taking it’s best guess at what “properly exposed” should be, and is telling you how far off you are. So if it looks like this, you’re 2 “stops” over-exposed, and should darken your image:
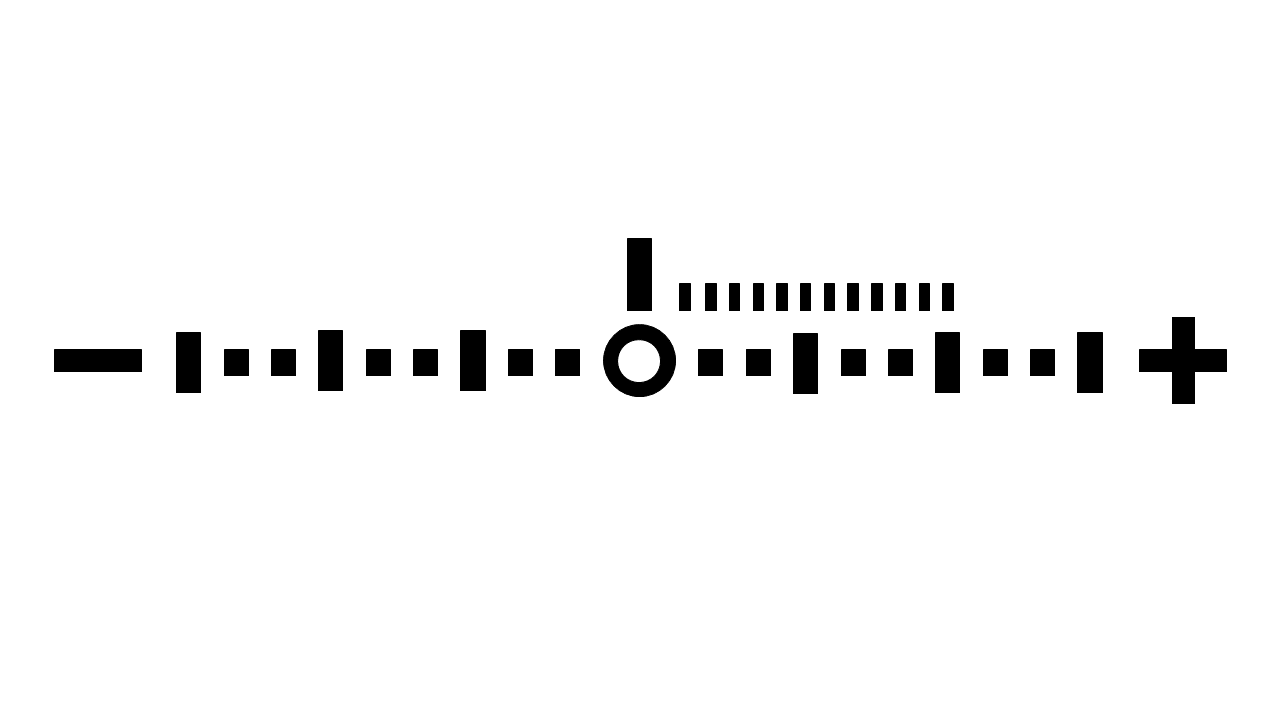
And by the way, don’t worry too much about what a “stop” (or an “exposure value” or “EV”) is right now. Depending on how your camera is set up, each “stop” is either two or three clicks of any of your settings. So, in this example, when you’ve set your aperture and your shutter speed, if you’re now 2 stops overexposed, you just need to turn your ISO dial in the direction that brings your ISO lower either 4 or 6 times, depending on whether your camera is set to move in half-stops or third-stops.
Now, the internal light meter isn’t perfect, but it gets you in the right ballpark. So once you’ve landed on what your camera thinks is properly exposed, you can take a test shot, review the image on your LCD screen, and make slight adjustments from there. Back when we shot with DSLR cameras, we got to know our cameras so well, that we knew that what our camera thought was one stop overexposed was usually super close to what we wanted, so that’s what we aimed for when setting our settings for our first test shot, then adjusted slightly from there. But now that we have mirrorless cameras, we don’t really need our internal light meter or test shots, because we can see live updates as to how over- or under-exposed our images are as we make changes to our settings.
Real World Examples
So, as promised, let’s dive into some real world examples. Let’s say that we’re at a wedding, and the guests have just finished dinner. In just a moment, the maid of honor is going to stand up and begin her speech. We don’t want to use flash for aesthetic reasons (and to keep this example simple), so we’re going to follow our order of operations: ASI.

For starters, let’s set our aperture. We’re only photographing a single person, so we can keep our aperture nice and open, at f/1.8. Next, we set our shutter speed. Since our subject is likely to move and shift around as she’s talking, we can set our shutter speed at 1/125th of a second.
Finally, we set our ISO. We look through our electronic viewfinder or we peek at our built-in light meter, and we see that our image is too dark. So we slowly, one click at a time, begin to bump up our ISO. We go from 500 to 640 to 750 to 1,000 to 1,250 to 1,500 (see image below). And as we adjust the ISO, we watch our electronic viewfinder get brighter, or our built-in light meter get closer to properly exposed.
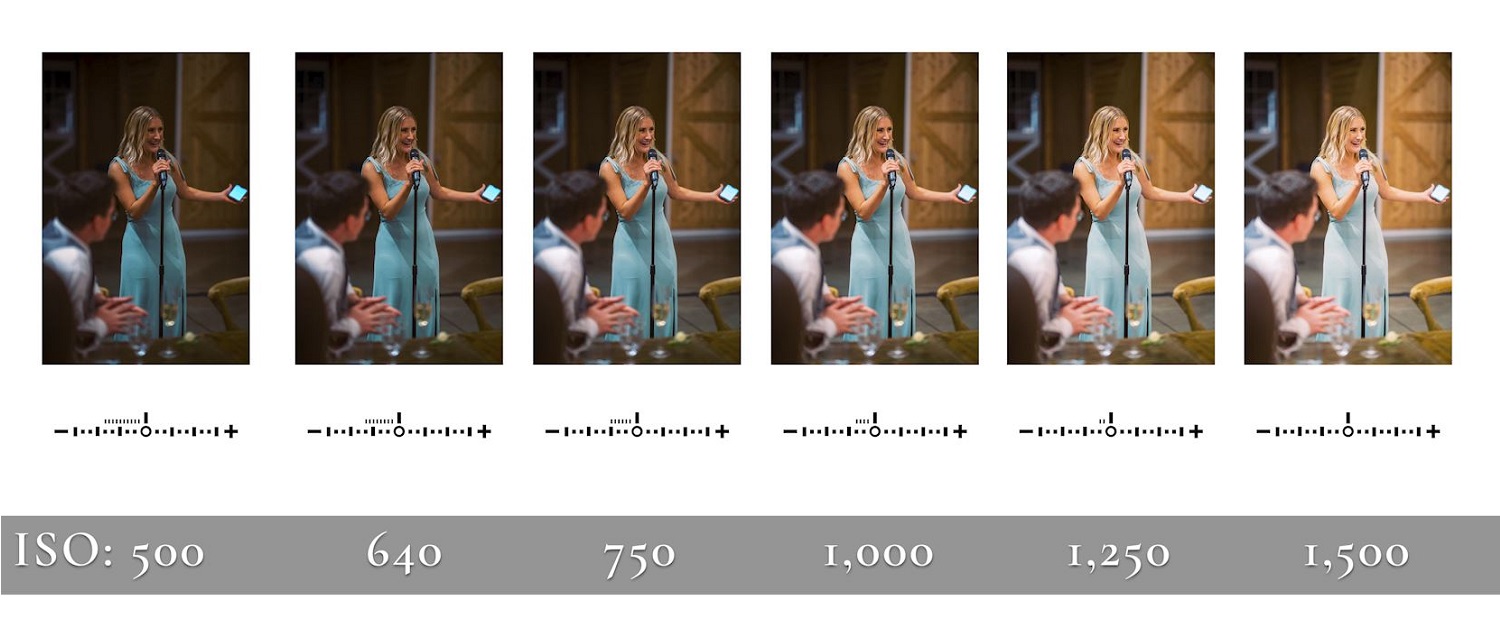
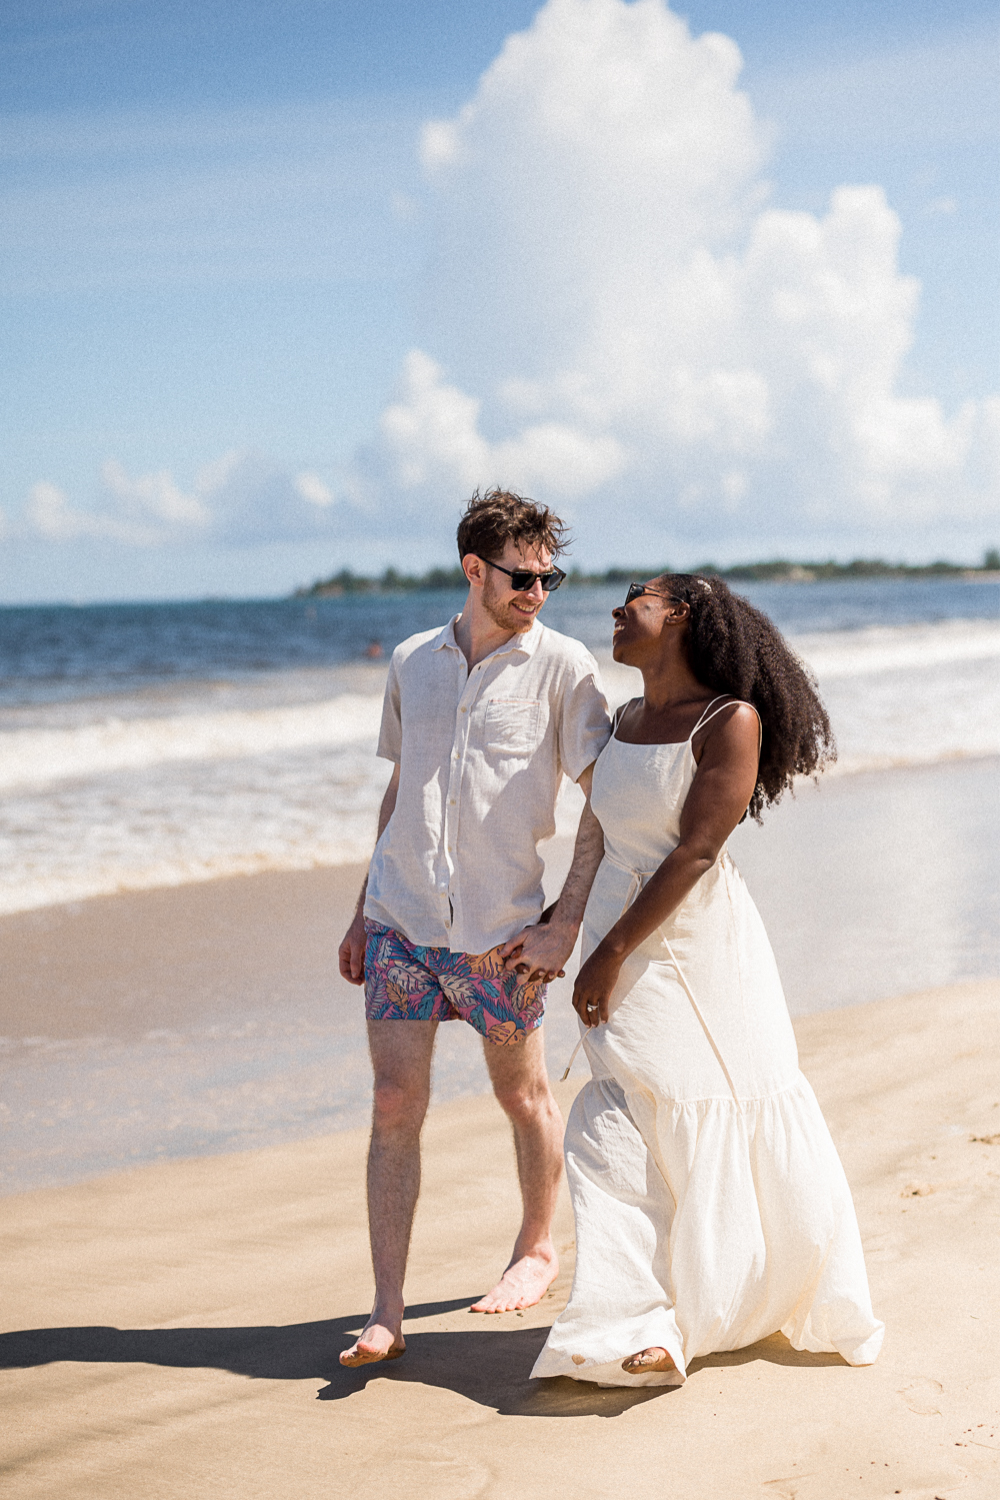
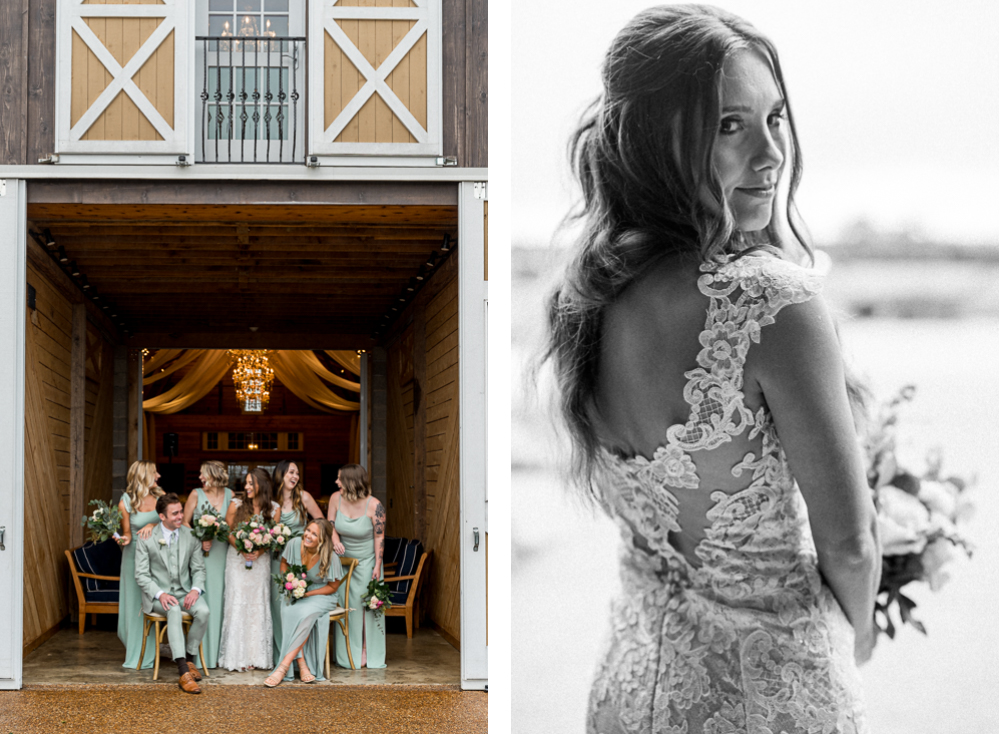
Until finally, we land on these settings, and capture images like these below!
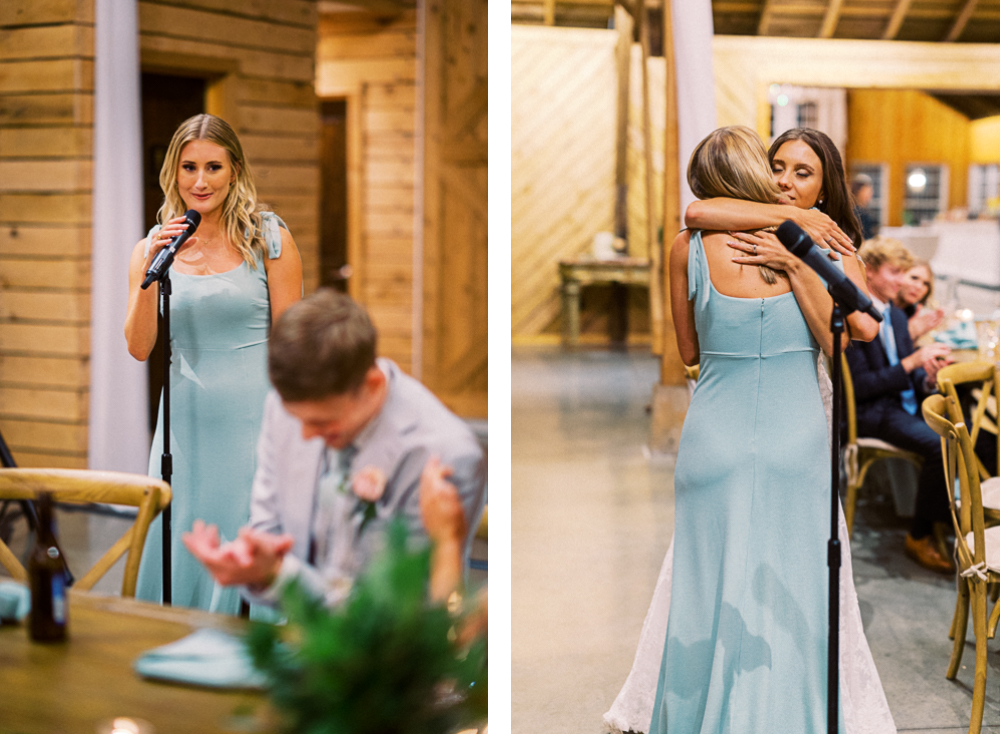
These images were taken with 85mm (left) and a 50 mm (right) lenses. For both cameras, our aperture was f/1.8, our shutter speed was 1/125, and our ISO was 1,500.
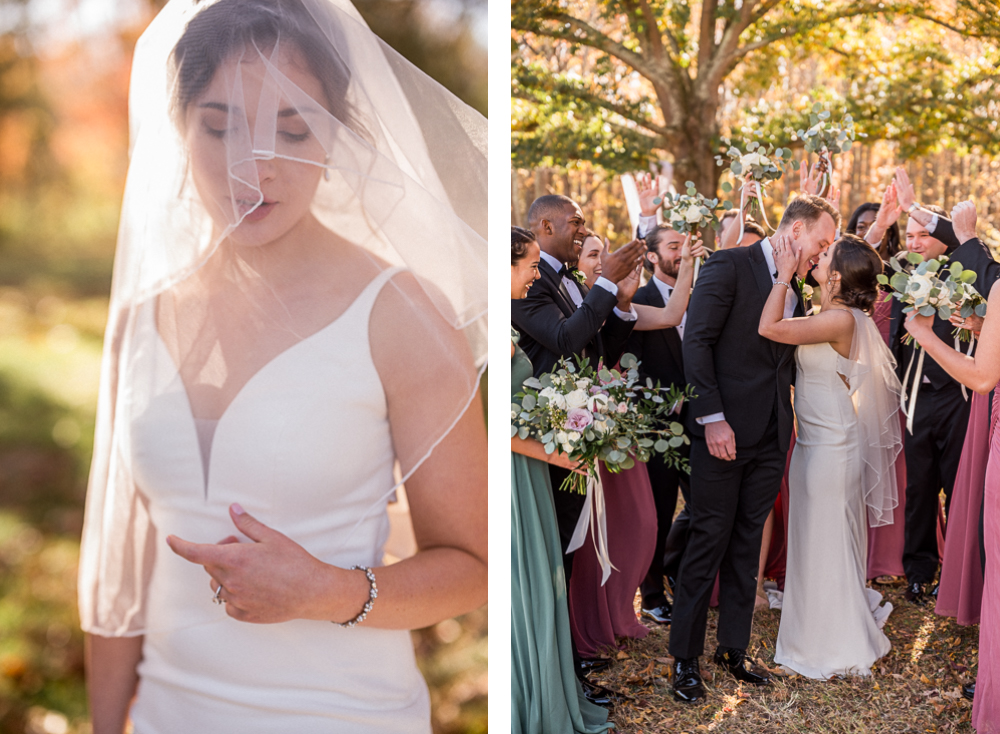
Let’s do another example, but this time we’re about to start an engagement session. We’ve just met our couple at a beautiful location, and as we’re chatting with them and setting expectations about what the next 90 minutes will look like, we’re also setting our settings on our camera, keeping ASI in mind: aperture, shutter, ISO.

We know that the first thing we’re going to do is ease them into their engagement session with some walking photos. And because there’s a bit of variation in any two people’s gait, and at any given time, one may be a bit closer to our camera than the other while they walk, we set our aperture at f/2.4. Next, we set our shutter speed. Our couple is going to be walking, so we set our shutter speed to 1/250th of a second to make sure that their movement isn’t blurry.
Finally, we look at our LCD screen (or our light meter), and see that our image is overexposed, so we turn our ISO down, click-by-click, until the image looks good (see images below).
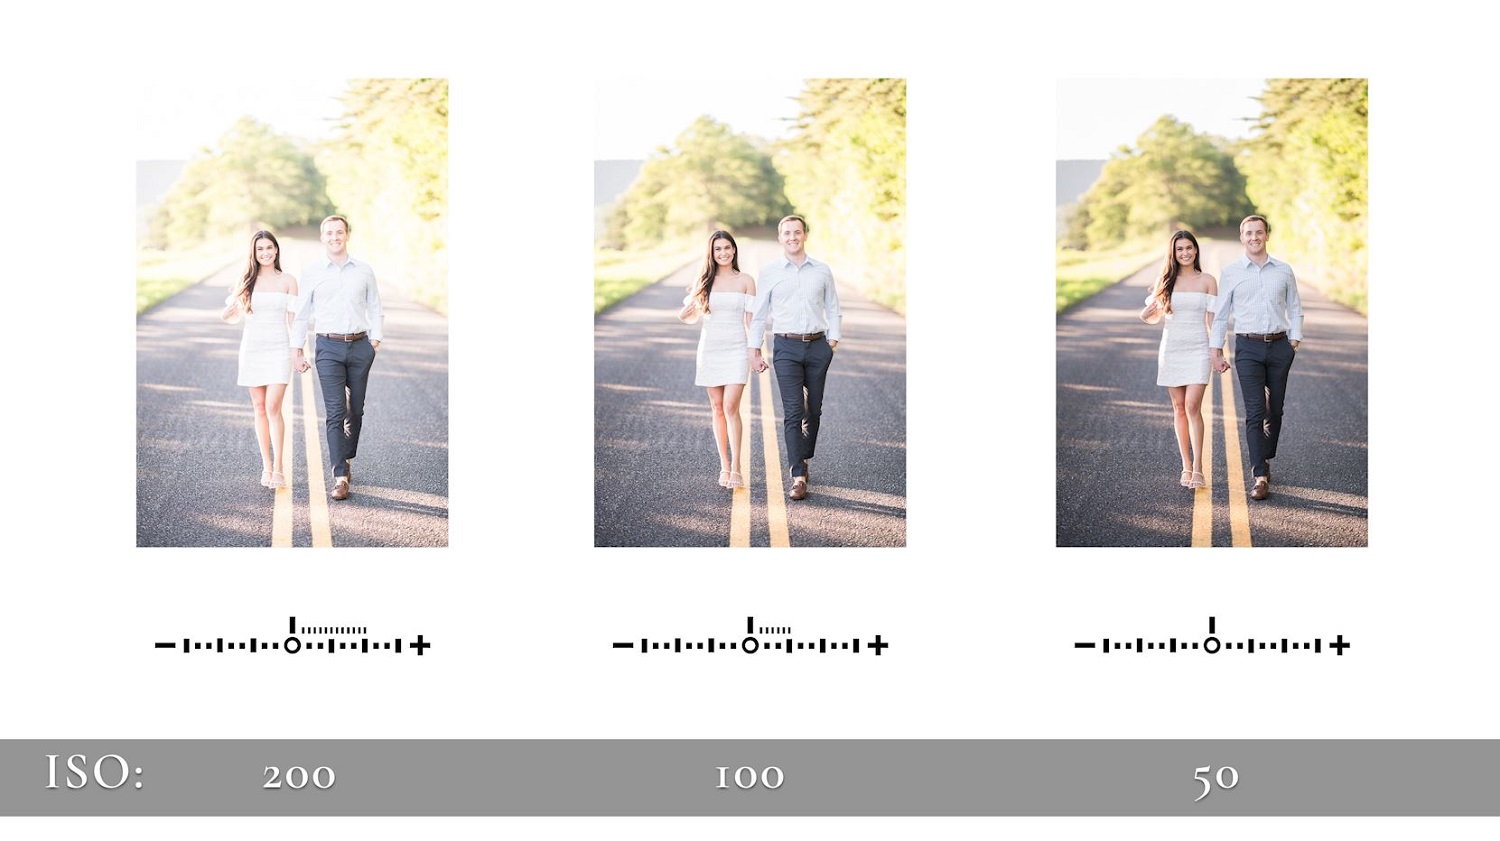
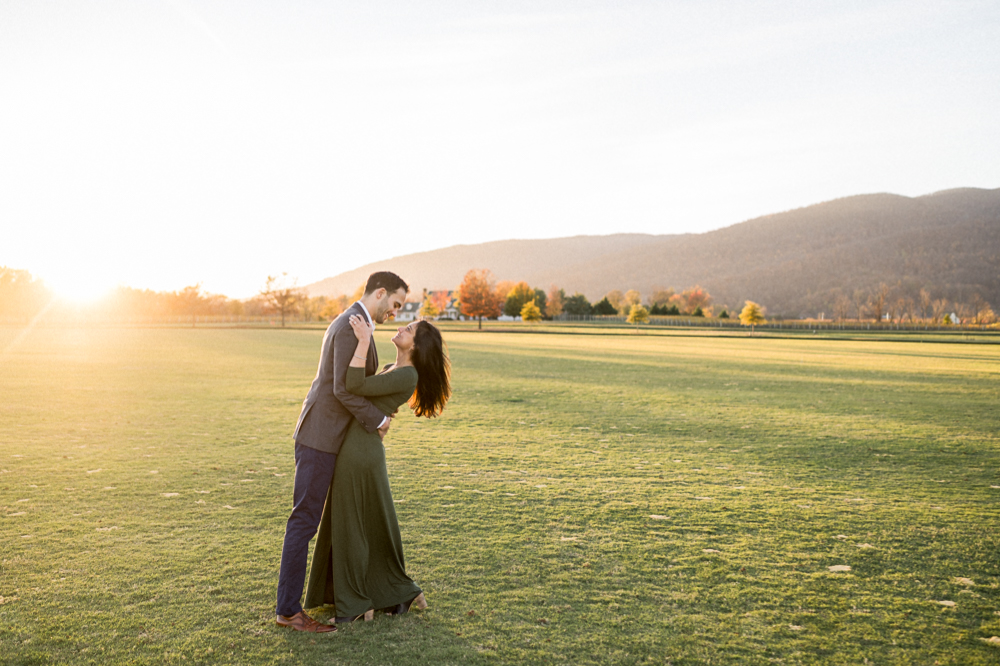
In this case, it’s ISO 50, our lowest setting. And then, we snap images like these below:
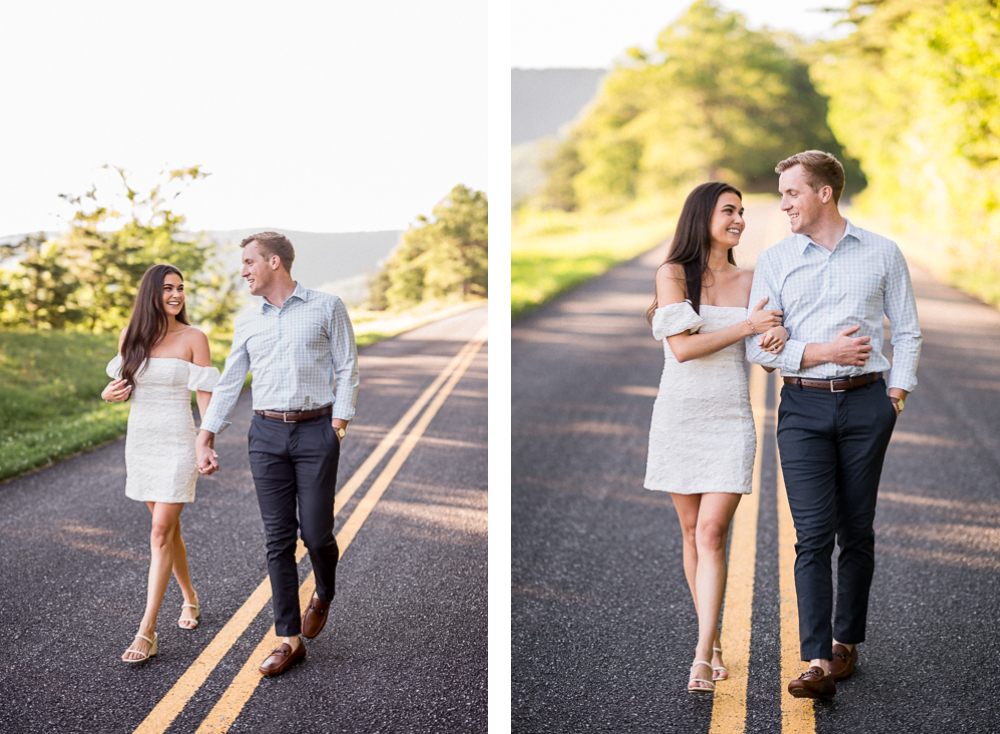
These images were taken with 50mm (left) and 85 mm (right) lenses. For both cameras, our aperture was f/2.4, our shutter speed was 1/250, and our ISO was 50.
Beyond ASI
But what happens if it’s really bright out, and our ISO gets to the lowest setting, and the image is still too bright?! Did we break the ASI order of operations?! Well, no! In some (really bright) situations, you will actually have to bounce back to shutter speed in order to land on the right settings.
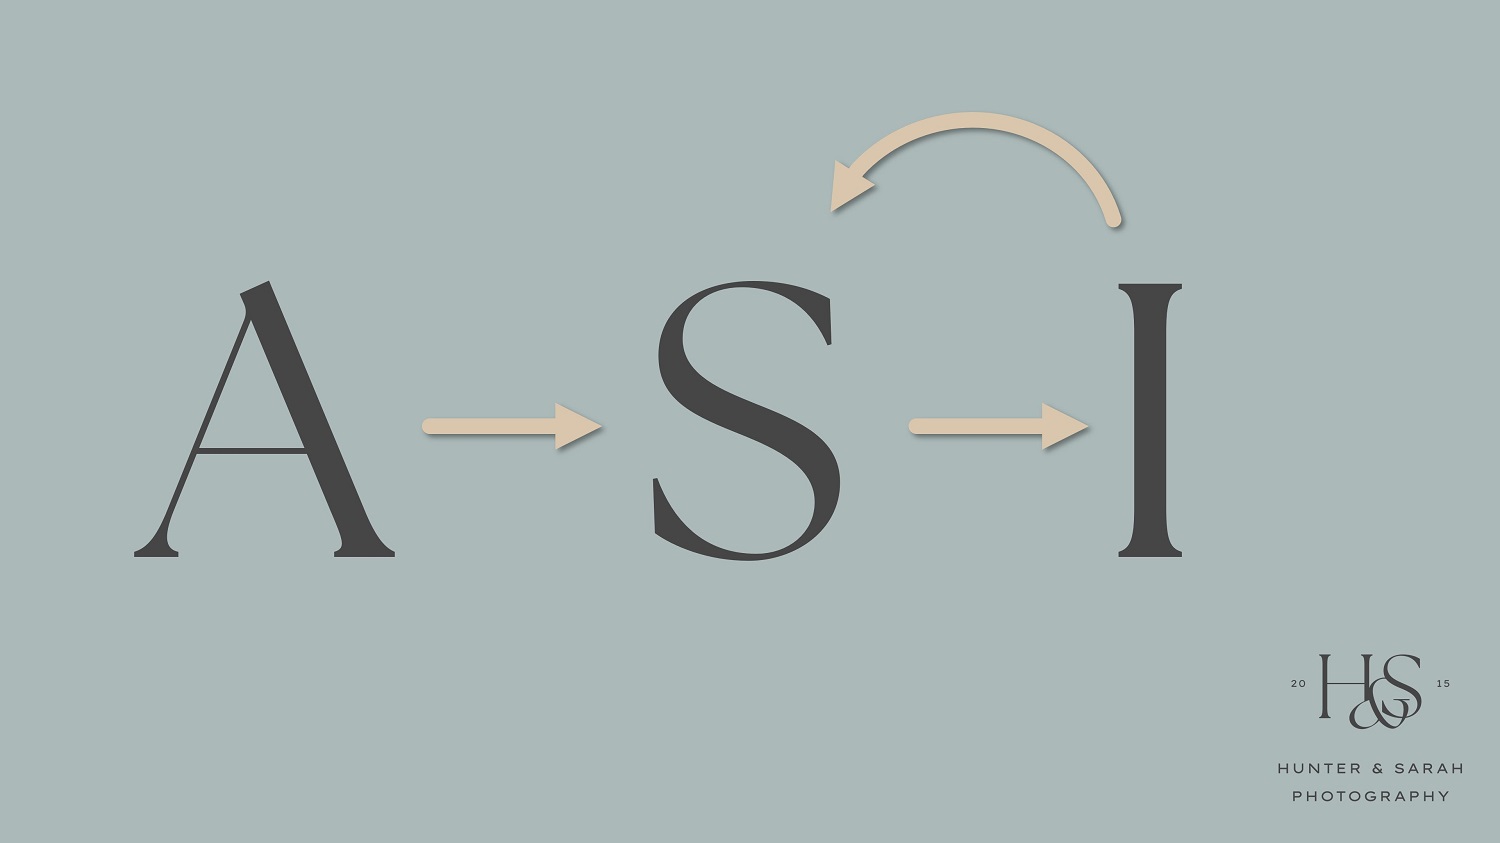
So let’s look at an example of what this could look like. For the sake of simplicity, we’re still at an engagement session, but this time, it’s really bright out. For all the same reasons as above, we set our aperture at f/2.4, our shutter speed at 1/250th, and our ISO at 50. But this time, even at these settings, our image is still too bright!
In this case, since our ISO can’t go any lower we have two options to make our image darker: we can either speed up our shutter speed OR we can close down our aperture. Since keeping our aperture low is still our first step and our highest priority, you start working backwards on your ASI order of operations, and take a second look at your shutter speed.
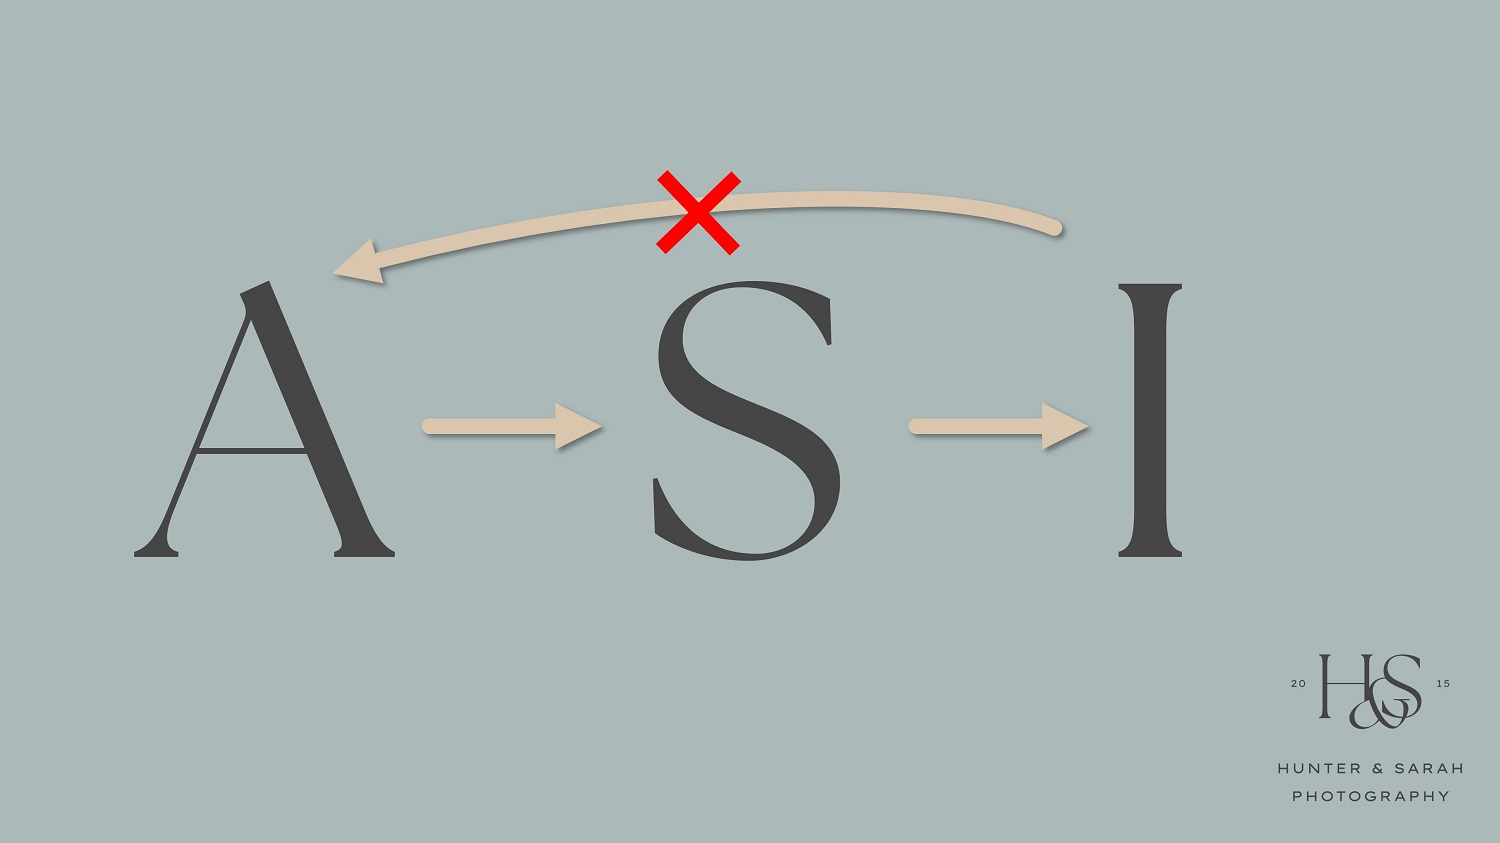
And intuitively, this should make sense. Closing down our aperture would make the image darker, but it would start to make our depth of field less shallow, bringing more of the background in to focus. But speeding up the shutter speed will just freeze even faster motion. And since they’re just walking, you won’t notice any difference between 1/250th and 1/1000th, other than how much darker the image is.
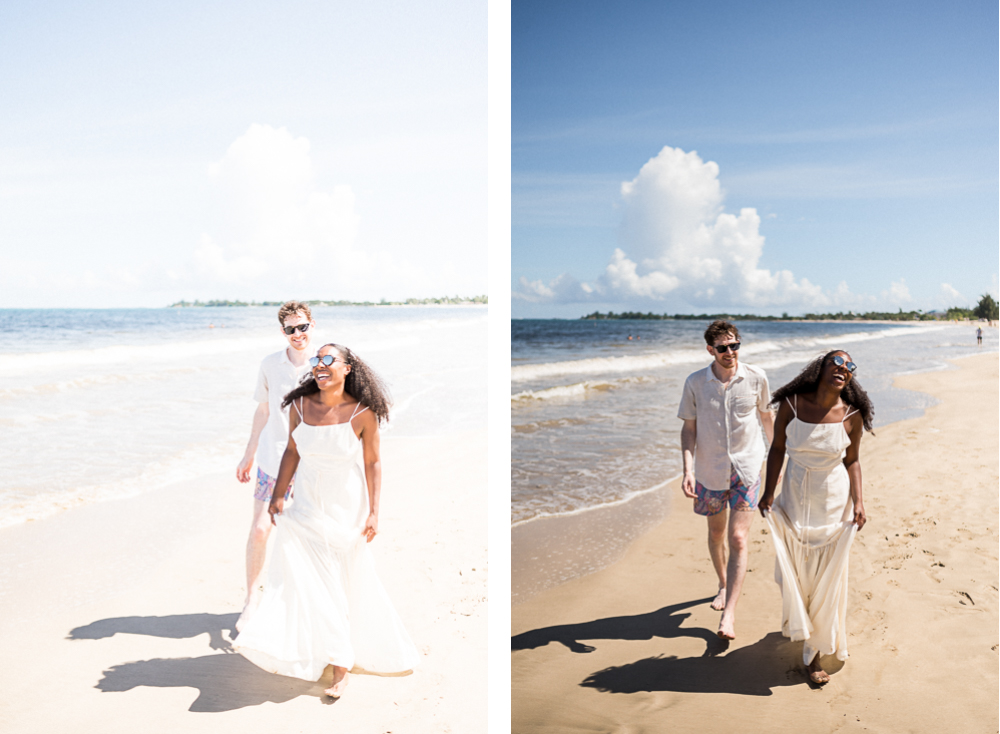
These images were taken with a 50mm lens just seconds apart, both with apertures of f/2.4 and ISO of 50. But on the left, the shutter speed of 1/250 left the image overexposed, and in the image on the right, 1/1,000 gave us a great exposure!
Now Get Out and Practice!
Now, we know that this was a pretty long post (even for us), and that this was a lot to take in. But if you’re still learning to shoot in manual, keep in mind that the very best thing you can do to get better is to get out and practice. Put yourself in a variety of lighting situations, and just practice setting your settings using ASI, and see how things turn out.
Photography is a lot like a muscle. The more you exercise it, the stronger it will get! And eventually, things that used to feel really “heavy” like setting your settings, will be as light as a feather and you can do them without even thinking about it!
—
Check out the other segments in this blog series!
- Part 1: Intro to Aperture and Depth of Field
- Part 2: Best Aperture for Portrait and Wedding Photography
- Part 3: Intro to Shutter Speed and Motion Blur
- Part 4: Best Shutter Speed for Portrait and Wedding Photography
- Part 5: Intro to ISO and Grain/Noise
- Part 6: Best ISO for Portrait and Wedding Photography (Indoor & Outdoor)
- Part 7: No More Confusing “Exposure Triangle”! The EASY Way to Set Your ISO, Aperture and Shutter Speed
Want More?
Click HERE to get your free copy of our eBook: “5 Essential Tips for Turning your Side-Hustle into a Full-Time Photography Business.” You’ll also be subscribed to our newsletter, so our newest content, weekly encouragement, and exclusive offers will be delivered right to your inbox!
Filed in:
Wedding Photography & Photography Education
Charlottesville, Virginia and Beyond
HOME
ABOUT US
WEDDINGS
JOURNAL
FOR PHOTOGRAPHERS
PRESS & PRAISE
BLOG
CONTACT
e. hunter@hunterandsarahphotography.com
p. (434) 260-0902
